Tuesday, December 26, 2006

Toasted Coconut-Chocolate Chunk Pecan Pie

I wanted to do a completely different Christmas menu this year. I've made roast beef, onion soup and cheesecake for years. This year I wanted to spread my wings a little. I bought one of those spiral cut hams and made an intriguing dessert from a recipe card I received in the mail as part of an offer for Christmas with Southern Living 2006. I was disappointed with another Southern Living cookbook that I had ordered so I threw out everything except the two recipe cards that interested me.

I was going to buy a deep dish pie plate, not solely for this recipe, but also to have on hand for other deep dish recipes. For some reason, I couldn't find one. Not just one I liked. At all. Does no one bake any more? I guess not. So I resorted to a foil pan from the grocery store which made it extremely difficult to maneuver this pie in and out of the oven. The foil pan kept bending. I needed three hands, two for the pie and one to open and close the oven door and slide the rack in and out.

I skipped the purchased pie crust and made my own. I have no idea why they shielded the crust at the end of the baking time. I went with my tried and true method of shielding the crust until the last 15 minutes of baking time. I imagine their way results in a burned or overdone crust. If you try their method, please let me know how it turned out. I'm really curious.

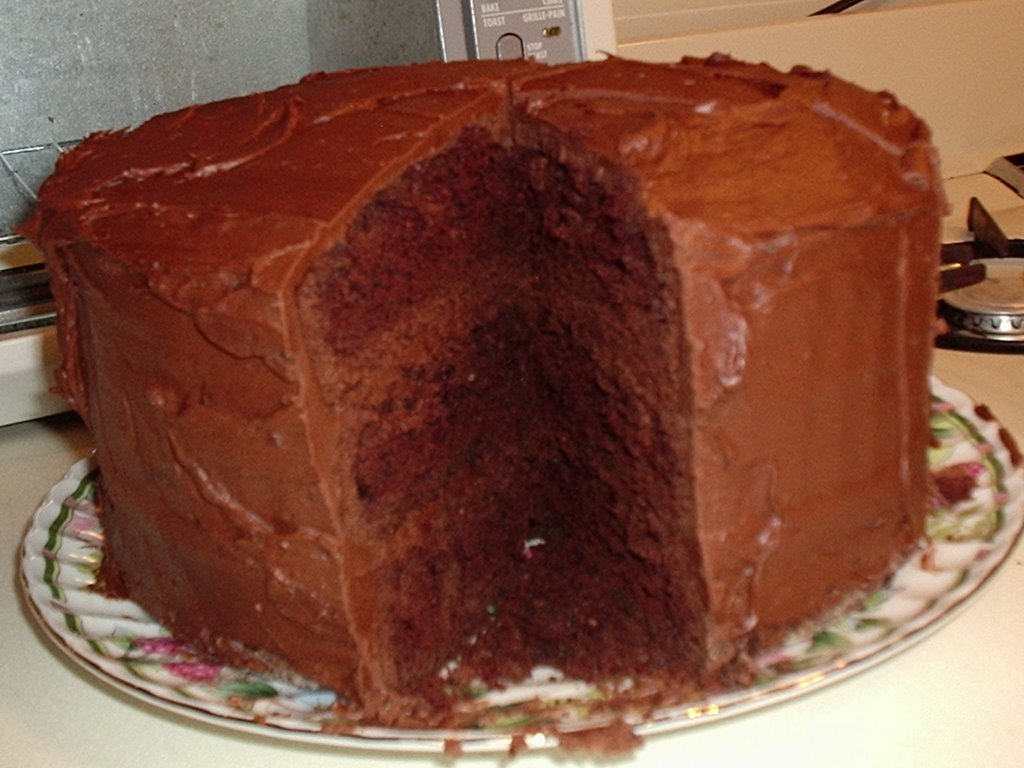
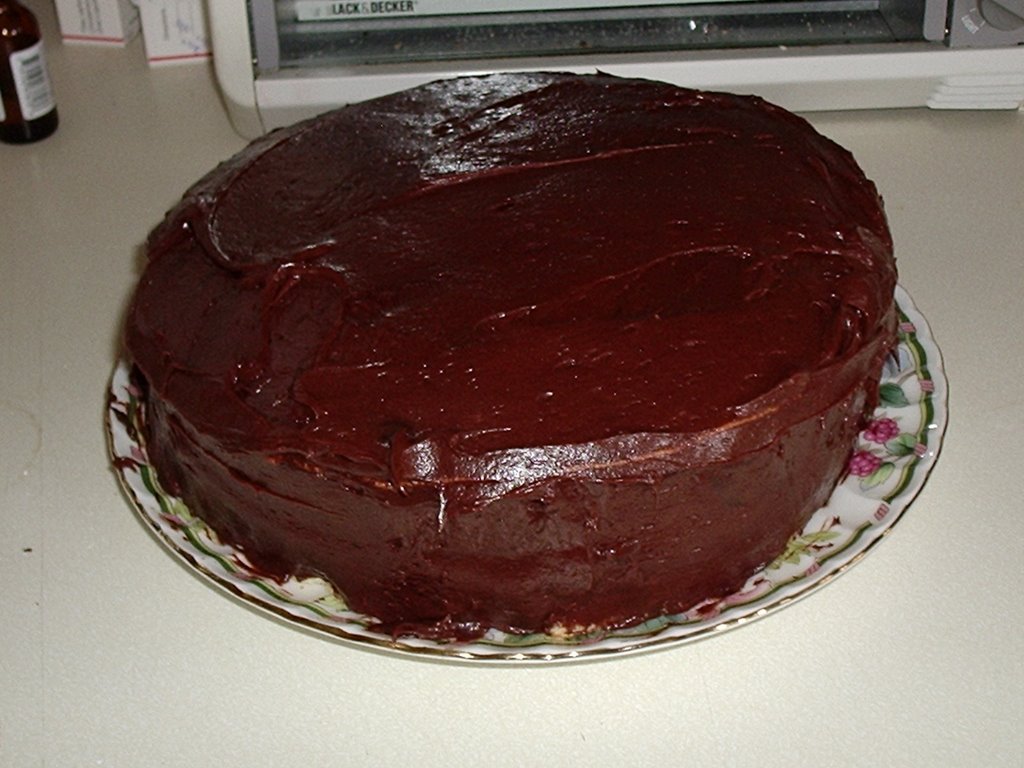
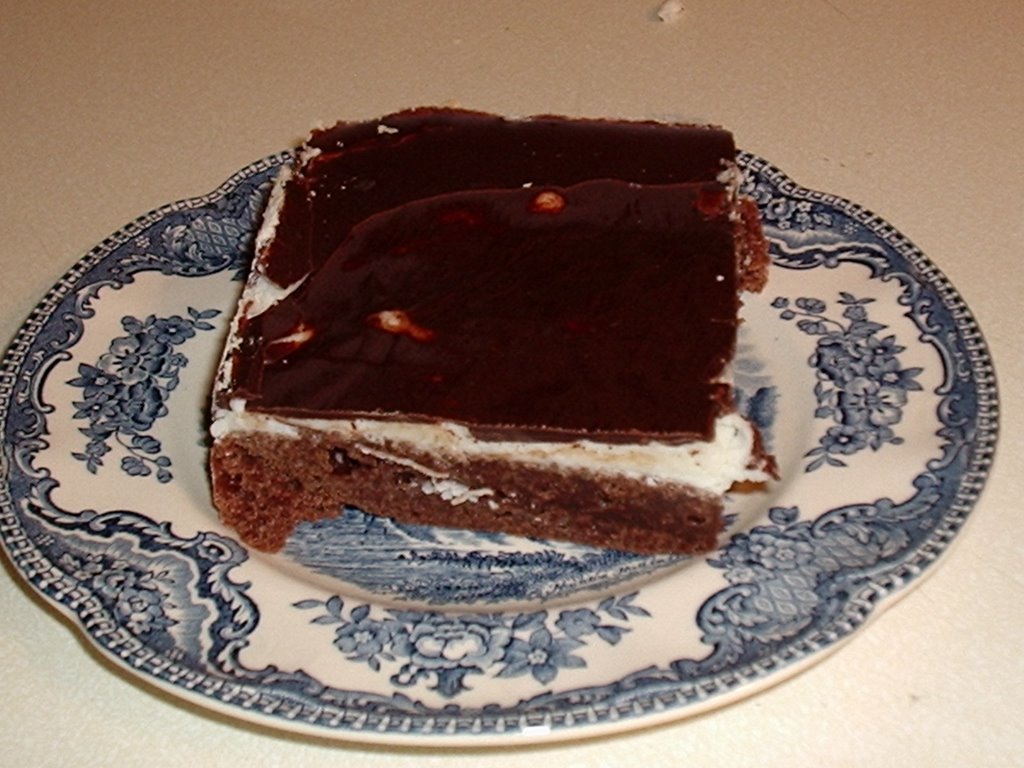
I didn't toast the coconut. I'm not sure if that makes a big difference in taste and/or texture. I was surprised that the morsels went in whole rather than pre-melted. My guess is that 1 1/4 hours in the oven are supposed to be sufficient to melt them. It wasn't. They just softened a little. Nor was it long enough to cook the pie all the way through. The center was still runny when I took it out. It looked good and it tasted good, it just didn't cook right.

Verdict: What were they thinking???

Toasted Coconut-Chocolate Chunk Pecan Pie


1 (15-ounce) package refrigerated pie crusts
1/3 cup butter or margarine, melted
1 cup sugar
1 cup light corn syrup
4 large eggs, lightly beaten
1 teaspoon vanilla extract
1/4 teaspoon salt
1 1/2 cups pecan halves
1 cup sweetened flaked coconut, toasted
3/4 cup semi-sweet chocolate chunks or morsels

Unroll 1 piecrust, and place on a lightly floured surface; lightly brush top crust with water. Unroll remaining crust, and place over bottom crust; gently roll into a 10" circle. Fit into a 9" deep-dish pieplate; fold edges under, and crimp.

Stir together butter and next 5 ingredients in as large bowl, stir well. Stir in pecans and remaining ingredients. Pour filling into piecrust.

Bake at 325 degrees F for 1 hour and 15 minutes or until set, shielding crust after 45 minutes with aluminum foil, if necessary. Cool completely on a wire rack. Yield: 8 to 10 servings.

Recycle: corn syrup bottle, vanilla extract bottle

Compost: eggshells

Sunday, December 17, 2006

Homemade Shake-and- Bake Chicken

I was recently invited to participate in a recipe swap. The stipulations were that the recipe I submitted should be easy to make and not have a lot of ingredients. That should be easy. I don't like recipes that have a lot of steps. As I went through my collection, I was amazed to see how many of my favorite recipes involved a lot of ingredients and quite a few steps. Then I came upon the easiest recipe I make: Homemade Shake-and-Bake Chicken.

There are only eight ingredients, counting the chicken and all you have to do is mix the flour and seasonings in a plastic bag, dip the chicken in milk and then shake it in the bag and bake. While the chicken is baking, you make your other dishes. An easy, delicious dinner.

Verdict: Yum!! This one's a keeper!!


Homemade Shake-and-Bake Chicken
1/2 cup flour
1 teaspoon paprika
1/2 teaspoon salt
1/2 teaspoon garlic powder
1/2 teaspoon dried thyme
1/4 teaspoon freshly ground pepper
4 chicken legs and thighs
1/2 cup milk
Preheat oven to 375 degrees F. Combine flour, paprika, salt, garlic powder, thyme, and pepper in a plastic bag.
Dip chicken legs in milk, shake off excess. Add to bag and shake to coat evenly. Place chicken on a greased baking sheet. Bake 40 minutes, until chicken is tender and coating crisp.

Friday, December 15, 2006

Cocktail Meatballs

My department at work had its annual Christmas party tonight. Originally I had planned on making my version of the Bacardi Rum Cake because it tastes better if made a day or two ahead and I had to cover a couple of nightshifts this week and wouldn't have a lot of time to bake. That idea got nixed by the organizers. They said they had enough deserts. Could I please make an entree? Swedish Meatballs were suggested. I loathe Swedish Meatballs, but I was willing to make them. Then I suggested Cocktail Meatballs. This idea appealed to me for a couple of reasons. I actually like cocktail meatballs. They are quick and easy to make. And best of all, I've never made them so I could try out a new recipe! I spent about an hour surfing the internet looking for a recipe that had the fewest ingredients and steps since I would be cooking on a few hours worth of sleep. I found the perfect recipe that was originally published in a women's magazine in the sixties.

My first challenge was mincing the onions. I have difficulty cutting onions into tiny pieces. These meatballs had to be 1" in diameter so I couldn't have huge chunks of onions in them. I threw the onion into the food processor which proceeded to shred them. At least it was in tiny "pieces". My next challenge was making 4 to 5 dozen meatballs. The meatball recipe I use makes 2 dozen meatballs so I used that as a guide and made 4 dozen meatballs. They looked small until I cooked them. Then I realized that they were an awkward size. A little large for just one bite but two small to be eaten in two bites. I have yet to perfect the art of cooking round meatballs. No matter how hard I try, the side that is cooking always gets flat so that I end up with a meatball with several flat sides rather than a nice round sphere.

The sauce was easy and after adding the meatballs, did thicken nicely. Surprisingly, the end result was quite tasty. One of my co-workers has requested the recipe.

Verdict: Yum!! This one's a keeper!!


Cocktail Meatballs
(Source: allrecipes.com)
Meatballs
1 pound ground beef
1/2 cup fine dry breadcrumbs
1/3 cup onion, minced
1/4 cup milk
1 egg, beaten
1 tablespoon fresh parsely, minced
1 teaspoon salt
1/2 teaspoon black pepper
2 tablespoons Worcestershire sauce
1/4 cup Crisco vegetable shortening
Sauce
1 12oz. bottle chili sauce
1 10 oz. jar grape jelly
Combine the first 9 ingredients, mixing well. Shape into 1" meatballs. Cook in an electric skillet in hot shortening over medium heat for 10-15 minutes or until browned. Cool meatballs by draining on paper towels. Discard grease.
Combine chili sauce and grape jelly in a medium saucepan (or same electric skillet); stir well until jelly is melted. Add meatballs and simmer UNCOVERED on low for 30 minutes (to thicken the sauce), stirring occasionally. Serve hot meatballs with toothpicks out of the skillet or a crockpot or chafing dish set on low to keep warm.
Makes about 4 to 5 dozen meatballs, depending on size.
Recycle: Worcestershire sauce bottle, chili sauce bottle, jelly bottle
Compost: onion skins, eggshell

Tuesday, December 12, 2006

Frosty Snowballs

Little pieces of heaven. I should leave it at that. They are that good. Really. Taste them for yourself.

I'm always on the lookout for non-chocolate recipes to bake. This one looked and sounded good. The picture showed little pastel colored balls. Reality was flat-bottomed hemispheres. But they were still absolutely delicious. I decided to forgo the colored sugar in favor of plain powdered sugar because I didn't want too much crunch going on.

The recipe calls for chopped pecans. The ones I bought on the grocery store looked more like chunked pecans. There was no way I was going to be able to make 1 inch balls with them so I ran them through the food processor until the pecans were the texture one normally associates with nut toppings.

For a few moments, I didn't think this dough was going to come together. I added all of the dry ingredients at once instead of a little at a time. It just spun in the mixer. Just as I was about to add more liquid, it jelled and became viable cookie dough. My other concern was that the dough might be too sticky to form easily into little balls. Not to worry, it was not too sticky. Twenty minutes was just perfect to bake them into the most delicious cookies I have ever made.

I took them to my monthly Master Gardener meeting and they were a huge hit. In fact, when the sign-up sheet for dishes to bring to our next big event came my way, everyone agreed I should make these cookies again!

Verdict: Yum! This one's a keeper!

Frosty Snowballs
(Source: BHG.com)


1 cup butter, softened
1/3 cup granulated sugar
1 tablespoon water
1 teaspoon vanilla
2-1/4 cups all-purpose flour
1 cup chopped pecans
1 cup sifted powdered sugar
Green, pink, and purple edible cake sparkles or colored sugar

1. In a large mixing bowl beat butter with an electric mixer on medium to high speed for 30 seconds. Add the granulated sugar; beat until combined, scraping sides of bowl occasionally. Beat in water and vanilla until combined. Beat in as much of the flour as you can with the mixer. Using a wooden spoon, stir in any remaining floru and the copped pecans.

2. Shape dough into 1-inch balls. Place 1 inch apart on an ungreased cookie sheet.

3. Bake in a 325 degree F oven 20 minutes or until bottoms are light brown. Transfer cookies to a wire rack; cool completely.

4. In each of three bowls place 1/3 cup of the sifted powdered sugar. Add a different color of edible cake sparkles or colored sugar to each bowl. Gently roll and shake cooled cookies in desired powdered sugar.

Recycle: vanilla bottle

Sunday, December 10, 2006

ISTEP+ Muffins

This recipe came to me all the way from Indiana via my good friend, A, who frequently appears in my garden blog. She got it from a friend of a friend. The originator of the recipe named it after the state standardized tests in Indiana because she makes these muffins for her children when they take the tests. I think that's a great idea! Breakfast is the most important meal of the day. And a healthy breakfast is much better than sugary cereal. A characterized these muffins as "...very moist, in fact almost too moist. They're not overly pumpkin-y". After making them myself, I agree with the moist, but disagree with the pumpkin-y. Perhaps because A makes them with the applesauce. I don't have applesauce in the house, so I skipped it. I'm not a big fan of the squash family. The cinnamon in this recipe wasn't enough to mask the pumpkin flavor. I would want to add more of the usual pumpkin pie spices to this. Maybe adding the raisins would also help.

The recipe says to "beat" the batter. Muffins are usually stirred with a wooden spoon. I threw caution to the wind and got out my KitchenAid. I don't know if it was that or the recipe itself, but the muffins came out very light, not the usual heavy, dense texture. I definitely want to try this recipe again with a few adjustments.

Verdict: Yum! This one's a keeper.

ISTEP+ Muffins
(Source: Anonymous)


3 cups all-pupose flour
1 tbsp cinnamon
2 tsp baking powder
2 tsp baking soda
1 tsp salt
4 eggs
2 cups sugar
1 1/2 cups oil (OR 3/4 cup oil and 3/4 cup applesauce)
1 3/4 cups pumpkin (1 small can)
2 cups raisins (optional)
brown sugar (optional)

Preheat oven to 375 degrees F. Combine flour, cinnamon, baking powder, baking soda and salt and set aside. Beat eggs slightly. Add sugar, oil and pumpkin and beat thoroughly. Add dry ingredients and mix until smooth. Stir in raisins (optional). Fill greased muffin cups 2/3 full and, optionally, sprinkle tops with brown sugar. Bake for 15-20 minutes for regular mufins; about 10 minutes for mini-muffins.

Makes approx. 3 dozen regular muffins or 7 to 8 dozen mini-muffins.

Recycle: pumpkin can, vegetable oil bottle, applesauce bottle

Compost: eggshells

Thursday, November 23, 2006

Pumpkin Pie

I only bake pies three times a year. Blueberry, when the blueberries are in season, apple when the Macintoshes are in season and a pumpkin pie at Thanksgiving. With the exception of the crust, there is nothing special about my pies. They are straight out of my trusty old Betty Crocker cookbook. I can see all of you foodies shuddering in horror! Rest assured that I have received many compliments on my pies over the years.

So much for the fillings. The pastry was another story. I was dissatisfied with Ms. Crocker's pastry. So I asked an elderly relative what made her pie pastry so flaky. She said she used lots of shortening. So I increased the amount of shortening in my own pastry and voila! Magic. Not only are they much better and flakier, they are also much easier to roll.

One other thing to bear in mind when making this pie: use evaporated milk. I've tried other things like Half & Half (when I found myself with no evaporated milk) and it's just not as good.

Verdict: Yum! This one's a keeper!


Pumpkin Pie
(Source: Betty Crocker Cookbook)


OldRoses' Pie Crust
1 cup all-purpose flour
1/2 teaspoon salt
1/2 cup shortening
3 tablespoons cold water

Filling
2 eggs
1 can (1 pound) pumpkin (2 cups)
3/4 cup sugar
1/2 teaspoon salt
1 teaspoon cinnamon
1/2 teaspoon ginger
1/4 teaspoon cloves
1 2/3 cups evaporated milk

Heat oven to 425 degrees.

Pastry
Measure flour and salt into bowl. Cut in shortening thoroughly. Sprinkle in water and mix until all flour is moistened and dough almost cleans side of bowl (1 to 2 teaspoons water can be added if needed).

Gather dough into ball; shape into flattened round on lightly floured pastry cloth. With floured roling pin, roll dough 2 inches larger than inverted pie pan. Fold pastry into quarters; unfold and ease into pan.

Trim overhanging edge of pastry 1 inch from rim of pan. Fold and roll pastry under, even with pan; flute.

Filling
Beat eggs slightly; beat in remaining ingredients. Pour into pastry-lined pie pan. (To prevent spills, place pie pan on oven rack or on open oven door when filling with pumpkin mixture.) Cover edge of pastry with 2- to 3-inch strip of aluminum foil to prevent excessive browning. Bake 15 minutes.

Reduce oven temperature to 350 degrees. Bake 45 minutes longer or until knife inserted in center comes out clean. (Remove foil last 15 minutes of baking.) Cool. Serve with sweetened whipped cream.

Makes one 9" pie.

Recycle: pumpkin can, evaporated milk can

Compost: eggshells

Saturday, November 18, 2006

Minestrone Soup

I'm always on the look out for soup recipes. I only make three kinds of soup regularly: mushroom, onion, and potato. I would love to find a recipe for chicken noodle soup or a good veggie soup. My perusal of my newest cookbook from BHG, turned up an interesting recipe for minestrone. It is a vegetarian ministrone but had beef bouillon in it giving it the taste of beef. I've found vegetarian dishes lacking in "oomph". I guess I am just a carnivore at heart.

I loved all the different kinds of vegetables in this recipe. I did make one mistake while shopping. I got red kidney beans instead of white kidney beans. Since I don't usually cook with beans, I'm not sure if there is a difference in taste or if the point is just to provide color contrast. Once I had all my ingredients assembled, I took a closer look at the recipe. I was shocked to see how short the cooking time was for all those vegetables. When I make stew, I always cook the veggies much longer.

And I was right. The vegetables didn't cook. The soup itself was alright, but the veggies were just plain raw.

Verdict: What were they thinking???


Minestrone Soup

6 cups water
1 28-oz. can tomatoes, undrained, cut up
1 8-oz. can tomato sauce
1 large onion, chopped
1 cup chopped cabbage
1 medium carrot, chopped
1 stalk celery, chopped
1 Tbsp. instant beef bouillon granules
1 Tbsp. dried Italian seasoning, crushed
1 tsp. salt
2 cloves garlic, minced
1/4 tsp. pepper
1 15-oz. can white kidney beans (cannellini beans) or Great Northern beans
1 10-oz. pkg. frozen lima beans or one 9-oz. pkg. forzen Italian-style green beans
4 oz. dried lingiune or spaghetti, broken
1 small zucchini, halved lenghtwise and sliced
2 to 3 Tbsp. purchased pesto(optional)
Grated Parmesan cheese (optional)

1. In a 5- to 6-quart Dutch oven, combine the water, undrained tomatoes, tomato sauce, onion, cabbage, carrot, celery, bouillon granules, Italian seasoning, salt, garlic, and pepper. Bring to boiling; reduce heat. Cover and simmer for 10 minutes. Stir in undrained white kidney beans, lima beans, linguine, and zucchini. Return to boiling; reduce heat. Simmer, uncovered, for 15 minutes.

2. To serve, ladle into soup bowls. If desired, top each serving with about 1 teaspoon of the pesto and pass Parmesan cheese. Makes 8 servings.

Make-ahead directions: Cool soup. Ladle soup into freezer containers. Seal, label, and freeze for up to 3 months. To serve, in a saucepan, heat soup over low heat until heated through, stirring frequently.

Recycle: tomato and tomato sauce cans, beans can

Compost: onion skins, carrot skins, celery leaves, garlic skins

Friday, November 17, 2006

Florentine Focaccia

I've been hearing a lot about focaccia but never actually tasted it. The few times that I have gone out to dinner, it was not on the menu. Last November, I came across a recipe for it that looked good. Although it was the dreaded multi-step recipe, for bread it quite simple. I especially liked that the time for cooking the bacon is built into the recipe instead of assuming that you just happen to have five strips of cooked bacon hanging around. That would never happen in my house. I don't normally eat bacon. In fact, when shopping for bacon for this recipe, I ended up buying turkey bacon because the pork bacon looked disgustingly fatty. Although raised on fatty meats, I've eaten only lean meats for decades. Fatty meats gross me out now.

I was unable to find Fontina cheese and substituted mozzarella instead. Due to the changing ethnic population in my town, the local grocery store has cut down on its Italian and Chinese ingredients and stocks more Hispanic foods. I can find any Chineses/Japanese ingredients I need at the local Asian market, but I'm having a tough time finding Italian ingredients.

Ten ounces of spinach is way too much. I only used about half the package and as you can see from the picture, that was plenty. The bread dough came together very easily and rose wonderfully. I can understand the need for the olive oil drizzled over the dough before baking, but it made the resulting bread very greasy. I like my bread drier to the touch. The taste was so-so. I'm very curious now to taste focaccia as served in an Italian restaurant and I wouldn't be averse to trying another recipe. I can't recommend this recipe, though.

Verdict: Not bad, but I won't be making this again.


Florentine Focaccia
(Source: Family Circle Magazine November 29, 2005)


3 cups all-purpose flour
1 envelope quick-rise yeast
3/4 teaspoon salt
3 tablespoons olive oil
1 tablespoon chopped fresh rosemary
4 ounces diced bacon (about 5 slices)
1 package (10 ounces) frozen chopped spinach, thawed and squeezed dry
1/2 teaspoon sea salt or coarse salt
1 1/2 cups shredded Fontina cheese

1. Combine 1 cup of the flour, yeast and salt in a large bowl.

2. Heat 2 tablespoons of the oil, rosemary and 1 cup water in a saucepan until very warm (125 degrees to 130 degrees F). Gradually beat water mixture into flour mixture with a wooden spoon. Beat in 1 1/2 cups of the remaining flour, 1/2 cup at a time, to make soft dough.

3. Knead dough on floured surface until smooth and elastic, 10 minutes, owrking in remaining 1/2 cup flour as needed to prevent sticking. shape into ball. Cover; let rest 10 minutes.

4. Saute bacon in skillet over medium heat for 4 to 5 minutes until crisp. Add spinach; cook an additional 1 to 2 minutes. Set aside.

5. Roll out dough on a floured surface to 15 x 11-inch rectangle. Fit in greased 15 x 11 x 1-inch jelly roll pan. make indentations all over surface of dough, pressing almost to bottom of pan. Drizzle dough with remaining tablespoon oil. Scatter bacon-spinach mixture and sea salt over top. Cover with plastic wrap. Let rise in warm place until almost doubled, 30 minutes.

6. Heat oven to 400 degrees. Sprinkle cheese evenly over top. Bake at 400 degrees for 20 to 25 minutes, until lightly browned and cheese is melted. Cut into 12 pieces. Serve warm.

Recycle: olive oil bottle

Thursday, November 16, 2006

Top Secret Recipes version of Starbucks Pumpkin Bread

I don't like Starbucks coffee. And even if I found myself in a Starbucks, I wouldn't purchase any of their baked goods because I prefer to bake my own. So I am at a loss as to why I felt so compelled to try this recipe. I actually had to ask people to taste it and tell me if it did taste like Starbucks' Pumpkin Bread. I didn't care for it, myself. Too bland. If you read the recipe closely, you will see that there are no seasonings in it. Just pumpkin and two kinds of sugar.

I don't have a metal bread pan. I used my clay meatloaf pan which may have contributed to the fact that this loaf did not cook all the way through. It was supposed to bake for 70 minutes but in less than an hour, I could smell it, a sure sign that it was done. Sure enough, when I checked it, the edges were brown and overcooking. I think this needed a lower oven temperature. I'm not even going to bother trying this again at a lower temperature. It's just not that good.

Verdict: What were they thinking???

Starbucks Pumpkin Bread


1 1/2 cups all-purpose flour
1 teaspoon baking soda
1/2 teaspoon baking powder
1/2 teaspoon salt
4 eggs
1 cup granulated sugar
1/4 cup light brown sugar
1/2 teaspoon vanilla
3/4 cups canned pumpkin
3/4 cup vegetable oil

Preheat oven to 350 degrees F.

Combine flour, baking soda, baking powder, and salt in a medium bowl.

Beat eggs, sugars and vanilla together in a large bowl with an electric mixer on high speed for about 30 seconds. Add pumpkin and oil and mix well.

Pour dry ingredients into the wet stuff and mix well with your electric mixer. Pour the batter into a well-greased 8 1/2" x 4 1/2" loaf pan. Bake for 70 minutes or until the top is dark brown and a toothpick stuck into the center of the bread comes out clean.

When the bread s cool, remove it from the loaf pan and use a bread knife to slice it into 1-inch thick slices.

Makes 8 slices.

Tidbits: This bread freezes perfectly. Simply seal any leftover slices in a zip top bag or wrap them in plastic ahd pop them into the chiller. To serve, microwave one frozen slice on high for about 45 seconds and it'll taste like it just came out of the oven.

Recycle: vanilla bottle, vegetable oil bottle, pumpkin can

Compost: eggshells

Sunday, November 05, 2006

Blueberry Bars

Since I started this blog, I've noticed that all of my cookbooks are old. I haven't bought a new one since I was divorced 14 years ago. Part of the reason was financial. When you are raising a child on a very small income, there is no money for luxuries like books. Probably the biggest reason why I stopped buying cookbooks was that I was cooking for a picky eater.

Cooking for a picky eater is sheer torture. Especially if you are like me and like to experiment with new ingredients and new techniques. Or even just variations on old standbys. With the advent of the internet, I could do a little experimenting for only the cost of the ingredients, my time and aggravation. But I miss leisurely leafing through a cookbook and discovering a great new recipe. So I've begun buying cookbooks again.
One of my recent purchases was from Better Homes and Gardens, their Our Best Recipes book. Silly me, I should have realized that it would just be a rehash of the recipes on their website but it is definitely more fun paging through the book than clicking around a website. Of course, all cookbooks come with "extras" these days. The "extra" with this one was a thin pamphlet called "BHG Favorite Bars & Cookies" again, a rehash of the website. I've actually made a few of these already and reviewed them here!
I had a few problems with this recipe. The first was cutting in the butter. It doesn't say to soften the butter first but I can't imagine trying to cut in cold, hard butter. It was difficult enough trying to cut softened butter into oatmeal! Combining frozen blueberries with anything is problematic. I don't know why they aren't defrosted first. I also didn't want to buy an entire lemon just for a little peel so I used the bottled stuff. It tasted fine. I used blueberry Polaner All-fruit rather than regular preserves. Perhaps that is why it was impossible to spread the blueberry mixture entirely over the crust. And how do you get 25 "bars" out of a 8" pan? Those are bites, not bars! But, in the end, it all came out delicious.
Verdict: Yum! This one's a keeper!
Blueberry Bars
(Source: BHG Favorite Bars & Cookies)

1 1/2 cups quick-cooking rolled oats
1 cup all-purpose flour
3/4 cup packed brown sugar
3/4 cup butter
1 cup frozen blueberries
1/2 cup bleuberry, raspberry, or strawberry preserves
1 teaspoon finely shredded lemon peel


1. Line an 8x8x2-inch baking pan with foil; set aside. In a medium bow combine rolled oats, flour, and brown sugar. Using a pastry blender, cut in butter until pieces are pea-size. Set aside 1 cup of the oat mixture for topping. Press the remaining oat mixture into the bottom of the prepared baking pan. Bake in a 350 degree oven for 25 minutes.

2. For filling, in a small bowl combine the frozen blueberries, preserves, and lemon peel. Carefully spread the filling over crust. Sprinkle with the reserved oat mixture, pressing lightly into blueberry mixture.

3. Bake about 30 minutes more or until the oat topping is golden brown. Cool in pan on a wire rack. Cut into bars. Makes about 25 bars.

Recycle: preserves bottle


Tuesday, October 24, 2006

Apple Streusel Muffins

As long as I am home and cooking this week, I decided to try a new breakfast treat. I got out my muffin cookbook and looked for a recipe with apples. I didn't make my annual apple pie this year so apple muffins sounded good.

I settled on this recipe because the book described them as "The delicious crumb topping makes these muffins taste like miniature coffee cakes. " Sold! The only problem was that I didn't have any chopped nuts. I used brown sugar instead and it tasted great although I have to admit, nuts probably would have tasted better.
The recipe recommends using Granny smith or Greenings apples. I always use Macintosh apples for baking. And eating. I grew up in upstate New York among apple orchards and cider mills. I was literally raised on Macs. I've also found that one Macintosh apple yields 1 cup of diced apple, making it so much easier to measure for recipes! For some reason, you're supposed to leave the apple unpeeled. I didn't. I always peel my apples when used for baking.

The cookbook was right. These muffins taste more like coffee cake than muffins. I made four large ones because I like a big muffin with my coffee in the morning (see sidebar for resizing muffin recipes). I'm definitely going to be making these often. And I'll be bringing them to next year's Fall Foliage Festival!

Verdict: Yum! This one's a keeper!

Apple Streusel Muffins


Topping

1/2 cup chopped walnuts
1/4 cup all-purpose flour
3 tablespoons granulated sugar
2 tablespoons butter, at room temperature
1/4 teaspoon ground cinnamon


Batter

1 1/2 cups all-purpose flour
1/2 cup granulated sugar
2 teaspoons baking powder
1 teaspoon ground cinnamon
1/4 teaspoon ground allspice
1/4 teaspoon salt
2 large eggs
1 cup sour cream
1/4 cup (1/2 stick) butter, melted
1 cup diced unpeeled apple, preferably a tart apple such as Granny Smith or Greenings

Heat oven to 375 degrees. Grease muffin cups or use foil baking cups.

Put streusel topping ingredients into a medium-size bowl. Mix with a fork, then crumble with fingers until mixture looks like chopped walnuts.

To make the muffin batter, thoroughly mix flour, sugar, baking powder, cinnamon, allspice, baking soda, and salt in a large bowl.

Break eggs into another bowl. Add sour cream and melted butter, and whisk until well blended. Stir in diced apple.

Pour egg mixture over flour mixture and fold in just until dry ingredients are moistened.

Scoop batter into muffin cups. Top each muffin with about 2 teaspoons of the streusel topping.

Bake 20 to 25 minutes, or until browned. A toothpick inserted into the center should come out clean. Remove from pans and let cool at least 1 hour before serving.

Recycle: sour cream container

Compost: eggshells, apple core and skins

Sunday, October 22, 2006

Meatballs

I'm off from work this week to get my bulbs planted. Naturally, after a week of gorgeous, warm weather, this week is predicted to be much colder. It happens every year. The week I pick to plant is the coldest week in October! I will have to bundle up to work outside.

After working in the yard all day, I will want something warm for dinner. Definitely comfort food. I spent the weekend cooking so all I will have to do for dinner each day is heat something up. Of course, I made my ultimate comfort food, macaroni & cheese. I'm also having cravings for spaghetti & meatballs.

For years, I made very simple meatballs: ground beef, an egg, oregano, garlic powder, onion powder, salt and pepper. They were okay, nothing to get excited about. Then I discovered a fabulous recipe in the strangest place, a Beanie Baby book. During the Beanie Baby craze, my daughter had many of them and a few books about them. One of the books, The Beanie Baby Handbook, contained recipes. We tried most of them. They were terrible. Except the meatballs. They were delicious! I no longer have the book, but I still have the recipe.

Verdict: Yum! This one's a keeper!

Meatballs


1 pound lean ground beef
2 eggs, lightly beaten
1 clove garlic, crushed
4 tablespoons grated Parmesan cheese
1/2 cup seasoned bread crumbs
1 tablespoon chopped parsley
salt and pepper to taste
2 tablespoons olive oil


Put the ground beef in a large mixing bowl. Add eggs, crushed garlic, Parmesan cheese, breadcrumbs, parsely, salt and pepper.

Using your hands, mix the ground beef mixture until it is well combined, but do not over mix as this will toughen the meatballs.

Divide ground beef mixture in half, divide each half into 12 even portions (this will make 24 small meat balls). Shape each portion of ground beef into a meatball. Place meatballs on a plate.

Heat oil in a frying pan on the stove over medium heat. Put meatballs in the pan and cook for about 10 minutes, turning occasionally with a wooden spoon to brown all sides.

Recycle: olive oil bottle

Compost: eggshells, garlic skins

Sunday, October 15, 2006

OldRoses' Potato Soup

The annual Fall Foliage Festival at Rutgers Gardens was held yesterday. Volunteers were urged to bring breakfast treats to share and a lunch if they were working the entire day. Of course, I made blueberry muffins to share with everyone for breakfast. For lunch, the Volunteer Coordinator had mentioned bringing soup and her crockpot because it was going to be a chilly day. That gave me a great idea! I have a wonderful recipe for potato soup that is rich and hearty. It's perfect for a crisp, cool autumn day.

The origins of this soup are lost in the mists of time. I know that I started out with a recipe card and then made changes but I can't recall what those changes were. Except the ham. Originally the recipe called for a specific amount of cooked ham. Most people use leftovers. I am cooking only for myself so there is no way I would be making an entire ham. Instead, I wait until ham steaks go on special at the grocery store, buy one, cut it up and use that instead.

Using red potatoes is important. I've tried other kinds of potatoes but the soup just doesn't taste as good.

The secret for making this soup great instead of just good is in the size of the potato and ham pieces. Yes, size matters! Take the time to cut up the potatoes and ham steak into tiny pieces. Smaller than bite size. The soup will be easier to eat and therefore, taste better. And the potatoes will also cook faster.

I have made this recipe many times but not for the past few months when the weather has been too warm for soup. Without thinking, I put in a lot of pepper the way I like it. Then I realized that other people might find it too spicy. I fished out as much of the red pepper flakes as I could and hoped for the best.

And the best is what I got. It's a good thing I grabbed some at noon. There wasn't much left by the end of the day. And I received the ultimate compliment for any chef: two requests for the recipe.

Verdict: Yum! This one's a keeper!


OldRoses' Potato Soup
(Source: OldRoses)
3 medium red potatoes
2 cups of water
1 small onion
3 tablespoons butter
3 tablespoons all-purpose flour
Crushed red pepper flakes
Ground black pepper
1 cup chicken broth
3 cups milk
1/2 teaspoon sugar
1 cup shredded cheddar cheese
1 ham steak
Peel potatoes and cut into bite size pieces.
Bring water to a boil in large saucepan. Add potatoes and cook until tender. Drain. Set aside potatoes.
While the potatoes are cooking, peel and finely chop onion. Cut ham into bite size pieces. After setting aside potatoes, melt butter in saucepan over medium heat. Add onion to saucepan; cook, stirring frequently, until onion is translucent and tender, but not brown.

Add flour to saucepan; season with pepper flakes and black pepper to taste. Cook 3 to 4 minutes.

Gradually add potatoes, chicken broth, milk and sugar to onion mixture in saucepan; stir well. Add cheese and ham. Simmer over low heat 30 minutes, stirring frequently.

Store leftovers, covered, in refrigerator.
Compost: potato skins, onion skins

Wednesday, October 11, 2006

Coconut Rounds

Another meeting, another cookie recipe. I'll use any excuse to cook! This recipe has been sitting in my "Recipes to Try" folder for close to a year. I found it in the December 2005 Family Circle magazine. I liked it because it used coconut flavoring in the cookies themselves, not just flaked coconut added to the dough or sprinkled on top. And, again, I had to make them ahead of time and they seemed like they would freeze okay.

I had some problems making these. Chilling the dough and making little dough balls was easy. Squashing the balls flat was another matter. The recipe called for a cup to be used. I used a glass. Either way, I'm sure I would have faced the same dilemna: either the dough stuck to the bottom of the glass or if I floured it enough to prevent sticking, then the cookie came out covered with too much flour.

My next problem came with the final step of icing the cookies with chocolate. The melting and dipping went okay, it was the setting. My kitchen was too warm and the chocolate wouldn't set. To freeze the cookies, I had to line my container with waxed paper and then place waxed paper between each layer of cookies. After I thawed them, I had to peel the waxed paper from each cookie. It was difficult and left unattractive marks on the icing.

The Master Gardeners who tried them liked them. In fact, this is all that was left after everyone had eaten their fill and wrapped up some to take home. Personally, I didn't find them all the tasty.

Verdict: Not bad, but I won't be making these again.

Coconut Rounds
(Source: Family Circle Magazine, December 2005)


1 1/2 cups all-purpose flour
1/2 teaspoon baking powder
1/8 teaspoon salt
1/2 cup (1 stick) unsalted butter, at toom temperature
3/4 cup sugar
1 egg
1/2 teaspoon coconut extract
1/4 teaspoon vanilla extract


1. In a large bowl, whisk together flour, baking powder and salt.

2. In a second large bowl, beat butter and sugar until smooth, about 2 minutes. Beat in egg, coconut and vanilla. On low speed, beat in flour mixture until just combined.

3. Gather dough. Wrap tightly in plastic wrap. Refrigerate 4 hours or as long as overnight.

4. Roll 1 heaping teaspoon dough into a ball. On a well-floured work surface, flatten with a cup. Transfer to an ungreased bking sheet. Repeat with remaining dough. Bake at 350 degrees for 10 to 12 minutes. Cool on wire rack.

5. Melt 8 ounces bittersweet chocolate. Dip an edge of one cookie in chocolate; rotate cookie slightly and dip again. repeat with all cookies and place on waxed-paper-lined baking sheets. Sprinkle with a total of 1/2 cup toasted coconut; let chocolate set at least 15 minutes.

Makes 4 dozen

Recycle: vanilla extract bottle, coconut extract bottle

Compost: eggshell

Wednesday, September 27, 2006

Vanishing Oatmeal Raisin Cookies

When I was a child, my grandmother always made oatmeal chocolate chip cookies for me. Much as I love(d) chocolate, the oatmeal part of the cookie was always my favorite. I asked her about the recipe once and she said it was on the oatmeal box. Unfortunately, she passed away not long after that while I was still too young to be baking myself.

I tried to replicate those cookies for years. The recipe on the oatmeal box didn't taste anything like them. The recipes in the standard cookbooks didn't taste anything like them. I finally gave up. Those cookies will have to remain a fond memory.

I still enjoy oatmeal cookies, though. I especially like the oatmeal cookies part of Oatmeal Scotchies but when I tried them without the butterscotch chips, they weren't particularly outstanding. When I made oatmeal scotchies recently, I noticed a recipe for oatmeal cookies on the cover of the oatmeal box that was similar but with small differences. I had another meeting to go to for the Rutgers Gardens Volunteers and these seemed like a good choice to bring. Just one problem. I had to make them ahead of time and I wasn't sure if raisins could be frozen and then thawed successfully.

I consulted with another avid baker. She had never tried it with raisins specifically but had been successful with other dried fruits. I decided to go ahead with the experiment. Boy, am I glad I did! These cookies, while nothing like my grandmother's, are outstanding. Even frozen and then thawed, they were moist and delicious. And a big hit at the meeting.

Verdict: Yum! This one's a keeper!

Vanishing Oatmeal Raisin Cookies
(Source: Top of the Quaker Old-Fashioned Oatmeal box)

1 cup (2 sticks) margarine or butter, softened
1 cup firmly packed brown sugar
1/2 cup granulated sugar
2 eggs
1 teaspoon vanilla
1 1/2 cups all-purpose flour
1 teaspoon baking soda
1 teaspoon cinnamon
1/2 teaspoon salt (optional)
3 cups Quaker Oats (quick or old fashioned, uncooked)
1 cup raisins

1. Heat oven to 350 degrees
2. Beat together margarine and sugars until creamy.
3. Add eggs and vanilla; beat well.
4. Add combined flour, baking soda, cinnamon and salt; mix well.
5. Stir in oats and raisins; mix well.
6. Drop by rounded tablespoonfuls onto ungreased cookie sheet.
7. Bake 10 to 12 minutes or until golden brown.
8. Cool 1 minute on cookie sheet; remove to wire rack.

About 4 dozen

Bar Cookies: Bake 30 to 35 minutes in ungreased 13 x 9-inch metal baking pan.

Recycle: vanilla extract bottle

Compost: eggshells

Friday, September 15, 2006

Oatmeal Scotchies

Next Sunday is the Annual Master Gardeners' Picnic. It's Pot Luck everything. Bring a dish. Bring a drink. Bring a plant. Just one problem. I have a gazillion things to do this week and the day before, I will be at Cook College all day attending Home Gardener's School. Then I remembered I had a bag of butterscotch morsels in the freezer. I could make Oatmeal Scotchies cookies any time during the week and then freeze them until Sunday. Problem solved!

Oatmeal Scotchies are very easy. The recipe is straight off the back of the morsels package. They are simply oatmeal cookies with butterscotch morsels in them. The only change I make in this recipe is the same one I make in all my recipes using brown sugar. I prefer the granulated brown sugar because it is easier to use.

Verdict: Yum! This one's a keeper!


Oatmeal Scotchies
(Source: back of the chips bag)

1 1/4 cups all-purpose flour
1 teaspoon baking soda
1/2 teaspoon salt
1/2 teaspoon ground cinnamon
1 cup (2 stocks) margarine or butter, softened
3/4 cup granulated sugar
3/4 cup firmly packed brown sugar
2 eggs
1 teaspoon vanilla extract
3 cups quick or old fashioned oats, uncooked
1 12 ounce package (2 cups) butterscotch flavored morsels

Preheat oven to 375 degrees. In a small bowl, combine flour, baking soda, salt and cinnamon; set aside. In a large mixer bowl, beat margarine, granulated sugar, brown sugar, eggs and vanilla extract until creamy. Gradually beat in flour mixture. Stir in oats and butterscotch morsels. Drop by measuring tablespoonfuls onto ungreased cookie sheets.

Bake 7 to 8 minutes for chewy cookies or 9 to 10 minutes for crisp cookies. Let stand on cookie sheets 2 minutes. Remove from cookie sheets; cool completely on wire racks. Store tightly covered.

Makes about 4 dozen cookies.

Recycle: vanilla extract bottle

Compost: eggshells

Monday, September 11, 2006

Rurality Shrimp

The cool breezes of autumn are finally blowing and it's safe to go back into the kitchen. I've been wanting to try this recipe all summer. I found it on a blog called Rurality. It has wonderful nature photos. I'm a sucker for great photography. Someday I hope to able to own a nice camera and take a course or two on photography.

I only made two small changes to this recipe. I didn't have any linguine so I substituted thin spaghetti. I also used 15 oz diced tomatoes with Italian seasonings. I had slightly less than 1 lb of shrimp in my freezer. My biggest concern was the lack of any sweetener like sugar or carrots in the sauce. Pure tomato sauces are usually too acidic for me. This one most definitely was not. Perhaps it was the shrimp. Whatever it was, this dish was absolutely delicious. I'll definitely be making it again.

Verdict: Yum! This one's a keeper!

Rurality Shrimp
(Source: Rurality , April 7, 2006)

1 1/2 tsp garlic, chopped
1 medium onion
2 tbsp olive oil
8 oz can Italian whole plum tomatoes
1 lb cooked shelled shrimp
1 tsp oregano
1 tsp basil
8 oz crumble feta cheese
8 oz uncooked linguini
salt & pepper to taste

Cook linguini in salted water.

Saute garlic & onion on olive oil 3 - 5 minutes on Medium High heat (until tender). Add cooked shrimp, saute for 2 minutes, remove from pan but leave garlic & onion. Add tomatoes & liquid & stir.

Bring to a boil, reduce heat. Add shrimp, oregano & basil, salt & pepper. simmer 3 - 5 minutes. Pour over drained linguini & toss.

Add crumbled feta cheese at the table.

Recycle: diced tomatoes can

Compost: garlic skins, onion skins

Monday, May 22, 2006

Chocolate Fudge Cake

At long last, I have found the perfect chocolate cake. Well, almost perfect. It's a little dryer than I would like, but still much, much better than any other recipe I have tried. And I have tried a lot of chocolate cake recipes. This one was pictured on the cover of the February 2006 issue of "Family Circle" magazine. I was attracted to it because it uses both unsweetened chocolate AND cocoa powder. Usually, it's one or the other. Recipes with just cocoa powder are never "chocolatey" enough for me. Also, it uses sour cream in both the cake and the frosting. And the frosting uses both unsweetened chocoate and cocoa powder AND butter and vegetable shortening AND milk and sour cream. I had to try it!

This is actually my second try at making this cake. The first time, I was following the ingredients list rather than the recipe and left out a cup of water. The resulting batter was incredibly stiff and baked into very dry layers which were surprisingly good. That encouraged me to try it again. The cake is light and not too dry but not as moist as I would like. The frosting came together incredibly well and the taste is to die for. This is definitely going to be my signature chocolate cake.

Verdict: Yum! This one's a keeper!


Chocolate Fudge Cake
(Source: Family Circle Magazine February 2006)


Cake:
1/2 cup (1 stick) unsalted butter
4 ounces unsweetened chocolate, broken up
2 1/2 cups all-purpose flour
2 1/4 cups sugar
1 cup unsweetened cocoa powder
2 teaspoons baking soda
1/2 teaspoon baking powder
1 1/2 teaspoons salt
1 1/2 cups sour cream
3 eggs
2 teaspoons vanilla extract

Frosting:
4 ounces unsweetened chocolate, broken up
1/2 cup solid vegetable shortening
1/2 cup (1 stick) unsalted butter, softened
1/4 cup sour cream
1/3 cup milk
2 teaspoons vanilla extract
1/4 teaspoon salt
1 box (1 pound) confectioners' sugar
1/2 cup cocoa powder
Garnish: chocolate curls; berries

1. Heat oven to 350 degrees. Grease and flour three 9-inch round cake pans.

2. Cake: In a glass bowl, melt butter and chocolate to gether in microwave on high until melted and smooth, 1 to 1 1/2 minutes, stirring halfway through. Set aside. On low speed, mix flour, sugar, cocoa, baking soda, baking powder and salt in a large bowl until blended.

3. Add sour cream, eggs, 1 cup water, chocolate mixture and vanilla; beat 30 seconds on low, until dry ingredients are moistened. Increase to medium; beat 2 minutes. Pour into prepared pans.

4. Bake at 350 degrees for 40 minutes or until cake layers spring back when pressed.

5. Cool layers in pans on rack 10 minutes. Remove cakes to rack to cool.

6. Frosting: In a small glass bowl, melt chocolate in microwave on high for 1 minute. Stir until smooth. Set aside. Beat shortening, butter, sour cream, milk, vanilla, salt, 1 cup of the sugar and the cocoa powder in a medium-size bowl until creamy. Gradually beat in remaining sugar and melted chocolate until thick and smooth.

7. Place a cake layer on pedestal. Spread with about 2/3 cup frosting. Top with second layer; spread with about 2/3 cup more frosting. Top with remaining layer. Frost top and sides, swirling decoratively. Garnish with chocoate curls and berries.

Recycle: vanilla extract bottle

Compost: eggshells

Friday, March 31, 2006

Shrimp Fra Diavolo

We have a small lounge area with seating in the ladies' room at work. Periodically, someone leaves magazines there. I'm not sure why. They are of the fashion and women's general interest variety. I , of course, turn immediately to the recipes. The latest "Family Circle" magazine featured a tasty Italian meal: mozzarella-garlic bread, shrimp fra diavolo, romaine with parmesan curls and rustic pear pie. I don't think I've ever had a pear pie. I'm looking forward to trying it. In the meantime, I made the shrimp fra diavolo.
Two pounds of linguine was way too much for me. I used one box (one pound). And an entire teaspoon of hot pepper flakes was also too much. This came out fiery more than spicy. And lastly, the shrimp was more garlicky than I care for. But with a few minor adjustments, this will definitely become part of my regular rotation of recipes. It was that good!
Verdict: Yum! This one's a keeper!
Shrimp Fra Diavolo
(Source: Family Circle Magazine April 1, 2006)


3 tablespoons olive oil
1 large red onion, cut in half, then thinly sliced
1 teaspoon minced garlic
1 teaspoon hot pepper flakes
1/2 cup red wine
3 cups marinara sauce
1/4 teaspoon black pepper
2 pounds linguine
1 1/2 pounds cleaned large shrimp
1/2 teaspoon minced garlic

Bring a large pot of water to a boil.

Heat 1 tablespoon of the olive oil in a large nonstick skillet over medium heat; add onion and cook 5 minutes unti soft. Add garlic and pepper flakes; cook 1 minute. Add wine; cook 3 minutes. Stir in marinara and black pepper; simmer 5 minutes.

Meanwhile, lightly salt water and add linguine; cook until tender but still firm, about 8 to 10 minutes.

When linguine is almost done, heat a large nonstick skillet over medium-high heat; add remaining oil. Add shrimp and cook, stirring, until pink, about 2 minutes. Scatter garlic on top and toss.

Drain pasta thoroughly and place in large serving bowl. Toss with marinara sauce; place shrimp on top and serve.

Recycle: olive oil bottle, wine bottle, marinara sauce bottle

Compost: onion skins, garlic skins

Monday, March 27, 2006

Buttermilk Layer Cake with Chocolate Satin Frosting

I can't believe I fell for it! Again! I gave up years ago trying recipes from "gourmet" sources like "Gourmet Magazine" and "The New York Times Magazine" because they were always incredibly complicated, used a lot of pans, and utensils, were time consuming and never, ever worked out for me. I've been good literally for decades. Then I saw this recipe last week. I think I fell for it because it is supposedly from "Joy of Cooking", a cookbook that many people swear by.

So, let's go over the many, many ways that this recipe failed. First clue: it uses vegetable oil to grease the cake pans. I used Crisco. The pans are greased, but not floured so, of course, the layers stuck to the pans like glue. I had to pry them out, in pieces. Seriously, do people really not flour their cake pans? Since I've only seen this in recipes from the NYT Magazine section, I'm convinced that it is a joke on the rest of us by the snooty food editors who know very well that cake will stick to pans that haven't been floured! To add insult to injury, the layers didn't cook in the middle either. Based on experience, this is the fault of the recipe, not my oven.

Let's move on to the frosting. Whoever heard of using a food processor to mix frosting? I didn't boil the cream or use a food processor. Microwave and KitchenAid, like a normal person. I was in a hurry when I made this cake so I probably didn't allow the frosting to set long enough. It was a bit runny as you can see from the picture.

It's too bad that this recipe didn't work out well because it actually tasted pretty good. I liked the light texture of the layers. At least the part that actually cooked! And the cream was delightful in the frosting. Hopefully I learned my lesson (again!) and it will be another two decades before I try another recipe from this source.

Verdict: What were they thinking???
Buttermilk Layer Cake with Chocolate Satin Frosting
(Source: The New York Times Magazine, March 19, 2006)

Buttermilk Layer Cake
Vegetable oil for greasing pans
2 1/3 cups cake flour
1 1/2 teaspoons baking powder
1/2 teaspoon baking soda
1/4 teaspoon salt
3 large eggs
1 teaspoon vanilla
6 ounces butter
1 1/3 cups sugar
1 cup buttermilk

Chocolate Satin Frosting
1 cup heavy cream
6 ounces unsweetened chocolate, cut into chunks
3 cups confectioners' sugar
6 tablespoons unsalted butter, cut into small pieces
1 teaspoon vanilla

Preheat oven to 350 degrees. Grease two 9-inch cake pans and set aside. Sift together the cake flour, baking powder, baking soda and salt; set aside. In a small bowl, whisk together the eggs and vanilla.

Using a mixer on medium speed, beat the butter until creamy. Over the course of 3 minutes, beat in the sugar. Over 2 minutes, add the egg mixture. Reduce the speed to low and alternate adding the flour and buttermilk in three parts,scraping the bowl.

Divide the batter between the pans and smooth the tops. Bake until light golden brown and a toothpick inserted in the center comes out clean, 25 to 30 minutes. Cool for 10 minutes, then unmold onto a rack to cool completely before frosting.

Frosting: Bring the cream to a boil. Remove from heat and add chocolate. Cover and set aside for 10 minutes. Scrape into a food processor and add the confectioners' sugar, butter and vanilla. Process until smooth, then 1 minute more. Set aside at toome temperatur until thickened into a spreadable consistency.

To frost cake, place 1 layer on a cake plate, rounded side down, trimming if necessary so it lies flat. Spread with a third of the frosting, top with the second layer and frost the remainder of the cake.

Adapted from "Joy of Cooking"

Recycle: vegetable oil bottle, vanilla bottle

Compost: eggshells

Friday, March 24, 2006

Beef in Red Wine

Still in search of crockpot recipes, this one caught my eye. Yes, I am just as sick of beef cooked in red wine as you are. This recipe, though, has an interesting variation: onion soup mix. I love onions and I especially love onions with beef. After making this dish, I realize there is a huge difference between onions and onion soup mix. It had a weird taste that I later realized was a result of all the chemicals that comprise the soup mix. If I ever make this recipe again, I will omit the onion soup mix.

Verdict: Not bad, but I probably won't be making this again.

Beef in Red Wine
(Source: BHG.com )


1-1/2 pounds beef stew meat, trimmed and cut into 1-inch cubes
2 medium onions, cut up
2 beef bouillon cubes or 1 envelope (1/2 of a 2.2-ounce package) onion soup mix
3 tablespoons cornstarch
Salt
Black pepper
1-1/2 cups dry red wine
Hot cooked whole wheat pasta (optional)

1. Place the beef and onions in a 3-1/2- or 4-quart slow cooker. Add bouillon cubes. Sprinkle with cornstarch, salt, and pepper. Pour red wine over all.

2. Cover and cook on low-heat setting for 10 to 12 hours or on high-heat setting for 5 to 6 hours. If desired, serve over pasta. Makes 6 servings.

Recycle: red wine bottle

Compost: onion skins

Monday, March 20, 2006

Deep Chocolate Brownies

Deep . . . Chocolate . . . Brownies . . . Just the name stirs me, chocoholic that I am. Then there are the ingredients. Bittersweet chocolate . . . Chocolate chips . . . Butterscotch topping . . . Coconut . . . Pecans . . . I couldn't wait to make this. And be disappointed. You would think I would know better by now.
The batter was incredibly stiff resulting in dry, dry, dry brownies. I don't care for dry cakes and brownies. I much prefer moist. Theye also tasted burned to me. Then I realized it was the bittersweet chocolate. Too bitter. The brown sugar just didn't take enough of the edge off of it for me. This is a good thing for many people who don't care for very sweet chocolate. I am not one of them.
And I should know better by now than to use prepared toppings. I could taste the chemicals in it. I should have made my own. I bought finely chopped pecans rather than the coarsely chopped ones. Just a personal preference. I liked the resulting texture better than if there had been "chunks" of pecans.
Verdict: Not bad, but I definitely won't be making this again.
Deep Chocolate Brownies
(Source:BHG.com )

1 egg
1 cup butterscotch-flavored ice cream topping
2 cups coarsely chopped pecans
2 cups flaked coconut
3/4 cup butter, softened
1-1/2 cups packed dark brown sugar
8 ounces bittersweet chocolate, melted and cooled
2 eggs
2 teaspoons vanilla
2 cups all-purpose flour
1 teaspoon baking powder
1/2 teaspoon baking soda
1/2 teaspoon salt
1 12-ounce package semisweet chocolate pieces

1. Preheat oven to 350F. Lightly grease a 13x9x2-inch baking pan; set aside.

2. In a medium mixing bowl beat the 1 egg with an electric mixer on medium speed until fluffy and light colored. Stir in ice cream topping. fiold in pecans and coconut; set aside.

3. In a large mixing bowl beat butter with an electric mixer on medium to high speed for 30 seconds. Beat in brown sugar until fluffy. Beat in cooled chocolate, the 2 eggs, and vanilla. Stir together flour, baking powder, baking soda, and salt; beat or stir into chocolate mixture. Stir in chocolate pieces. Spread in prepared pan; spread nut mixture over batter. Bake about 35 minutes or until golden and set. Cool in pan on a wire rack. Cut into bars. Makes 24 bars.

Recycle: ice cream topping bottle, vanilla bottle

Compost: eggshells

Friday, March 10, 2006

Parmesan Chicken Breasts

I don't need another chicken recipe. Really, I don't. And I already have an oven-baked "fried-chicken" recipe that I've been using for years. This looked like such an interesting variation that I had to try it. Parmesan cheese, garlic and basil. It could be Italian oven-baked "fried-chicken".

It was easy enough to put together. Six chicken breasts were way too much for me, so I only used four. Good thing because that's about all that the oil and garlic mixture covered. I don't know how I could have done six. There was plenty of bread crumb mixture however so I was able to sprinkle some more on top as suggested. It smelled really garlicky as it was baking and tasted very garlicky also. Believe it or not, it got more garlicky each day that it sat in my fridge (I cook for an entire week at a time). Now I love garlic, but this was too much even for me. And I really don't care for dishes where one taste overpowers all the others.

Verdict: Too garlicky. I won't be making this again.

Parmesan Chicken Breasts

2 tablespoons olive oil
1 clove garlic, minced
1 cup dry bread crumbs
2/3 cup grated parmesan cheese
1 teaspoon dried basil leaves
1/4 teaspoon ground black pepper
6 skinless, boneless chicken breast

Preheat oven to 350F. Lightly grease a 9x13 inch baking dish. In a bowl, combine the olive oil and garlic. In a pie plate or bowl mix the bread crumbs, parmesan cheese, basil, and pepper. Dip each chicken breast in the oil mixture, then in the bread crumb mixture. Arrange the coated chicken breasts in the prepared bvaking dish, and top with any of the remaining bread crumb mixture. Bake 30 minutes or untiol the chicken is no longer pink and juices run clear.

Recycle: olive oil bottle

Compost: garlic skins

Monday, March 06, 2006

Classic Sugar Cookies

I have a perfectly good sugar cookie recipe that I have used literally for years. Nonetheless, when I saw this sugar cookie recipe in a magazine, I had to try it out. My recipe uses a combination of almond extract and vanilla extract. This one uses only vanilla extract. My recipe calls for confectioner's sugar. This one calls for regular sugar. It's supposed to be for Christmas cookies but I used it for St. Patrick's Day.
I had problems with it right from the start. I looked and looked and looked but couldn't find a shamrock cookie cutter anywhere. So I used my scalloped edge round cookie cutter and green sugar. I took the recipe writer at their word and refrigerated the dough overnight. It fit my schedule better than 4 hours. Big mistake! The dough came out of the refrigerator rock hard. I had to let it warm up to room temperature before I could roll it out thereby defeating the entire purpose of refrigerating it.
Baking the cookies was also a problem. I know from prior recipes that my oven temperature is accurate so I baked the first batch of cookies for 12 minutes. They came out too brown. I baked the second batch for 11 minutes. Still too brown. The third batch baked for only 10 minutes and they still came out brown. The texture was also off. The edges were crispy and the centers chewy. I just didn't care for these cookies. BUT . . . I brought them to a committee meeting and they were a big hit. So it's a split decision.
Verdict: (Me) Not bad, but I don't think I'll be making these again.
(Committee Members) Yum! This one's a keeper.
Classic Sugar Cookies
(Source: Family Circle Magazine, December 2005)
1 1/2 cups all-purpose flour

1/2 teaspoon baking powder

1/8 teaspoon salt

1/2 cup (1 stick) unsalted butter, at room temperature

3/4 cup sugar

1 egg

3/4 teaspoon vanilla extract

Red and pink decorating sugar

1. In a large bowl, whisk together flour, baking powder and salt.

2. In a second large bowl, beat butter and sugar until smooth, about 2 minutes. Beat in egg and vanilla. On low speed, beat in flour mixture until just combined.

3. Gather dough; divide in half. Form each half into a disk. Wrap tightly in plastic wrap. Refrigerate 4 hours or as long as overnight.

4. Heat oven to 350F. Roll out one dough disk to 3/16- to 1/4-inch thickness. Cut into stars using a 2-inch star cookie cutter. Place on ungreased baking sheets; sprinkle with decorating sugar, and bake at 350F for 10 to 12 minutes until light golden around edges. Remove from baking sheets; cool on wire rack. Repeat with remaining half of dough. Gather scraps and refrigerate. Re-roll and cut into stars. Bake as directed. When completely cool, store in airtight containers for up to 2 weeks.

Makes: 3 1/2 dozen cookies

Recycle: vanilla extract bottle

Compost: eggshell

Friday, March 03, 2006

Flavorful Beef Stir-Fry

I know, I know. Another stir-fry recipe. But look at the ingredients! Broccoli! Carrots! Onions! Sliced water chestnuts! Now look at the picture. Isn't that gorgeous? And it tasted just as good as it looked. It was super-easy too. Not to mention fool-proof. The recipe calls for the pan to be covered for four minutes while the veggies simmer. There is no cover for this pan and I don't own one wide enough. No problem! I simmered without a cover and it still turned out great!

Verdict: Yum! This one's a keeper.

Flavorful Beef Stir-Fry
(Source: allrecipes.com )

2 tablespoons cornstarch
2 teaspoons sugar
6 tablespoons soy sauce
1/4 cup white wine, apple juice or water
1 pound boneless beef round steak, cut into thin strips
3 cups broccoli florets
2 medium carrots, thinly sliced
1 (6 ounce) package frozen pea pods, thawed
2 tablespoons chopped onion
2 tablespoons vegetable oil, divided
1 (8ounce) can sliced water chestnuts, undrained
hot cooked rice

In a bowl, combine cornstarch, sugar, soy sauce and wine, apple jiuce or water until smooth. Add beef and toss to coat; set aside.

In a large skillet, stir-fry broccoli, carrots, pea pods and onion in 1 tablespoon oil for 1 minute. Stir in water chestnuts. Cover and simmer for 4 minutes; remove and keep warm.

In the same skillet, stir-fry beef in remaining oil until meat reaches desired doneness. Return vegetables to pan; toss. Serve over rice.

Recycle: soy sauce bottle, vegetable oil bottle, water chestnut can

Compost: broccoli stem, carrot skins, onion skins

Monday, February 27, 2006

Chocolate Mint Brownies

Do you like Junior Mints? I do. And I'm sure you've seen recipes for "Junior Mint Brownies" made with Junior Mints. But I like to make everything from scratch so I was excited to find this recipe that seemingly mimicked the Junior Mint recipes without using Junior Mints.

This recipe was nothing but problems. To begin with, I didn't record where I found it and despite numberous internet searches, couldn't locate a source. Scroll down to the recipe and see if you can find another problem. Right you are! There is no oven temperature specified. I used 350F, the temperature used to bake my other favorite brownie recipes. Here's something else I noticed: no baking powder or baking soda. As you can see from the picture, the brownie part stayed flat. Another missing detail: the recipe didn't specify what kind of chocolate to use in the brownie. I opted for unsweetened because of the amount of sugar. I didn't bother with the green food coloring because I didn't have any on hand. The frosting was very stiff and difficult to spread and waaaaaay too minty. It overpowered the chocolate flavors of the brownie and the top chocolate coating. The recipe says to spread the chocolate covering over the frosting. I just poured it on top and then tilted the pan around until most of the frosting was covered. Crude, but it worked. All in all, this recipe was a big disappointment.

Verdict: What were they thinking???

Chocolate Mint Brownies
(Source: Unknown)
Brownies:
2 squares choclate
1/2 cup butter
2 eggs
1 cup sugar
1 cup nuts

Frosting:
1 1/2 cups confectioners sugar
3 tablespoons butter
1 1/2 tablespoons cream
1 teaspoon peppermint extract
2 drops green food coloring

Chocolate covering:
1 square semi-sweet chocolate
1 square unsweetened chocolate
1 1/2 tablespoons butter

Cream 1/2 cup butter with 1 cup sugar. Add eggs and (melted, cooled) chocolate. Add flour and nuts. Mix well. Bake in a greased and floured 9 x 9-inch pan for 20 minutes. Mix frosting ingredients. Allow brownies to cool, frost and place in refrigerator. In double boiler, melt the ingredients for chocolate covering, cool slightly and spread over frosting. When set, cut into squares.

Recycle: peppermint extract bottle, green food coloring bottle

Compost: eggshells

Friday, February 24, 2006

Pizza

I've wanted to make pizza for years but every recipe I've ever come across uses prepared pizza sauce. I want to make my own. I found a promising recipe on the website of Sunset Magazine. I wasn't thrilled with their recipe for the dough. The first sentence was: "Start the dough at least 1 day ahead." Yeah, right. Like that's going to happen. I have enough cookbooks that it should have been easy to find another pizza dough reciep. Surprisingly, it wasn't. I finally found one in a 1996 edition of Betty Crocker (I own several editions). It was quick and easy but I wasn't happy with the taste. Too bland.

The pizza sauce recipe was one of those that sounds delicious on paper, but in reality is just terrible. I'm not a big fan of tomatoes. Tomato sauce, tomato soup, tomato juice are all fine but not tomatoes themselves. The diced tomatoes and tomato paste used in this recipe produced a sauce that was way too "tomato-y" for me. One pound of cheese was also way too much as was the 4 ounces of meat. I ended up using half that much for two pizzas. I opted for pepperoni and mushroom.

Verdict: What were they thinking???

Pizza
(Source: Betty Crocker and Sunset Magazine )


Pizza Dough

1 package regular or quick active dry yeast

1 cup warm water (105F to 115F)

2 1/2 cups all-purpose flour

2 tablespoons olive or vegetable oil

1/2 teaspoon salt

Olive or vegetable oil

Cornmeal

Quick Pizza Sauce

1 can (14 oz., or 1 3/4 cups) chopped or diced tomatoes, undrained

1 can (6 oz.) tomato paste

2 tablespoons chopped fresh basil leaves or 2 teaspoons dried basil

1 1/2 tablespoons extra-virgin olive oil

1 1/2 teaspoons dried oregano

1 1/2 teaspoons sugar

1/2 teaspoon chopped garlic

salt to taste

Toppings

4 cups shredded 100% whole-milk mozzarella cheese (1 lb.)

4 ounces meat such as thinly sliced salami or pepperoni

3 to 4 cups thinly sliced vegetables such as red onions, mushrooms, bell peppers or pitted ripe olives

2 to 4 tablespoons seasonings such as chopped fresh jalapeno chilies or minced garlic (optional)

Dissolve yeast in warm water in medium bowl. Stir in flour, 2 tablespoons oil and the salt. Beat vigorously 20 strokes. Cover and let rest 20 minutes.

Move oven rack to lowest position. Heat oven to 425F. Grease 2 cookie sheets or 12-inch pizza pans with oil. Sprinkle with cornmeal. Divide dough in half; pat each half into 11-inch cicle on cookie sheet with floured fingers. Prick dough thoroughly with fork. Bake about 10 minutes or until crust just begins to brown.

In a bowl, mix sauce ingredients. Spread 3/4 cup sauce over each crust to within 1 inch of edge. Sprinkle with cheese. Top with other ingredients. Bake at 425F about 10 minutes, until cheese is melted and pizzas are bubbly.

Recycle: diced tomato can, tomato paste can, olive oil bottle

Compost: garlic skins

Friday, February 17, 2006

Teriyaki Steak

Always in search of crockpot recipes/beef recipes, I was enticed by this one which fits both bills. Yes! Another Chinese/Japanese recipe. I happen to love teriyaki sauce and this is "make your own"! It seemed like one of those simple recipes that you could just throw into the crockpot without a lot of preparation. It was, but the end result was disappointing. It says to cook on low for 6 to 8 hours. I went with the shorter time because my crockpot tends to run a little hot. I don't know if that was the reason or if it was the recipe itself, but this came out tasting slightly burned. I was very disappointed.

Verdict: Not bad, but I don't think I'll be making this one again.


Teriyaki Steak
(Source: RecipeSource )

2 pounds boneless round steak

1 teaspoon ground ginger

1 tabelspoon sugar

2 tablespoons oil

1/2 cup soy sauce

1 clove garlic, crushed

3 scallions, chopped

1 can Chinese vegetables (optional)

Cut the steak into 1/8 inch slices. Combine the sauce ingredients and scallions in a small bowl. Place the meat in the crockpot and pour sauce over it all. Cover and cook on low for 6 to 8 hours. About 15 minutes before serving, add Chinese vegetables if desired. Serve with rice.

Recycle: oil bottle, soy sauce bottle, Chinese vegetables can

Compost: garlic skin

Monday, February 13, 2006

Best-Ever Chocolate Cake

BHG.com had a slide show on chocolate desserts. One of them was called "Best Ever Chocolate Cake". That sounds like a challenge to me! I looked at the ingredients and couldn't imagine how this recipe could be "Best Ever". First of all, it's made with cocoa. My experience has been that anything made with cocoa is not very "chocolatey". And I LIKE chocolatey. The frosting is made with sour cream! I couldn't even imagine what that must taste like. I accepted the challenge. Hey, it's Valentine's Day. Valentine's Day is all about chocolate!

My problems with this recipe started with the pans. The recipe calls for two 8x8x2-inch square or 9x 1 1/2-inch pans or one 13x9x2-inch pan. The accompanying illustration shows three round layers! Were they three 8-inch layers or three 9-inch layers? I took a look at the frosting recipe and found a clue. It supposedly frosts the tops and sides of two or three 8- or 9-inch cake layers or halve it to frost the top of a 13x9x2-inch cake. I opted for three 8-inch round pans. Turns out that was exactly right! They baked up beautifully.

The frosting was not as beautiful. An 8-ounce carton of sour cream is way too much. The frosting was too runny and much too plentiful for my three layers. I probably could have frosted two three layer cakes with it! It did nothing towards holding the layers together. When I cut the cake, it fell completely apart.

The taste was definitely not "best ever". As I expected, it wasn't chocolatey at all and even worse, it was dry, dry, dry. I like my chocolate cakes to be moist and chocolatey. I didn't care much for the frosting either. I just don't like my frosting to taste of chocolate chips!

Verdict: What were they thinking???

Best-Ever Chocolate Cake
(source: BHG.com )


3/4 cup butter, softened

3 eggs

2 cups all-purpose flour

3/4 cup unsweetened cocoa powder

1 teaspoon baking soda

3/4 teaspoon baking powder

1/2 teaspoon salt

2 cups sugar

2 teaspoons vanilla

1-1/2 cups milk

Chocoalte-Sour Cream Frosting

1. Allow butter and eggs to stand at room temperature for 30 minutes. Meanwhile, lightly grease bottoms of two 8x8x2-inch square or 9x1/2-inch round cake pans. Line bottom of pans with waxed paper. Grease and lightly flour waxed paper and sides of pans. Or grease one 13x9x2-inch baking pan. Set pans aside.

2. In a mixing bowl stir together the flour, cocoa posder, baking soda, baking pwoder; and salt; set aside.

3. In a large mixing bowl beat butter with an electric mixer on medium to high speed for 30 seconds. Gradually add sugar, about 1/4 cup at a time, beating on medium speed until well combined (3 to 4 minutes). Scrape sides of bowl; continue beating on medium speed for 2 minutes. Add eggs, one at a time, beating after each addition (about 1 minute total). Beat in vanilla.

4. Alternately add flour mixture and milk to beaten mixture, beating on low speed just until combined after each addition. Beat on medium to high speed for 20 seconds more. Spread batter evenly into the prepared pan(s).

5. Bake in a 350 degree F oven for 35 to 40 minutes for 8-inch pans and the 13x9x2-inch pan, 30 to 35 minutes for 9-inch pans, or until a wooden toothpick inserted in the center comes out clean. Cool cake layers in pans for 10 minutes. Remove from pans. Peel off waxed paper. Cool thoroughly on wire racks. Or place 13x9x2-inch cake in pan on a wire rack; cool thoroughly. Frost with desired frosting. Makes 12 to 16 servings.

Chocolate-Sour Cream Frosting: In a large saucepan melt 1 12-ounce package (2 cups) semisweet chocoate pieces and 1/2 cup butter over low heat, stirring frequently. Cool for 5 minutes. Stir in 1 8-ounce carton dairy sour cream. Gradually add 4-1/2 cups sifted powdered sugar (about 1 pound), beating with an electric mixer until smooth. This frosts tops and sides of two or three 8- or 9-inch cake layers. (Halve the recipe to frost the top of a 13x9x2-inch cake.) Cover and store frosted cake in the refrigerator.

Recycle: vanilla extract bottle

Compost: eggshells

Sunday, February 12, 2006

OldRoses' Chocolate-Dipped Valentine Heart Cookies

Your wish is my command. Susan requested my "regular" Valentine cookie recipe. It's a two parter. I saw the idea in that same "First Magazine" that I found so many recipes that became staples in my kitchen. This one was from the February 10, 1992 edition. I like to keep things simple, so I eliminated the white chocolate and assorted colored sugars, sprinkles tinted coconut, etc. that were suggested as toppings. I also doubled the amount of chocolate chips and shortening so there would be enough to cover all the cookies. Then I substituted my favorite sugar cookie recipe from my favorite cookbook, Betty Crocker, for the one used in the magazine. That one called for zest from 2 oranges. I wasn't thrilled with the thought of orange-flavored cookies. And I tinted the dough pink in honor of Valentine's Day. No pictures this time. You just have to imagine the Half-Hearted Valentine Cookies in pink!

Verdict: Yum! This one's a keeper.
OldRoses' Chocolate-Dipped Valentine Heart Cookies
(Source: OldRoses)
1 recipe Deluxe Sugar Cookies
Red food coloring
2 cups semi-sweet chocolate chips (12 ounces)
4 tablespoons shortening
Mix cookie dough as directed. Using red food coloring, tint dough pink. Cut out with heart shaped cookie cutters and bake as directed.
Melt chocolate chips and shortening in micro-wave in a deep bowl. Dip 1 side of each cookie into the chocolate and let excess drip off. Scrape bottom edge against bowl to remove last of the excess chocolate. Put on sheets of waxed paper to set.
Deluxe Sugar Cookies
(Source: Betty Crocker Cookbook)
1 cup butter or magarine, softened
1 1/2 cups confectioners' sugar
1 egg
1 teaspoon vanilla
1/2 teaspoon almond extract
2 1/2 cups all-purpose flour
1 teaspoon soda
1 teaspoon cream of tartar
Mix thoroughly butter, confectioners' sugar, egg, vanilla and almond extract. Blend in flour, soda and cream of tartar. Cover, chill 2 to 3 hours or overnight.
Heat oven to 375F. Divide dough in half. Roll each half 3/16 inch thick on lightly floured pastry cloth. Cut into desired shapes. Place on lightly greased baking sheet. Bake 7 to 8 minutes or until light brown on edge.
About 5 dozen 2 to 2 1/2 inch cookies
Recycle: vanilla extract bottle, almond extract bottle, food coloring bottle
Compost: eggshell

Friday, February 10, 2006

Sweet, Hot, and Sour Meatballs

I have to stop trying recipes that use prepared mustard. All I taste is the mustard. And there are just certain things that should never be eaten with mustard. Meatballs definitely fall into that category. I was intrigued by this recipe because of the unique combination of ingredients. Uniquely awful, as it turns out. What was I thinking? Mustard and apple juice and apple jelly? I have absolutely nothing good to say about this dish. The sooner I can get this posted and begin forgetting I ever made it or tasted it, the happier I will be.

Verdict: What were they thinking???


Sweet, Hot, and Sour Meatballs
(Source: BHG.com )
1/2 cup refrigerated or frozen egg product, thawed
1/2 cup fine dry bread crumbs
1/2 cup finely chopped onion
1/4 cup milk
1/2 teaspoon salt
1/2 teaspoon black pepper
1 pound bulk pork sausage
1 pound ground beef
3/4 cup apple jelly
1/3 cup spicy brown mustard
1/3 cup whiskey or apple jiuce
1-1/2 teaspoon Worcestershire sauce
Few dashes bottled hot pepper sauce
1. In a large bowl combine egg product, bread crumbs, onion, milk, salt, and pepper. Add sausage and beef; mix well. Shape into 48 meatballs. Place meatballs in a shallow baking pan. Bake, uncovered, in a 375 degree F oven about 30 minutes or until done (160 degree F). Remove from oven; drain.
2. Meanwhile, in a large saucepan stir together jelly, mustard, whiskey, Worcestershire sauce, and bottled hot pepper sauce. Heat and stir until jelly melts and mixture bubbles. Add meatballs, stirring gently to coat. Cook for 3 to 5 minutes or until sauce thickens slightly and meatballs are coated.
Makes 24 servings (48 meatballs)
Recycle: jelly jar, mustard jar, whiskey or apple juice bottle, Worcestershire sauce bottle
Compost: onion skins