Saturday, January 27, 2007

Orange Pound Cake

"A" has made a couple of the recipes from the January 2007 issue of Family Circle magazine. Now it's my turn. I wanted to try the Orange Pound cake. I like pound cake and I'm always on the lookout for cake recipes that aren't chocolate. Citrus is not one of my favorites, but I can tolerate orange. I won't eat an orange, but I enjoy orange juice, orange sherbet and orange popsicles. Orange Pound cake sounded like another winner.

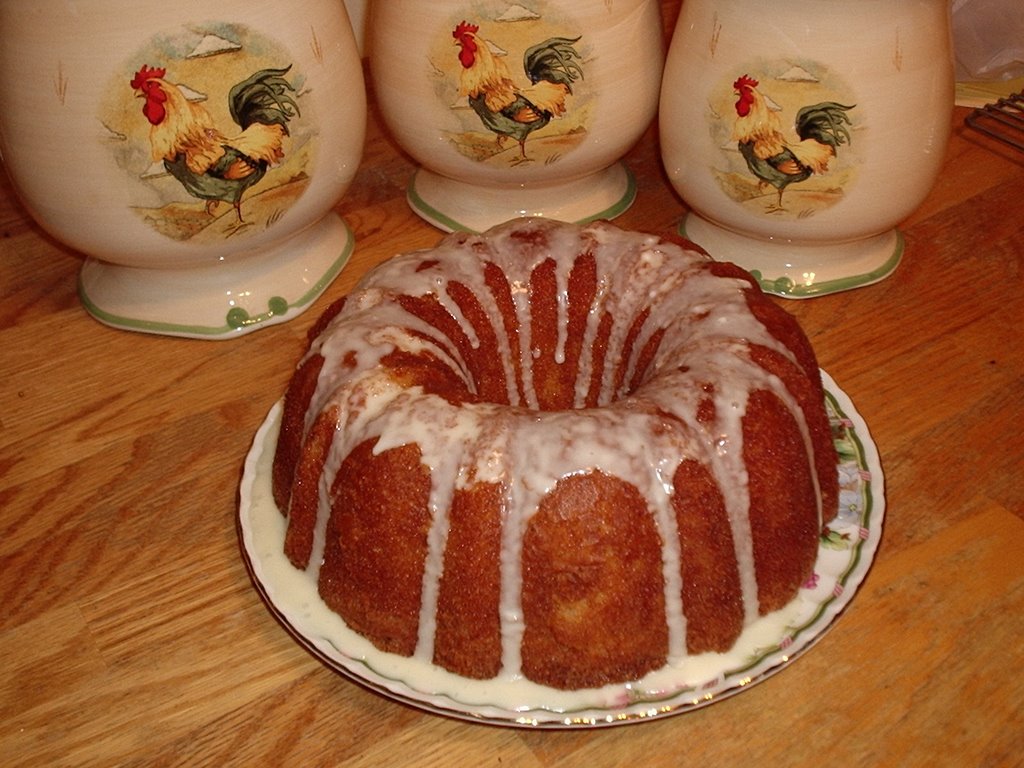
The recipe calls for a tube pan. This is the second recipe I have tried that called for a tube pan rather than a bundt pan. The other was the Bacardi Rum Cake recipe. Both times I struck out looking for a tube pan. Does no one bake any more? So I crossed my fingers and made this in my bundt pan.

The batter was easy to make and tasted delicious. Just orange-y enough without being overwhelming. The cake baked up beautifully but I had a heck of a time getting it out of the pan. Loosening the sides with a knife was not sufficient. I literally had to pry it out. Fortunately, it came out in one piece. The icing was also easy and only slightly orange-y tasting. I wish I could say the same for the finished cake. It lost a lot of its orange flavor in the baking process. Even the second day when most baked goods have developed their best flavor, there was precious little orange taste to this. And it was greasy, probably from all the butter. I prefer moist cakes over dry ones, but I don't care for greasy. All in all, very disappointing.

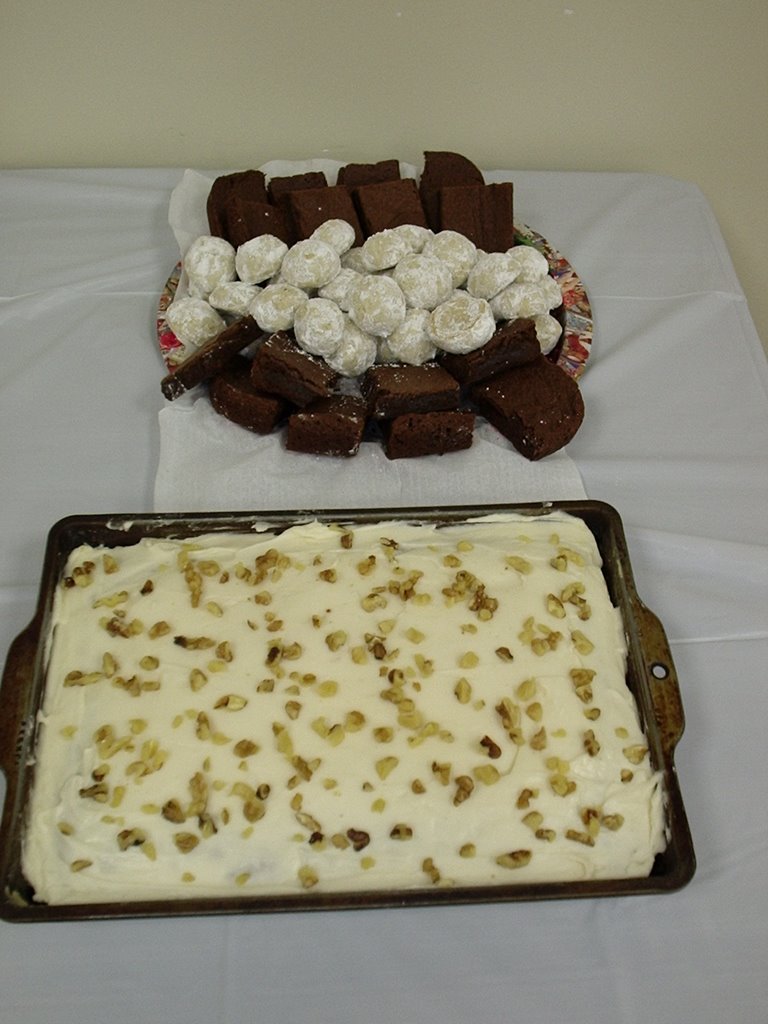
Verdict: Not bad, but I probably won't be making this again.

Orange Pound Cake
(source: Family Circle Magazine, January 2007)


1 3/4 cups (3 1/2 sticks) unsalted butter, softened
2 3/4 cups granulated sugar
8 eggs
1 teaspoon orange extract
2 teaspoons grated orange rind
3 cups all-purpose flour
1 tablespoon baking powder
1 teaspoon salt
3/4 cup fresh orange juice (from 3 oranges)

Drizzle:
3/4 cup confectioners' sugar
1 tablespoon orange juice plus 1 teaspoon water

1. Het oven to 350 degrees. Butter and flour 10-inch tube pan. Tap out excess flour.

2. Beat butter in bowl until creamy. Gradually beat in sugar until fluffy, scraping down bowl. Add eggs, one at a time. Beat in extract and rind.

3. Combine flour, baking powder and salt in small bowl. Gradually beat into butter mixture on medium speed alternating with orange juice. Beat 2 minutes, scraping down bowl occasionally, until thick and creamy. Pour into prepared pan.

4. Bake at 350 degrees for 35 minutes. Lower heat to 300 degrees. Bake 45 to 50 minutes or until toothpick comes out clean. Cool in pan on rack 15 minutes; turn cake out on rack; cool completely.

5. Drizzle: In a bowl, whisk confectioners' sugar and thinned juice until smooth. Drizzle over cooled cake. Let dry before slicing and serving.

Recycle: orange extract bottle

Compost: eggshells

Tuesday, January 23, 2007

Buttermilk Carrot Cake

Every January, the Steering Committee of the Middlesex County Master Gardeners sponsors a get-together for all of the Master Gardeners. They call it a "Reunion" because one of the purposes is for members to get together with their former classmates. It's also a great time to meet members of other classes and for the new class to get to know those who have gone before. Hey, it's January. There's not a whole lot else to do!

Everyone is asked to bring a dish or dessert for the buffet. I always volunteer to bake. I already had a pretty good idea of what I wanted to make, but it was still gratifying to be requested to make "those cookies". It took a while to decide which brownies recipe to bake but in the interests of keeping it fairly simple, I went with the Melt in Your Mouth Brownies and the Frosty Snowballs ("those cookies"). This was an excellent chance to try out a new carrot cake recipe. Who doesn't like carrot cake?

This recipe was appealing because it called for buttermilk, coconut, a glaze and could be made into a sheet cake, very handy for a crowd. The first problem I ran into was the cream cheese. You will note that the recipe calls for two 3 ounce packages of cream cheese. Apparently no one bakes any more because despite visiting every grocery store in town, I couldn't find cream cheese in 3 ounce packages. I ended up buying one 8 ounce package and whacking off a guesstimated 2 ounces.

My next problem was the baking time. I left it in for the minimum 40 minutes, but it came out a little overbaked. Not bad, just browner around the edges than I like it and the bottom appeared to be burned or nearly burned. I think 30 to 35 minutes would be more appropriate.

I'm not entirely certain what the purpose of the glaze is in this recipe. It was definitely glaze-y in the pan but soaked into the cake when I poured it on. The frosting, on the other hand, was heavenly. Much, much better than the cream cheese frosting I make with my "regular" carrot cake recipe. The cake part of this recipe is pretty blah considering all of the ingredients that go into it, but the frosting is definitely a keeper!

Verdict: Not bad, but I don't think I'll be making it again.

Buttermilk Carrot Cake
(Source: BHG.com)

Cake

2 cups all-pupose flour

2 cups sugar

2 teaspoons baking soda

1 ½ teaspoons ground cinnamon

1 teaspoon baking powder

¼ teaspoon salt

4 medium carrots, shredded (2 cups)

¼ cup buttermilk or sour milk

¼ cup cooking oil

1 8-¼ ounce can crushed pineapple, drained

1 cup chopped walnuts

3 eggs

½ cup coconut

1 teaspoon vanilla

Glaze

½ cup sugar

¼ cup buttermilk or sour milk

¼ cup margarine or butter

2 teaspoons light-colored corn syrup

½ teaspoon vanilla

Frosting

2 3-ounce packages cream cheese

½ cup margarine or butter, softened

2 teaspoons vanilla

4-1/2 to 4-3/4 cups sifted powdered sugar

½ cup chopped walnuts

Grease and lightly flour two 9x1-1/2-inch round baking pans (or one 13x9x2-inch baking pan); set aside. In a large mixing bowl combine flour, 2 cups sugar, baking soda, cinnamon, baking powder, and salt. Add shredded carrot, ¼ cup buttermilk or sour milk, cooking oil, pineapple, nuts, eggs, coconut, and 1 teaspoon vanilla. Stir until combined. Spread batter in prepared pans.

Bake in a 350ยบ F oven for 40 to 45 minutes or until cakes spring back when touched lightly.

Meanwhile, prepare glaze: In a medium saucepan combine ½ cup sugar, the remaining ¼ cup buttermilk or sour milk, ¼ cup margarine or butter, and corn styrup. Bring to boiling; reduce heat. Cook and stir for 4 minutes. Remove from heat and stir in ½ teaspoon vanilla. Pour evenly over tops of cakes. Cool cakes in pans on wire racks for 15 minutes. Remove layer cakes from pans and place on wire racks (do not remove cake from 13x9x2-inch pan). Cool completely.

In a large mixing bowl beat cream cheese, ½ cup margarine or butter, and 2 teaspoons vanilla with an electric mixer on medium to high speed until light and fluffy. Gradually add sifted powdered sugar, beating to spreading consistency. Stir in walnuts. Forst cake. Store in the refrigerator. Makes 16 servings.

Make-Ahead Tip: Cover and chill frosted cake up to 48 hours.

Recycle: vanilla bottle, cooking oil bottle, pineapple can, corn syrup bottle

Compost: eggshells, carrot peelings

Sunday, January 21, 2007

Peanut-Sesame Noodles

In addition to the Black & White Brownie Delight, "A" also made the Peanut-Sesame Noodles from the same issue of Family Circle magazine. Here are her thoughts on that recipe:

Okay, up front I must admit that I did make quite a few changes to this recipe. I don't like going out and buying ingredients unless I'm pretty sure I'll use them again. And I do like to use up what I have. In this case, I used whole wheat rotini, thinking it would go well with the peanutty flavor (which it did). I used ordinary vinegar and soy sauce, olive oil instead of sesame oil, and powdered ginger instead of fresh. I also cut out the red pepper flakes (I'm not into high heat) and scallions (I'm not into garnishes), and replaced the chicken broth with water because I wanted a vegetarian dish. Oh, and I cut the recipe in half. And ate it warm instead of cold.

The good thing about this recipe is that it's really fast. You do want to start the pasta cooking first, because it takes longer to cook than the sauce does. The directions say to cook the sauce for about 10 minutes, but for me it didn't take nearly that long. Maybe 5 minutes tops. Even that was probably a little too long, because when it cooled, it thickened to about the consistency of tomato paste.

As for the flavor - all I could detect was peanut, and a hint of garlic. I probably should have put in more ginger - maybe a teaspoon at least - and maybe a little chili powder. Or something. Any ideas?

"A's" Verdict: Has potential, but needs some work.

Peanut-Sesame Noodles
(source: Family Circle magazine, January 2007)


1 pound linguine or lo mein noodles
3/4 cup smooth peanut butter
1/3 cup chicken broth plus 1/3 cup water
1/4 cup rice vinegar
2 tablespoons light soy sauce
2 tablespoons sugar
2 teaspoons Asian dark sesame oil
2 teaspoons peeled ginger, finely chopped
1/2 teaspoon garlic powder
1/2 teaspoon red pepper flakes
3 tablespoons sesame seeds
2 scallions, trimmed and sliced on the diagonal

1. Cook linguine in a large pot of lightly salted water following package directions. Drain, and immediately plunge into an ice water bath. Set aside.

2. Meanwhile, in medium-size saucepan, combine peanut butter, chicken broth and water, rice vinegar, soy sauce, sugar, sesame oil, ginger, garlic powder and red pepper flakes. Whisk until combined. Cook on medium-high heat for about 10 minutes or until thickened. Remove from heat.

3. While sauce simmers, toast sesame seeds in a nonstick skillet over medium heat for 5 minutes, shaking pan to keep seeds from burning.

4. Drain noodles, discarding ice cubes. Toss with half of the dressing (about 3/4 cup), and allow to soak in for a few minutes. Add remaining dressing and toasted sesame seeds to noodles and toss until well combined. Top with sliced scallions and serve cold. Best if served on the day it is made.

Recycle: peanut butter jar, soy sauce bottle, sesame oil bottle

Compost: ginger peels, scallion greens

Wednesday, January 10, 2007

Black & White Brownie Delight

This is a guest post written by my good friend "A", a founding member of the Straw Hat Society and fellow cooking enthusiast. We were both intrigued by the cover recipe of the January issue of Family Circle magazine. She tried it and submitted the following review:

My first thought, after reading this recipe, was, "This had better be good. Very good." It looked like a lot of effort, and fairly pricey too (the chocolate mousse mix alone cost $4.00). Because I felt I was spending enough on this recipe as it was, I made a couple substitutions so that I could use things I already had: I used light brown instead of dark brown sugar for the bottom layer, and ordinary chocolate chips instead of chocolate chunks in the garnish. I also used a 10 x 14 pan, since I don't have a 9 x 13 pan. Oh, and instead of nonstick foil, I just used regular foil and sprayed the piece lining the pan with cooking spray. This made things a bit difficult when it came time to spread the bottom layer in the pan. This batter is pretty stiff, so when I tried to spread it out in the pan, not only did it not want to stick to the foil, but the foil kept sliding around. Remembering that the pan was larger than the recipe called for, I finally left the batter as a rectangle somewhat smaller than the pan.

The recipe tells you to put the next two layers into bags and pipe them on. This is not necessary. Both these layers have the consistency of cake batter, i.e. light and fairly thin, so I just poured them onto the middle of the previous layer(s) and spread to the edges with a spatula. This worked just fine.

The magazine claims the prep time is 25 minutes, but it took me about an hour and 45 minutes from the time I started until the time the pan went into the oven. An hour later, when I took the foil tent off, the batter had risen to completely fill the pan, so I was glad I'd used the larger
pan.

The finished product is pretty heavy and rich, so you do want to cut them small. 32 pieces from a 9 x 13 pan is definitely reasonable. As for the flavor - I was kinda disappointed. They taste okay, but not special enough, I thought, to justify all the work involved. They're not very chocolate-y; really, you taste the peanuts more than anything else. They're not bad, just not, I thought, very flavorful. However, I took some into work and my coworkers were delighted. My boss kept purring (apparently that's what Rachael Ray does, but I don't have cable so I've never seen her). Since I've only worked there about a month, that's probably a good thing....

"A's" Verdict: Not bad, but I probably won't make them again.

Black & White Brownie Delight
(Source: Family Circle magazine, January 2007)

Blondie:
1 ½ cups all-purpose flour
1 tablespoon unsweetened cocoa powder
¾ teaspoon baking powder
½ teaspoon salt
6 tablespoons (3/4 stick) unsalted butter, at room temperature
1 cup packed dark-brown sugar
1 teaspoon vanilla extract
2 eggs
½ cup coarsely chopped dry-roasted peanuts

Cheesecake:
2 packages (8 ounces each) cream cheese, softened
⅔ cup sugar
2 eggs
⅓ cup all-purpose flour

Brownie:
1 ½ cups all-purpose flour
6 tablespoons unsweetened cocoa powder
2 teaspoons baking powder
½ teaspoon salt
½ cup (1 stick) unsalted butter, at room temperature
1 ⅓ cups sugar
2 eggs
⅔ cup creamy peanut butter
1 cup milk

Garnish:
2 packages (2.8 ounces each) chocolate mousse mix
1 cup milk
⅓ cup chopped dry-roasted peanuts
⅓ cup chopped chocolate chunks
¾ cup prepared caramel topping


1. Heat oven to 350°. Prepare nonstick foil as follows: Fold 24-inch-long sheet of nonstick foil over upside-down pan, crimping it to hold the shape; set aside. Repeat with second sheet of foil; this will be used to line the pan. To ensure even baking, after lined pan is filled with batter, place pre-formed foil “tent” over top of pan – do not let it touch batter. Line 13 x 9-inch baking pan with one of the prepared foil sheets, extending up the long sides and over short ends.

2. Blondie: Mix flour, cocoa, baking powder and salt in a bowl. Beat butter, sugar and vanilla in a medium-size bowl until creamy. Beat in eggs, one at a time. On low, beat in flour mixture. Stir in peanuts. Spread into pan; level top.

3. Cheesecake: Beat cream cheese in a medium-size bowl on medium speed untiol smooth. Add sugar, eggs and flour and beat to incorporate. Place mixture in large plastic bag; snip off end. Pipe over blondie layer to cover, gently spreading to smooth top.

4. Brownie: Stir flour, cocoa, baking powder and salt in a medium-size bowl. Beat butter and sugar in second bowl until light and fluffy. Beat in eggs one at a time. Beat in peanut butter until well blended. On low speed, beat half flour mixture, then half milk, into butter mixture. Repeat. Place mixture in large plastic bag; snip off end. Pipe over cheesecake layer to cover, gently spreading to smooth top. Place second prepared foil “tent” over top, crimping edges. Do not let foil touch top of batter.

5. Bake at 350°, covered for 1 hour; remove foil and bake 25 to 30 more minutes. Place on rack to cool 30 minutes. Refrigerate at least 2 hours or up to 24 hours.

6. Garnish: Prepare chocolate mousse mixes as packages direct, using only 1 cup milk total. Spread smoothly onto top of bar. Cut into 32 pieces. In a small bowl, combine chopped peanuts and chocolate chunks. Stir in caramel topping. Spoon over individual pieces and serve.

Recycle: vanilla extract bottle, caramel topping bottle

Compost: eggshells

Sunday, January 07, 2007

Crunchy Coffee Cake

Last June, I was intrigued by a recipe for a cake that could be prepared three ways, as a cake, a coffee cake and as cupcakes. I bookmarked the webpage, intending to revisit it when the weather cooled off. I have no air conditioning, so baking is out of the question during the summer months. I finally got around to trying one of the variations this weekend. I opted for the coffee cake because I needed something for breakfast.

When I looked more closely at the recipes, I realized that the cake and the cupcake recipes contained no flavorings beyond the usual vanilla extract. The coffee cake recipe, on the other hand, contained both cinnamon and lemon extract in addition to the vanilla extract, a rather odd combination. My motto is that I will try anything once. Who knows, maybe it could turn out to be one of those truly great combos.

The directions for the cake part were a little confusing, perhaps a typo on someone's part. I just plowed ahead. The cake has to be baked for 20 minutes before adding the topping, again rather odd. Even odder, was the fact that the topping contained 1/2 cup of the cake batter. You are supposed to "sprinkle" the topping over the partially baked cake. I found this impossible because the addition of the cake batter made the topping soupy, rather than crumbly. I poured the topping over the cake. It proceeded to run over the sides of the pan. I placed another pan underneath it in the oven to catch the drips.

When I removed the cake from the oven after a further 15 minutes, it just wasn't cooked. There is something drastically wrong with this recipe. Temperature? Cooking time? Both? The outside of the cake was done enough for me to sample it. The lemon flavor was overpowering. The cinnamon flavor was barely discernable, and as I had thought, did not go well with the lemon.

Verdict: What were they thinking???

Crunchy Coffee Cake
(Source: Country Living at iVillage.com)


Coffee Cake
1 1/2 cups sifted cake flour
1 1/2 teaspoons baking powder
1/4 teaspoon salt
1/2 teaspoon ground cinnamon
1/2 cup (1 stick) unsalted butter, softened
1 cup sugar
2 large eggs, room temperature
1/2 teaspoon vanilla extract
1/2 teaspoon lemon extract
1/2 cup whole milk

Topping
4 tablespoons butter
1/4 cup granulated sugar
3 tablespoons light brown sugar
1/4 cup cake flour
1/2 teaspoon cinnamon

1. Heat oven to 400 degrees F. Lightly coat an 8-inch cake pan with butter and dust with all-purpose flour.

2. Sift the cake flour, baking powder, salt, and cinnamon into a large mixing bowl. Beat in the butter one heaping 1/4 teaspoonful at a time, using an electric mixer set on low speed, until the mixture resembles coarse sand. Beat in the sugar a tablespoon at a time, until the mixture resembles fine damp sand. Beat in the eggs one at a time.

3. Add the vanilla, lemon extract, and milk, beat on medium high, just until blended. Do not over beat.

4. Set aside 1/2 cup batter. Bake remaining batter in an 8-inch cake pan at 400 degree F for 20 minutes.

5. Make the topping: Cut the 4 tablespoons of butter with the granulated and light-brown sugars, the cake flour, and the cinnamon, and mix with reserved cake batter. Sprinkle over the baking cake and continue to bake until a skewer tests clean and the topping is bubbling - about 15 more minutes.

Recycle: vanilla extract bottle, lemon extract bottle

Compost: eggshells