Monday, February 13, 2006

Best-Ever Chocolate Cake

BHG.com had a slide show on chocolate desserts. One of them was called "Best Ever Chocolate Cake". That sounds like a challenge to me! I looked at the ingredients and couldn't imagine how this recipe could be "Best Ever". First of all, it's made with cocoa. My experience has been that anything made with cocoa is not very "chocolatey". And I LIKE chocolatey. The frosting is made with sour cream! I couldn't even imagine what that must taste like. I accepted the challenge. Hey, it's Valentine's Day. Valentine's Day is all about chocolate!

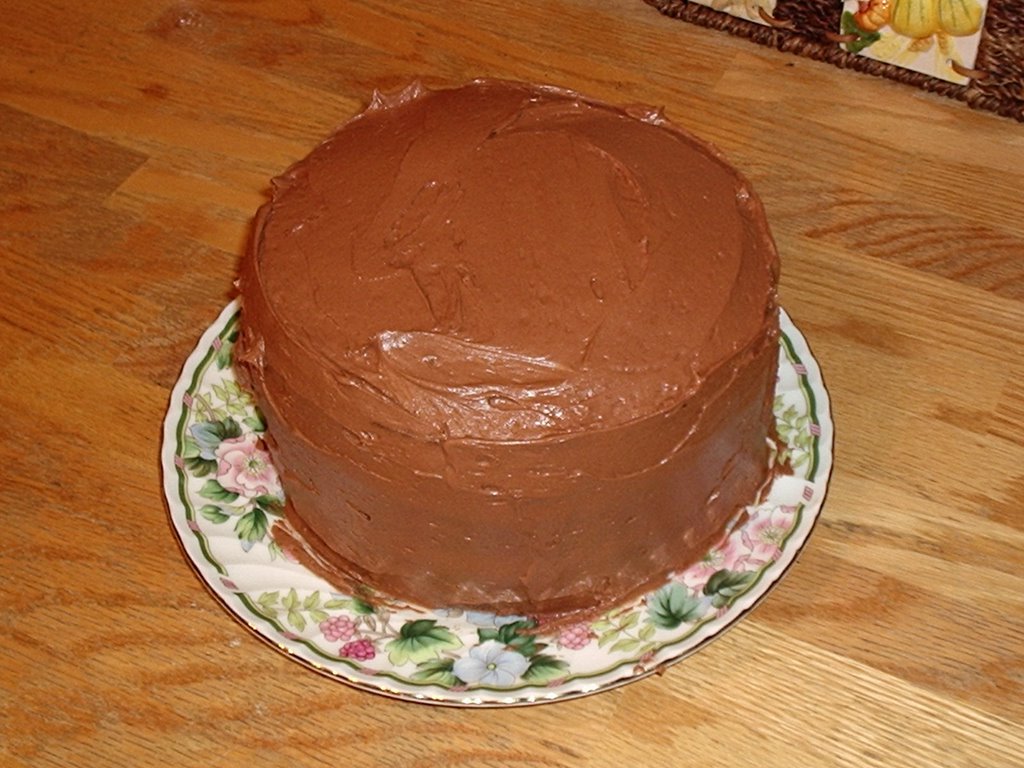
My problems with this recipe started with the pans. The recipe calls for two 8x8x2-inch square or 9x 1 1/2-inch pans or one 13x9x2-inch pan. The accompanying illustration shows three round layers! Were they three 8-inch layers or three 9-inch layers? I took a look at the frosting recipe and found a clue. It supposedly frosts the tops and sides of two or three 8- or 9-inch cake layers or halve it to frost the top of a 13x9x2-inch cake. I opted for three 8-inch round pans. Turns out that was exactly right! They baked up beautifully.

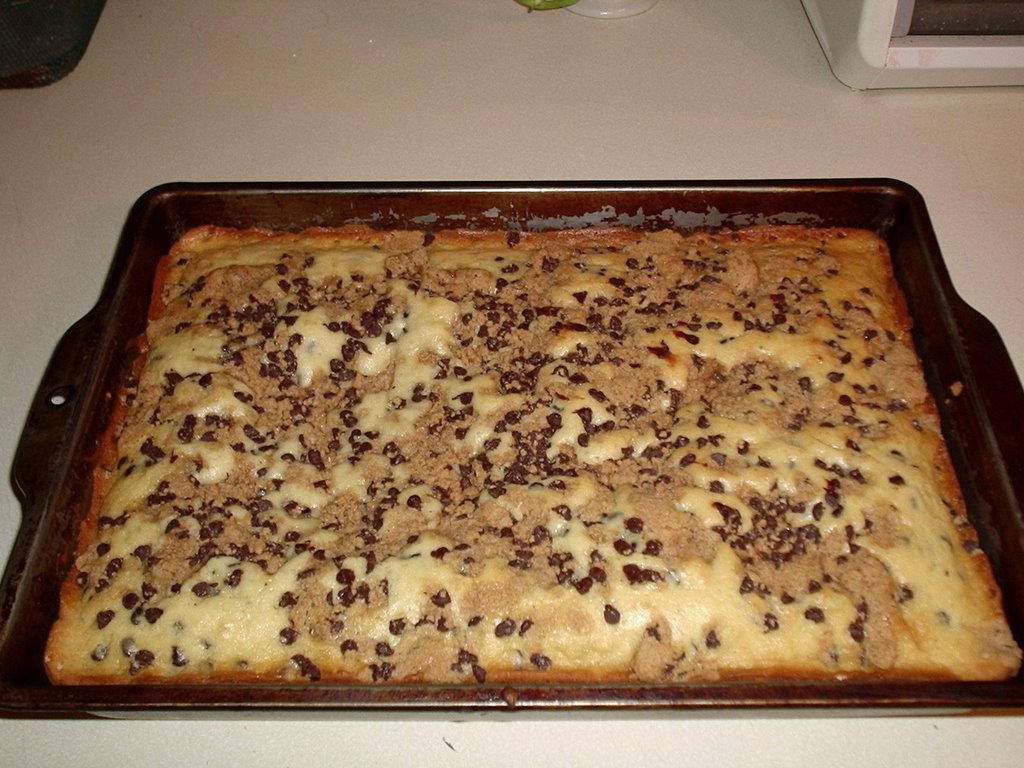
The frosting was not as beautiful. An 8-ounce carton of sour cream is way too much. The frosting was too runny and much too plentiful for my three layers. I probably could have frosted two three layer cakes with it! It did nothing towards holding the layers together. When I cut the cake, it fell completely apart.

The taste was definitely not "best ever". As I expected, it wasn't chocolatey at all and even worse, it was dry, dry, dry. I like my chocolate cakes to be moist and chocolatey. I didn't care much for the frosting either. I just don't like my frosting to taste of chocolate chips!

Verdict: What were they thinking???

Best-Ever Chocolate Cake
(source: BHG.com )


3/4 cup butter, softened

3 eggs

2 cups all-purpose flour

3/4 cup unsweetened cocoa powder

1 teaspoon baking soda

3/4 teaspoon baking powder

1/2 teaspoon salt

2 cups sugar

2 teaspoons vanilla

1-1/2 cups milk

Chocoalte-Sour Cream Frosting

1. Allow butter and eggs to stand at room temperature for 30 minutes. Meanwhile, lightly grease bottoms of two 8x8x2-inch square or 9x1/2-inch round cake pans. Line bottom of pans with waxed paper. Grease and lightly flour waxed paper and sides of pans. Or grease one 13x9x2-inch baking pan. Set pans aside.

2. In a mixing bowl stir together the flour, cocoa posder, baking soda, baking pwoder; and salt; set aside.

3. In a large mixing bowl beat butter with an electric mixer on medium to high speed for 30 seconds. Gradually add sugar, about 1/4 cup at a time, beating on medium speed until well combined (3 to 4 minutes). Scrape sides of bowl; continue beating on medium speed for 2 minutes. Add eggs, one at a time, beating after each addition (about 1 minute total). Beat in vanilla.

4. Alternately add flour mixture and milk to beaten mixture, beating on low speed just until combined after each addition. Beat on medium to high speed for 20 seconds more. Spread batter evenly into the prepared pan(s).

5. Bake in a 350 degree F oven for 35 to 40 minutes for 8-inch pans and the 13x9x2-inch pan, 30 to 35 minutes for 9-inch pans, or until a wooden toothpick inserted in the center comes out clean. Cool cake layers in pans for 10 minutes. Remove from pans. Peel off waxed paper. Cool thoroughly on wire racks. Or place 13x9x2-inch cake in pan on a wire rack; cool thoroughly. Frost with desired frosting. Makes 12 to 16 servings.

Chocolate-Sour Cream Frosting: In a large saucepan melt 1 12-ounce package (2 cups) semisweet chocoate pieces and 1/2 cup butter over low heat, stirring frequently. Cool for 5 minutes. Stir in 1 8-ounce carton dairy sour cream. Gradually add 4-1/2 cups sifted powdered sugar (about 1 pound), beating with an electric mixer until smooth. This frosts tops and sides of two or three 8- or 9-inch cake layers. (Halve the recipe to frost the top of a 13x9x2-inch cake.) Cover and store frosted cake in the refrigerator.

Recycle: vanilla extract bottle

Compost: eggshells

Sunday, February 12, 2006

OldRoses' Chocolate-Dipped Valentine Heart Cookies

Your wish is my command. Susan requested my "regular" Valentine cookie recipe. It's a two parter. I saw the idea in that same "First Magazine" that I found so many recipes that became staples in my kitchen. This one was from the February 10, 1992 edition. I like to keep things simple, so I eliminated the white chocolate and assorted colored sugars, sprinkles tinted coconut, etc. that were suggested as toppings. I also doubled the amount of chocolate chips and shortening so there would be enough to cover all the cookies. Then I substituted my favorite sugar cookie recipe from my favorite cookbook, Betty Crocker, for the one used in the magazine. That one called for zest from 2 oranges. I wasn't thrilled with the thought of orange-flavored cookies. And I tinted the dough pink in honor of Valentine's Day. No pictures this time. You just have to imagine the Half-Hearted Valentine Cookies in pink!

Verdict: Yum! This one's a keeper.
OldRoses' Chocolate-Dipped Valentine Heart Cookies
(Source: OldRoses)
1 recipe Deluxe Sugar Cookies
Red food coloring
2 cups semi-sweet chocolate chips (12 ounces)
4 tablespoons shortening
Mix cookie dough as directed. Using red food coloring, tint dough pink. Cut out with heart shaped cookie cutters and bake as directed.
Melt chocolate chips and shortening in micro-wave in a deep bowl. Dip 1 side of each cookie into the chocolate and let excess drip off. Scrape bottom edge against bowl to remove last of the excess chocolate. Put on sheets of waxed paper to set.
Deluxe Sugar Cookies
(Source: Betty Crocker Cookbook)
1 cup butter or magarine, softened
1 1/2 cups confectioners' sugar
1 egg
1 teaspoon vanilla
1/2 teaspoon almond extract
2 1/2 cups all-purpose flour
1 teaspoon soda
1 teaspoon cream of tartar
Mix thoroughly butter, confectioners' sugar, egg, vanilla and almond extract. Blend in flour, soda and cream of tartar. Cover, chill 2 to 3 hours or overnight.
Heat oven to 375F. Divide dough in half. Roll each half 3/16 inch thick on lightly floured pastry cloth. Cut into desired shapes. Place on lightly greased baking sheet. Bake 7 to 8 minutes or until light brown on edge.
About 5 dozen 2 to 2 1/2 inch cookies
Recycle: vanilla extract bottle, almond extract bottle, food coloring bottle
Compost: eggshell

Friday, February 10, 2006

Sweet, Hot, and Sour Meatballs

I have to stop trying recipes that use prepared mustard. All I taste is the mustard. And there are just certain things that should never be eaten with mustard. Meatballs definitely fall into that category. I was intrigued by this recipe because of the unique combination of ingredients. Uniquely awful, as it turns out. What was I thinking? Mustard and apple juice and apple jelly? I have absolutely nothing good to say about this dish. The sooner I can get this posted and begin forgetting I ever made it or tasted it, the happier I will be.

Verdict: What were they thinking???


Sweet, Hot, and Sour Meatballs
(Source: BHG.com )
1/2 cup refrigerated or frozen egg product, thawed
1/2 cup fine dry bread crumbs
1/2 cup finely chopped onion
1/4 cup milk
1/2 teaspoon salt
1/2 teaspoon black pepper
1 pound bulk pork sausage
1 pound ground beef
3/4 cup apple jelly
1/3 cup spicy brown mustard
1/3 cup whiskey or apple jiuce
1-1/2 teaspoon Worcestershire sauce
Few dashes bottled hot pepper sauce
1. In a large bowl combine egg product, bread crumbs, onion, milk, salt, and pepper. Add sausage and beef; mix well. Shape into 48 meatballs. Place meatballs in a shallow baking pan. Bake, uncovered, in a 375 degree F oven about 30 minutes or until done (160 degree F). Remove from oven; drain.
2. Meanwhile, in a large saucepan stir together jelly, mustard, whiskey, Worcestershire sauce, and bottled hot pepper sauce. Heat and stir until jelly melts and mixture bubbles. Add meatballs, stirring gently to coat. Cook for 3 to 5 minutes or until sauce thickens slightly and meatballs are coated.
Makes 24 servings (48 meatballs)
Recycle: jelly jar, mustard jar, whiskey or apple juice bottle, Worcestershire sauce bottle
Compost: onion skins

Monday, February 06, 2006

Half-Hearted Valentine Cookies

I have a recipe for Valentine cookies that I have used for years. It's just a sugar cookie recipe that I tint pink, cut out with a heart-shaped cookies cutter and dip in a chocolate glaze. But I'm always on the lookout for new recipes and this one seemed an interesting variation. I was a bit leery of the peppermint extract and the plain color didn't appear terribly appetizing. I forged ahead anyways.

The cookie part of the recipe went fine other than the strong smell of peppermint. I ran into trouble with the glaze. The glaze I normally make is chocolate chips and shortening. This one is chocolate chips and butter. Richer (which is good!) but also thicker, which as it turns out, was not good. I broke a few cookies trying to scrape off the excess off of the back of them. I also ran out of glaze before I was halfway through because it was so thick. The thinner glaze that I normally use goes much further. I made another batch of glaze and soldiered on.

These cookies have to be refrigerated for the chocolate to set correctly. To accomplish this feat you need three to four cookie sheets covered with waxed paper and a nearly empty refrigerator. I'm fortunate. I live alone so my refrigerator is pretty empty most of the time. I can't imagine how a normal family with a full refrigerator could possibly fit that many cookie sheets in without emptying it out.

In the end, I felt it wasn't worth the effort. I just didn't care for peppermint cookies although the glaze was pretty good. I was rushing to finish these because I wanted to bring them to a meeting. I forgot to take pictures before I left. No matter, I could take pictures there. But I forgot my camera. No problem, I could take pictures of the leftovers when I got home. But there were no leftovers. Some of the attendees liked the cookies so much, they eagerly took home all of the leftovers. One woman even requested the recipe! I found the picture below on the Lane O Lakes website. I also noticed that they have changed the recipe for the glaze from butter to shortening.

Verdict: I didn't care for them, but other people loved them.

Half-Hearted Valentine Cookies
(Source: Favorite Brand Name Cookie Collection)

Cookies

3/4 cup sugar

1 cup Land O Lakes butter, softened

1 package (3 ounces) cream cheese, softened

1 egg

1 teaspoon peppermint extract

3 cups all-purpose flour

Glaze

1 cup semi-sweet real chocolate chips

1/4 cup Land O Lakes butter

For Cookies, in large mixer bowl, combine sugar, butter, cream cheese, egg and peppermint extract. Beat at medium speed, scraping bowl often, until light and fluffy. Add flour; beat until mixed. Divide dough into halves. Wrap in waxed paper. Refrigerate until firm, at least 2 hours.

Preheat oven to 375F. Roll out dough on lightly floured surface to 1/4-inch thickness. Cut out with floured heart-shaped cutters. Place 1 inch apart on ungreased cookie sheets. Bake for 7 to 10 minutes, or until edges are very lightly browned. Remove immediately; cool completely on wire racks.

For Glaze, in small saucepan, melt chocolate and butter, stirring occasionally, over low heat until melted, 4 to 6 minutes. Dip half of each heart into chocolate. Refrigerate on waxed paper-lined cookie sheet until chocolate is firm. Store, covered, in refrigerator.

Makes about 3 1/2 dozen cookies

Recycle: peppermint extract bottle

Compost: eggshell

Friday, February 03, 2006

Kung Pao Chicken

I seem to be making a lot of Chinese recipes lately. Not only do I like the flavors, but also the veggies. I'm not a big cooked veggie eater. Another leftover from my mother who couldn't cook. Her idea of making vegetables was to open a can, pour it into a pan and then boil it to death. Imagine my surprise years later to discover that veggies aren't supposed to be mushy and tasteless. I like them best raw now. My second favorite is steamed or stir-fried. This recipe calls for broccoli, not one of my favorites but with a good sauce, even broccoli can be tasty.

Szechuan is spicy and I love spicy. Crushed red pepper . . . yum! I tried substituting grated ginger from my frozen stock, but that didn't work well so I resorted to the dried. And I left out the peanuts. But it was still fantastic! I can't wait for shrimp to go on special at my grocery store. I think this would be even better made with shrimp instead of chicken.

Verdict: Yum! This one's a keeper.


Kung Pao Chicken
(Source: Cooking Light, December 2005)
1 tablespoon canola oil, divided
4 cups broccoli florets
1 tablespoon ground fresh ginger, divided
2 tablespoons water
1/2 teaspoon crushed red pepper
1 pound skinless, boneless chicken breasts, cut into 1/4-inch strips
1/2 cup fat-free, less-sodium chicken broth
2 tablespoons hoisin sauce
2 tablespoons rice wine vinegar
2 tablespoons low-sodium soy suace
1 teaspoon cornstarch
4 garlic cloves, minced
1 tablespoons coarsely chopped salted peanuts
Heat 1 teaspoon oil in a large nonstick skillet over medium-high heat. Add broccoli and 2 teaspoons ginger to pan; saute 1 minute. Add water. Cover; cook 2 minutes or until broccoli is crisp-tender. Remove broccoli from pan; keep warm.
Heat remaining 2 teaspoons oil in pan; add remaining 1 teaspoon ginger, crushed red pepper, and chicken. Cook 4 minutes or until chicken is lightly browned, stirring frequently.
Combine broth and next 5 ingredients (through garlic) in a small bowl, and stir with a whisk. Add broth mixture to pan; cook 1 minute or until mixture thickens, stirring constantly. Return broccoli mixture to pan; toss to coat. Sprinkle with peanuts.
Yield: 4 servings
Recycle: hoisin sauce bottle, rice wine vinegar bottle, soy sauce bottle
Compost: broccoli stem, garlic skins

Monday, January 30, 2006

Cheesecake Sampler

Cream cheese went on special this week so it was time to try out a cheesecake recipe from the free "Little Book of Cheesecakes" that I ordered a new cookbook to get. There are two recipes for New York style cheesecakes in it. One is a cheesecake sampler, i.e. each piece has a different topping, and the other is plain. They are made in different size pans which was the deciding factor for me. The plain one requires a 7" springform pan. My springform pan is a standard 9" one as required by the sampler recipe. So that's the one I made sans the myriad toppings.

This one is definitely an adventure. I don't think I've ever made anything that required 7 eggs and 3 containers of sour cream. Nor have I ever baked anything that had to sit in an unheated oven for 4 hours. It is also probably the heaviest baked good I have ever made. But in the end, it was all worth it. This is by far the best cheesecake recipe I have ever made and comes very close to being the best cheesecake I have ever tasted.

Verdict: Yum! This one's a keeper.

Cheesecake Sampler
(Source: Southern Living Little Book of Cheesecakes)


2 cups graham cracker crumbs
1/2 cup butter or margarine, melted
2 tablespoons sugar
4 (8-ounce) packages cream cheese, softened
1 3/4 cups sugar
7 large eggs
3 (8-ounce) containers sour cream
1 tablespoon vanilla extract


Combine first 3 ingredients; stir well. Press mixture firmly into bottom and up sides of a lightly greased 9-inch springform pan. Chill thoroughly.

Beat cream cheese at high speed with a heavy-duty electric mixer until fluffy. Gradually add 1 3/4 cups sugar, beating well. Add egs, 1 at a time, beating well after each addition. Add sour cream and vanilla; beat at low speed until smooth. Pour into prepared pan. Bake at 300 degrees for 1 hour and 25 minutes. Turn off oven, and leave cheesecake in oven 4 hours. (Do not open oven door.)

Remove cheesecake from oven; cool completely on a wire rack. Cover and chill 8 hours. Gently run a knife around edge of cheesecake to relese sides of pan; carefully remove pan; transfer cheesecake to a serving platter. Cut into 8 wedges; top each slice with desired Cheesecake Toppings.

Recycle: vanilla extract bottle

Compost: eggshells


Friday, January 27, 2006

Stromboli

I started my career working in Manhattan. Having grown up surrounded by orchards and dairy farms, I was drawn to the bright lights of the big city like a moth to a flame. I couldn't get enough of the energy and excitement. I spent my weekends in the City also. One my favorite activities were the street fairs. I adored the different kinds of people, merchandise and especially the food. I had to try everything. I don't know how I managed to stay thin.
My mother couldn't cook. Seriously couldn't cook. She either boiled things to death or charred them to a crisp. I didn't know that food was supposed to taste good until I moved downstate and was introduced to a whole universe of foods I never knew existed. The best thing about street fairs was that I could literally eat for blocks and never taste the same thing twice.
I recently came across a recipe for stromboli that transported me back to those heady days. I was a bit intimidated at first but the urge to recapture some of the tastes of my youth spurred me on. Turns out this recipe is surprisingly easy to make. Ten minutes is exactly the right amount of time to knead the dough into the right consistency. It rose with no problem, rolled out into a rectangle with no problem and after layering the meats and cheeses, rolled up again with no problem. One warning - layer the meats first and then the cheese. I did it the opposite way and the cheeses oozed out of the slits!
The author also offers some advice: "One hint, however, the more veggies you use, the more liquid they'll release, so too many veggies can make a somewhat soggy strombolil. Use as many different fillings as you like, but it's important to not layer them too thickly, as this will make it difficult to roll the stromboli".
Verdict: Yum! This one's a keeper.
Stromboli
(Source: MomsMenu.com )

Dough
1 1/4 cups warm water (105 F - 115 F)
1 tablespoon yeast
1 teaspoon sugar
2 tablespoons olive oil
2 teaspoons salt
3 1/2 to 4 cups flour

Fillings (mix and match as you like)
about 1/2 lb. thinly sliced meats such as ham, slami, turkey, pepperoni, etc.
about 1/4 lb. sliced cheese such as mozzarella, provolone, etc.
1/4 cup grated Parmesan cheese

Other Options
thinly sliced tomatoes
thinly sliced onions
thinly sliced bell peppers or roasted bell peppers
chopped black or green olives
roasted garlic
fresh basil

1 egg, beaten
2 teaspoons sesame seeds or poppy seeds (optional)

Makes about 16 slices

Combine 1/4 cup warm water, yeast and sugar in a large bowl and stir to dissolve. Let stand until foamy, about 5 minutes. Stir in remaining warm water, olive oil and salt. Gradually add 1 1/2 to 2 cups flour, mixing until smooth. Gradually add enough remaining flour until you have a smooth dough that comes away from the bowl. Turn dough out onto a lightly floured surface and knead 10 minutes, working in more flour as needed. Shape into a ball, place in a greased bowl and cover with a clean kitchen towel. Let dough rise until doubled, about 1 hour.

Preheat oven to 375F and grease a large baking sheet (if you have a pizza or bread stone in your oven you can forego the baking sheet and bake the stromboli directly on the stone).

Punch dough down and cut in half. On a lightly floured surface, roll each dough half into a rectangle about 10" x 8". Arrange fillings over dough, finishing with a sprinkling of Parmesan. Roll the dough much like you would if you were making a jelly roll. Pinch the edges of the seam and tuck the ends under.

Cut long diagonal slashes, about 1/2 inch deep, along the top of the loaf every 3 inches or so. Brush top of loaf with beaten egg, avoiding the area in the slashes. Sprinkle with poppy or sesame seeds if desired. Bake for about 30 minutes or until bread is golden brown. Cool slightly before cutting and serving, or if you prefer to eat your stromboli cold, cool completely on a wire rack before wrapping and refrigerating.

Monday, January 23, 2006

Choc-Oat-Chip Cookies

I always check the recipes on the backs of the chocolate chip bags when I buy one (or two or three or however many my coupon is for!). Usually, it's the same old recipes but occasionally they surprise me with a new one. What intrigued me about this recipe is that it calls for milk. Whoever heard of using milk to make oatmeal cookies? I've heard of drinking milk with oatmeal cookies or dunking oatmeal cookies in a glass of milk, but actually using milk to make oatmeal cookies was a first for me.

Unlike the Chocolate-Studded Dream Cookies that I made a few weeks ago, this batter was not incredibly stiff and the cookies baked into nice rounded shapes. The flavor was unlike the usual oatmeal cookies. It was more like oatmeal cookies dipped in milk. Gee, I wonder why??? Kinda bland sums it up. I think I'll stick to just adding chocolate chips to regular oatmeal cookies.

Verdict: Not bad, but I don't think I'll be making these again.

Choc-Oat-Chip Cookies
(source: Back of the chips bag)


1 3/4 cups all-purpose flour
1 tsp. baking soda
1/2 tsp. salt (optional)
1 1/4 cups packed brown sugar
1 cup (2 sticks) buter or margarine, softened
1/2 cup granulated sugar
2 large eggs
2 tbsp. milk
2 tsp. vanilla extract
2 1/2 ups quick or old-fashioned oats
2 cups (12-oz. pkg.) Nestle Toll House Semi-Sweet Chocolate Morsels
1 cup coarsely chopped nuts (optional)

Preheat oven to 375 degrees F.

Combine flour, baking soda and salt in small bowl. Beat brown sugar, butter and granulated sugar in large mixer bowl until creamy. Beat in eggs, milk and vanilla extract. Gradually beat in flour mixture. Stir in oats, morsels and nuts; mix well. Drop by rounded tablespoons onto ungreased baking sheets.

Bake for 9 to 10 minutes for chewy cookies or 12 to 13 minutes for crispy cookies. Cool on baking sheets for 1 minute; remove to wire racks to cool completely.

Makes about 4 dozen cookies

Recycle: vanilla extract bottle

Compost: eggshells

Friday, January 20, 2006

White Wine-Tomato-and-Clam Pasta

I'm still revelling in the fact that I can cook ANYTHING I WANT! Even seafood. And not just tuna fish. I love linguine and clam sauce so a White Wine-Tomato-and-Clam pasta dish sounded delicious. I admit I had some reservations about this recipe. There didn't appear to be enough sugar to offset the acidity of the tomatoes and the lack of tomato sauce or paste made me wonder how "saucy" it was going to be.
As the Aussies say, no worries mate. The tomatoes weren't too acidic and the clams weren't too clammy (if that's a word). I had two major problems with this recipe. The first was that after 20 minutes, the "sauce" hadn't thickened at all. The second was the part where you have to toss the pasta. How does one "toss" pasta? I know how to toss a salad , but the spaghetti very nearly defeated me. Hint: large bowl, large fork.
This recipe is a variation of a Red Wine-Tomato Pasta. To make that, just substitute dry red wine for the dry white wine and omit the clams. I'm definitely going to. This could easily become my new favorite spaghetti sauce. I've been looking for a recipe for a good spaghetti sauce for years.
Verdict: Yum! This one's a keeper.
White Wine-Tomato-and-Clam pasta
(Source: Southern Living 2005 Annual Recipes)

1 1/2 teaspons minced fresh garlic
2 tablespoons olive oil
1/2 cup dry white wine
2 (14 1/2-ounce) cans petite diced tomatoes, undreained
2 tablespoon chopped fresh or 1 teasponn dried basil
1 tablespoon chopped fresh or 1/2 teaspoon dried oregano
1 teaspoon sugar
1/4 teaspoon freshly ground black pepper
1 (6.5-ounce) cans chopped clams, drained
12 ounces uncooked thin spaghetti
1 (4-ounce) block mozzarella cheese, shredded
1/3 cup freshly grated Parmesan cheese
Toppings: chopped fresh basil, freshly grated Parmesan cheese


Saute garlic in hot oil in a large skillet over medium heat 1 minute or until lightly browned. Carefully stir in wine and next 5 ingredients; bring to a boil. Reduce heat to medium-low, and simmer, stirring occasionally, 20 minutes or until thickened.

Cook pasta according to package directions; drain. Stir together hot pasta, mozzarella cheese, and 1/3 cup Parmesan cheese in a large serving bowl, tossing to coat until cheeses start to melt. Stir clams into tomato sauce and pour over pasta mixture. Toss to combine. Serve immediately with desired toppings.

Makes 6 servings.

Recycle: olive oil bottle, wine bottle

Compost: garlic skins

Monday, January 16, 2006

Blueberry Muffins

Blueberries are on special this week. Okay, maybe $2.00 for 4.4 ounces isn't terribly "special", but it is the middle of winter and they came all the way from Chile. They are wonderful berries, not a single rotten one, no stems even. I felt a sudden urge for blueberry muffins.

The recipe I use is from my trusty Betty Crocker cookbook. It's the blueberry variation of the sweet muffin recipe. I prefer that one not just because it is sweet but because it also has a lighter texture than the regular muffin recipe. I strongly advise greasing the bottoms of the muffin cups with Crisco or whatever shortening you normally use or use paper cups. My muffins came out with a weird metallic taste. After giving it some thought, I realized that I had tried a "shortcut" and used a cooking spray. A quick check of the ingredients confirmed my suspicions. It claims to be all-natural. I suppose grain alcohol is natural but I'm not so sure about "propellant". Honest, that's what it says. Just one word. No explanation of what it consists of. Just propellant. I'm definitely going to think twice about using this spray again. I'm not sure I want to be eating propellant.

Verdict: Yum! This one's a keeper.


Blueberry Muffins
( Source: Betty Crocker Cookbook)


1 egg
1/2 cup milk
1/4 cup salad oil
1 1/2 cups all-purpose flour
1/2 cup sugar
2 teaspoons baking powder
1/2 teaspoon salt
1 cup fresh blueberries or 3/4 cup well-drained frozen blueberries (thawed)


Heat oven to 400 degrees. Grease bottoms of 12 medium muffin cups (2 3/4 inches in diameter). Beat egg; stir in milk and oil. Mix in remaining ingredients except blueberries just until flour is moistened. Batter should be lumpy. Fold blueberries into batter.

Fill muffin cups 2/3 full. Bake 20 to 25 minutes or until golden brown. Immediately remove from pan.

12 muffins

Recycle: salad oil bottle

Compost: eggshell

Friday, January 13, 2006

Sloppy Jose Sandwiches with Cilantro Slaw

I have completely lost my mind. I bought a new cookbook. I already have dozens of cookbooks. I have newletters full of recipes arriving in my emailbox daily. I have access to the internet with its myriad recipe sites. And I bought "Southern Living 2005 Annual Recipes" (over 900 recipes!) anyways. What I really wanted was the free "Little Book of Cheesecakes" that came with it (Remember, I am still searching for the perfect cheesecake recipe). The plan was to keep the free cheesecake cookbook and return the 900 recipe cookbook before the end of the thirty day trial period. But, of course, I started looking through it, saw a bunch of recipes I wanted to try and gave up and mailed in my check. It's hopeless. I'm a recipe addict.

I'm always on the lookout for Sloppy Joe recipes that don't involve ketchup. Have you ever read the ingredients list on ketchup? High fructose corn syrup meaing all it is is tomato flavored sugar syrup. I was a little concerned about this recipe because it involved tomato sauce with nothing to cut the acid. And I was right. It was good, but too acidic for my tastes. The cole slaw was also good. The mustard made it nice and spicy. I went to two different grocery stores but couldn't find broccoli slaw mix. That was very disappointing. It sounds delicious.

Verdict: Not bad, but I don't think I'll be making this one again.

Sloppy Jose Sandwiches with Cilantro Slaw
(Source: Southern Living 2005 Annual Recipes)

1 medium onion, finely chopped
1 tablespoon Enova Oil
1 pound lean ground beef
2 (8-ounce) cans no-salt-added tomato sauce
1 tablespoon ground cumin
1 tablespoon dried oregano
1/2 teaspoon pepper
1/4 teaspoon salt
4 Nature's Own Honey Wheat hamburger buns
cilantro Slaw

Cook onion in hot oil in a cast-iron or large skillet over medium heat about 4 minutes or until onion is soft and tender. Stir in ground beef and next 6 ingredients, and cook, stirring occasionally, 15 minutes or until beef crumbles and is no longer pink.

Spoon beef mixture on bottom halves of toasted buns; top each with about 3 tablespoons Cilantro Slaw and remaining bun halves. Serve with remaining Cilantro Slaw.

Makes 4 servings.

Cilantro Slaw:

1/4 cup finely chopped fresh cilantro
1/4 cup Dijon mustard
3 tablespoons Hellmann's or Best Foods Real Mayonnaise
1 tablespoon white wine vinegar
1 (12-ounce) package broccoli slaw mix

Whisk together first 4 ingredients in a large bowl; add broccoli slaw, tossing to coat.

Makes 4 cups.

Recycle: tomato sauce cans, mustard bottles, mayonnaise bottle, vinegar bottle

Compost: onion skins

Monday, January 09, 2006

Chocolate-Studded Dream Cookies

I think I have mentioned before that I am now on the mailing list for Nestle's site,
VeryBestBaking.com . In addition to recipes, they also offer coupons as inducements to try their products. When you print out a coupon, a recipe accompanies it. In this case, it was a recipe for cookies using the Swirled Semi-Sweet and White Cocolate Morsels. It was chocolate. I had to try it!

The batter for theses cookies comes out really, really stiff. I use a KitchenAid to mix my batters and it was laboring. You are supposed to divide the morsels putting half in the batter and the other half sprinkled on top of the cookies before putting them in the oven. These are drop cookies. I couldn't figure out a good way to top them with morsels so I put all of the morsels in the batter. They are supposed to be baked for 11 to 13 minutes but I found that wasn't enough and baked them for 15 minutes. When they came out of the oven, they were by far some of the ugliest cookies I have ever seen! They didn't bake into nice rounded cookies. Instead, they maintained their lumpy shapes.

Despite all the problems, they were delicious. I took them to a committee meeting. It was fun to watch people say they were just going to "try one" and then all through the meeting surreptitiously help themselves to more when they thought no one was looking. The bolder ones continued to help themselves as I made my way out the door at the end of the meeting! There weren't very many cookies left to bring home.

Verdict: Yum! This one's a keeper.


Chocolate-Studded Dream Cookies

2 cups all-purpose flour
3/4 cup Nestle Toll House Baking Cocoa
1 teaspoon baking soda
1/2 teaspoon salt
1 cup (2 sticks) butter or margarine, softened
2/3 cup granulated sugar
2/3 cup packed brown sugar
1 teaspoon vanilla extract
2 large eggs
1 2/3 cups (10-oz pkg.) Nestle Toll House Swirled Real Semi-Sweet & White Chocolate Morsels, divided

Preheat oven to 325F.

Combine flour, cocoa, baking soda and salt in small bowl. Beat butter, granulated sugar, brown sugar and vanilla extract in large mixer bowl until creamy. Add eggs, one at a time, beating well after each addition. Gradually beat in flour mixture. Stir in 1 cup Swirled Morsels. Drop by well-rounded teaspoon onto ungreased baking sheets. Top with remaining Swirled Morsels.

Bake for 11 to 13 minutes or until cookies are puffed and centers are set. Cool on baking sheets for 2 minutes; remove to wire racks to cool completely.

Recycle: vanilla extract bottle

Compost: eggshells

Friday, January 06, 2006

Ham and Swiss Casserole

Despite the ham and swiss quiche fiasco, I continue to be attracted to ham and swiss recipes. I have nothing bad to say about this one, other than that it is incredibly bland. Probably why the cook who submitted it to Allrecipes.com said: "This is one of the only casseroles that my picky husband will eat". Picky eaters notoriously prefer bland food. I, on the other hand, love spicy food. So why do I like ham and swiss so much? After much thought, I realized that when I make a ham and swiss sandwich, I use plenty of SPICY mustard. I love reubens which have corned beef (SPICY) and sauerkraut (SPICY). So this will probably be my last ham and swiss recipe unless I find one with SPICY ingredients!

This was very fast and easy to make. I diced the ham, cheese and onions while the noodles cooked so all I had to do was saute the onion and then mix it all. I'm not sure what the purpose of the milk and eggs is. They don't add anything in the way of taste or texture. This dish would be fine without them.

Verdict: Not bad, but I probably won't be making this one again.

Ham and Swiss Casserole
(Source: Allrecipes.com )


2 cups egg noodles
2 tablespoons vegetable oil
1 cup chopped onions
1 (6 ounce) can mushrooms, drained
1 cup diced cooked ham
1 cup diced Swiss cheese
1 teaspoon salt
1/2 teaspoon ground black pepper
2 eggs
1/4 cup milk
1/4 cup grated Parmesan cheese

Bring a large pot of lightly salted water to a boil. Add egg noodles and cook for 8 to 10 minutes or until al dente; drain.

Preheat oven to 400 degrees F (200 degrees C).

Toss drained noodles with 2 teaspoons of the oil. Heat remaining oil in a skillet and saute onion over medium heat until soft. Combine noodles, onion, mushrooms, ham, Swiss cheese, salt and pepper. Transfer to a greased 3 quart casserole dish. In a bowl mix together egg and milk; pour over noodle mixture. Sprinkle with Parmesan cheese.

Bake in a preheated oven for 30 minutes.

Recycle: vegetable oil bottle

Compost: onion skins, eggshells

Monday, January 02, 2006

Bacardi Rum Cake

Do you believe in ghosts? I do. Strange things happen to me. For instance, last summer when it was way too hot to cook, I suddenly started thinking about a Christmas years and years ago that I spent with my elderly great aunt (one of my grandmother's sisters). I had found a recipe in a magazine for rum cake that I wanted to try. We felt very wicked as we soaked the cake in a glaze that had actual rum, not rum flavoring in it. I hadn't thought about that cake in decades. It was very weird. About a week after that, I was half-heartedly straightening up my basement, more in an effort to escape the heat than for cleanliness when I found a magazine from 1980 and on the back of it was the recipe for rum cake. Are you getting goosebumps? I did.

Aunt E passed away in 1988. I made the cake this holiday season in her memory. The original recipe uses a yellow cake mix. I no longer make cake mix cakes so I substituted a yellow cake recipe that closely approximated it. I added an egg to bring it up to 4 eggs and used milk instead of water and Crisco instead of oil. It is supposed to bake for 1 hour but it was overdone after 50 minutes. The resulting crust made it difficult to soak in the glaze. It was well worth the effort though. Thank you, Aunt E for reminding me of this wonderful cake and that wonderful holiday we spent together.

A word of caution. If you are like me and like to lick the beaters and/or the bowl, be careful. This is made with rum. It is possible to get a buzz from cake batter!

Verdict: Yum! This one's a keeper.

Bacardi Rum Cake
(Source: Woman's Day Great Holiday Baking Ideas, December 1980)


Cake:
1 cup chopped pecans or walnuts
1 18 1/2 oz. pkg. yellow cake mix*
1 3 3/4 oz. pkg. Jell-O Vanilla Instant Pudding and Pie Filling
4 eggs
1/2 cup cold water
1/2 cup Wesson oil
1/2 cup Bacardi dark rum (80 proof)

*If using yellow cake mix with pudding already in the mix: omit instant pudding, use 3 eggs instead of 4, 1/3 cup oil instead of 1/2.

Glaze:
1/4 lb. butter
1/4 cup water
1 cup granulated sugar
1/2 cup Bacardi dark rum (80 proof)

Preheat oven to 325F. Grease and flour 10" tube or 12-cup Bundt pan. Sprinkle nuts over bottom of pan. Mix all cake ingredients together. Pour batter over nuts. Bake 1 hour. Cool. Invert on serving plate. Prick top. Spoon and brush glaze evenly over top and sides. Allow cake to absorb glaze. Repeat till glaze is used up.

Glaze: Melt butter in saucepan. Stir in water and sugar. Boil 5 minutes, stirring constantly. Remove from heat. Stir in rum.

Optional: Decorate with border of sugar frosting or whipped cream.

Recycle: rum bottle

Compost: eggshells

Friday, December 30, 2005

Crockpot Beef Sandwiches

I'm a little behind in my email. June, to be exact. So the recipe newsletter I was reading from one of my all time favorite sites, Old Fashioned Living , was offering crockpot dinners for hot summer evenings that didn't heat up the kitchen. Not having air conditioning myself, I like that idea very much. I decided to give the beef sandwiches a try.

The recipe calls for a 3 to 4 pound beef roast. I bought a cheap pot roast. Probably not one of my better ideas. The meat ended up being very tough. It also calls for seasoned salt, not something I have on hand. I used regular salt. It was still delicious. I'm going to be making this one again, just with a different cut of meat. I think this could be an all-season dish. Add a nice cup of hot soup and it would make a lovely, warm meal for colder weather also.

Verdict: Yum! This one's a keeper.


Crockpot Beef Sandwiches


3-4 pound beef roast
1 tsp. seasoned salt
1 tsp. ground black pepper
1/2 tbsp. dry mustard
1 tbsp. Worcestershire sauce
1/2 tbsp. garlic powder or granules
1 large sweet onion, very thinly sliced and halved
1/4 cup beef broth
French bread or submarine buns

Put first 8 ingredients in crock pot, cover and cook on low for 8-10 hours or high for 4-5. Remove the beef to cut or shred and return to the crock pot. Stir and serve on the bread or buns. Add mayonnaise, lettuce, and tomato if you wish.

Recycle: Worcestershire sauce bottle

Compost: onion skins

Monday, December 26, 2005

Sticky Buns

Christmas mornings at my grandmother's house were a very regimented affair. We children had to wait until the adults got up before we could leave our bedroom. Then we were allowed to "open" our stockings. Next was breakfast and then, finally we could dive into Santa's bounty. Looking back now, I can understand that the adults got up much earlier than usual, allowed us into our stockings to mollify us long enough so that they could have breakfast and much needed coffee before getting down to the business of opening gifts.

Those long ago breakfasts were a real treat for me because it was the only time I got to indulge in sticky buns. There was an excellent bakery near my grandmother's house thanks to which I was able to sample "exotic" baked goods such as apple kuchen and sticky buns, a far cry from the Hostess cupcakes and Twinkies served in my parents' house. Once I began baking myself, I searched and searched for a recipe similar to the sticky buns at my grandmother's house. I finally found one that was even better in First magazine, the same source for the chicken pot pies I posted earlier.

The problem I have found with most recipes for sticky buns is that the "bun" part is just too heavy. The "bun" part of this recipe is buttery and light. The sticky part is just heavenly. Again, the taste and texture is superior to other recipes. I thought I used a 9-inch pan as called for in the recipe, but I must have grabbed one of my 8-inch ones by accident because they overflowed the pan. So please don't be put off by the picture. They taste wonderful. To me, they taste like Christmas.

Verdict: Yum! This one's a keeper.

Sticky Buns
(Source: First magazine, 3/9/92)
12 Tbs. butter
1 pkg. (2 3/4 tsp.) active dry yeast
3/4 cup granulated sugar
3/4 tsp. salt
3 egg yolks
1/2 cup milk
3 to 3 1/2 cups flour
3/4 + 1/3 cup light-brown sugar
2 Tbs. corn syrup 3/4 cup pecan halves
1/2 tsp. cinnamon
Melt 6 Tbs. of the butter and let cool. Dissolve yeast in 1/4 cup lukewarm water. Stir in granulated sugar, salt, yolks, milk, 4 Tbs. of the cooled butter and 2 1/2 cups of the flour.
Turn out onto a lightly floured work surface. Knead until dough is smooth and elastic, about 5 minutes, working in enough of the remaining flour so that the dough is no longer sticky.
Put in a buttered bowl, cover with plastic wrap and let rise until doubled in bulk, about 45 minutes. To test, press dough with your finger tips. If an imprint remains, the dough has doubled.
Butter a 9" baking pan. In a saucepan, combine 6 Tbs. butter, 3/4 cup brown sugar and the corn syrup. Stir over low heat until smooth. Pour into prepared pan and strew 1/2 cup of the pecan halves on top.
Combine the 1/3 cup brown sugar with the cinnamon. Chop remaining 1/4 cup pecans.
Punch dough down. On a lightly floured work surface, shape into an approximately 18' x 9" rectangle. Brush with the remaining 2 Tbs. melted butter. Sprinkle with the brown sugar and cinnamon and the chopped pecans. Roll up dough starting with a long side.
Cut into 9 slices and put in the prepared pan. Cover and let rise until doubled, about 40 minutes.
Heat oven to 375F. Bake until browned and bubbly, 30 to 35 minutes. Let cool in the pan 5 minutes. Invert onto a serving plate and let stand about 30 seconds before removing pan. Cool slightly before serving.
Compost: eggshells

Friday, December 23, 2005

Wild Basmati Pilaf

There are some real advantages to being an empty-nester. After I clean, my house actually stays clean. I don't have to fight for time on the computer. And I can cook whatever I want. Cooking for a picky eater is no fun. Every new recipe has to have the ingredients vetted to make sure none of them are on the list of things the picky eater won't eat which is much longer than the list of things that she will eat. Best of all, once the recipe is made, I don't have to coax anyone to eat it. "Just try a little bit. It has mushrooms in it. You like mushrooms".

Now I can look at a recipe and say "Hmmm . . . brown basmati rice. Never heard of it. Should be fun to try". Or "Vegetable broth! I've never used that. I wonder what's in it?". Even if in the end I don't like it, I can "play" with it and see if I can come up with a version that I do like. As in this case. I didn't read this recipe closely. The rice takes over an hour to cook (!). Secondly, it has way too many reductions. I don't like recipes that have lots of complicated steps. Ideally, I want to be able to walk into the kitchen at 5:00 PM and have dinner on the table in time for the news at 6:00 PM.

After all that effort, I just didn't like the way it tasted. But I think I can fix it! I didn't like the vegetable broth and all that parsley. And reducing onions and garlic in water is way too bland for me. I want to make this again with chicken broth instead of the vegetable broth, use butter to cook the onions and garlic, no reductions please, and leave out the celery and parsley. I loved the combination of the thyme, marjoram, black pepper and salt. It's the only thing that saved this recipe for me.

Verdict: Not bad, but I don't think I'll be making this one again (as written).


Wild Basmati Pilaf

1/4 cup wild rice
1 - 15 oz. can Swanson's vegetable broth
3/4 cup brown basmati rice
1 onion, finely chopped
3 garlic cloves, minced
2 cups thinly sliced mushrooms
2 stalks celery, thinly sliced
1/2 teaspoon thyme
1/2 teaspoon marjoram
1/4 teaspoon black pepper
1/4 teaspoon salt
1/3 cup finely chopped parsley
Rinse wild rice and place it in a saucepan with the vegetable broth and 1/2 cup water. Stir to mix, then cover & simmer for 20 minutes. At the end of this time, add the basmati rice. Cover and continue cooking until both varieties of rice are tender, about 50 minutes. Heat 1/2 cup water in a large pot or skillet. Add onion and garlic & cook until all the water has evaporated and browned bits of onion begin to stick to the pan. Add another 1/4 cup water, scrape the pan, and cook until the onions begin to stick again. Repeat this process of adding water and cooking the onion until they are nicely browned. This will take about 15 minutes. Stir in the mushrooms, celery, & seasonings. Cook, stirring frequently, for 5 minutes, then add the cooked rice and finely chopped parsley. Cook over low heat, turning gently, until the mixture is very hot.
Serves 6.
Recycle: broth can
Compost: garlic skins

Monday, December 19, 2005

Gingersnaps

I have loved spicy food since I was a child. A very small child. As a toddler, I'm told my favorite foods were salami sandwiches and gingersnaps. There is also an anecdote, perhaps apocryphal, that at one point I ate so many gingersnaps that I developed an allergy to them and broke out in hives. Apocryphal or not, I still love gingersnaps and have spent years looking for a good recipe for them.

Everyone has a website these days. Even the spice makers, McCormick, have a website. And on that website they have recipes. One of them, not surprisingly, is for gingersnaps. I decided to give it a try but I didn't think anything this simple could be any good. Wrong! They are simple to make and delicious. And very, very spicy.

For the record, I still love salami.

Verdict: Yum! This one's a keeper.

Gingersnaps


3/4 cup shortening
1 cup sugar
1/4 cup molasses
1 egg
2 cups all-purpose flour
2 teaspoons baking soda
1/2 teaspoon salt
1 tablespoon McCormick Ground Ginger
1 teaspoon McCormick Ground Cinnamon
Sugar for rolling

Preheat oven to 350F. Place shortening and sugar in large mixer bowl and cream until light and fluffy. Add molasses and egg and beat well.

Combine flour, baking soda, salt, and spices. Gradually add to shortening mixture and mix well.

Shape dough into 1-inch balls and roll in sugar. Place 2 inches apart on ungreased cookie sheets. Bake 12 minutes.

Remove from cookie sheets and place cookies on wire racks to cool.

Recycle: molasses bottle

Compost: eggshell

Friday, December 16, 2005

Quick Chicken Moo Shu

I think this recipe should take some kind of prize for longest gestation. I cut it out of the newspaper last spring. I had planned on setting it aside until fall when I would get to the Asian food market for hoisin sauce. Over the summer, I found hoisin sauce in my local grocery store. I bought it and put it aside because it was too hot to cook. When I was at the Asian food market in November buying tofu for the turkey stir fry I spotted frozen moo shu pancakes. I bought them and stuck them in the freezer. Here it is December and I'm finally getting around to making it! I'm happy to report that it was worth the wait.

This recipe calls for fresh ginger. Instead of substituting ground ginger as I normally would, I have decided to try out an idea I have heard from other cooks. If you don't use a lot of fresh ginger, I'm told that you can freeze it and just break off a piece when you need it. I'll let you know how that works out. It also calls for shredded cabbage. I didn't have time or energy to shred cabbage, so I cheated and bought a cole slaw mix. You only need one cup, but in the future, I will definitely be doubling that. This recipe is excellent but could use more "crunch". I will also be substituting flour tortillas for the moo shu pancakes. I don't know if it is the particular ones I bought or if frozen ones are not a good idea, but they just didn't work out for me. They didn't taste good and they were too stiff to wrap around the chicken.

Verdict: Yum! This one's a keeper.

Quick Chicken Moo Shu
(Source: The Star Ledger )

2 tablespoons vegetable or peanut oil
1 tablespoon fresh ginger, minced
1 teaspoon garlic, minced
1 bunch scallions, trimmed and cut into 1/2-inch lengths
1 cup cabbage, shredded
4 cups cooked chicken, shredded
1 tablespoon sesame oil
1 cup hoisin sauce
8 to 12 small, soft flour tortillas

In a wok or large saute pan over high heat, heat oil until hot and stir-fry ginger, garlic, scallions and cabbage, about 90 seconds. Add chicken and stir-fry until hot.

Remove from heat and drizzle sesame oil and hoisin sauce over stir-fry mixture. Toss to coat with glaze of oil and hoisin.

Serve immediately with warm, soft tortillas or steamed Mandarin pancakes, additional hoisin suce and chopped scallions, if desired.

Recycle: oil bottles, hoisin sauce bottle

Compost: ginger and garlic skins, unused parts of scallions and cabbage

Monday, December 12, 2005

Ultimate Chocolate Brownies

There were a few raised eyebrows in my office when I baked brownies for our Hamburg office. I had to remind my co-workers that I bake for the office Christmas party so they shouldn't feel slighted. In an effort to mollify them, I promised to make better brownies for them than I did for Hamburg.

I work in an IT department. My fellow employees come from many different countries and backgrounds. For the Christmas party each year, everyone is encouraged to bring a dish that is traditional in their country/culture/family and an ornament for the departmental Christmas tree. And their families too! The kids have a blast decorating the tree while the parents enjoy the incredible buffet. The Scottish Shortbread that I baked last year was a a big hit and I had been racking my brains trying to figure out how to equal or surpass it this year. Ultimate Chocolate Brownies were the perfect answer.

I only make these brownies when I have to bring a dish to an event. I don't particularly like them. I think it's the cocoa I find objectionable. And I don't care for the combination with the chocolate chips. About the only thing I like about this recipe is the frosting! Everyone else seems to like them, so I keep making them.

Here are two things you might want to do when you make these brownies. I've never actually tried this, but I've read in several places that if you want your brownies to come out of the pan looking as perfect as in photos, line the pan with aluminum foil. After they are baked, you lift the brownies out in the aluminum foil rather than trying to pry them out with a knife. The second idea is one I do use. The recipe calls for 1 cup of chocolate chips. I always buy the 12 oz package which yields 2 cups of chips. One cup I add to the batter as directed and the remaining chips I sprinkle on top of the frosting.

Picture Credit: For the party, I arranged the brownies on a holiday platter with doilies. They were very pretty but I was in such a rush that I forgot to take pictures so you will have to settle for a photo I stole from the Hershey's website. My brownies didn't look this perfect, but my presentation was better! Further Note: Apparently Blogger didn't like the picture either and is refusing to allow me to post it. Please use your imagination instead.

Verdict: Yum! This one's a keeper.

Ultimate Chocolate Brownies
(Source: Favorite Brand Name Cookie Collection)
3/4 cup Hershey's Cocoa
1/2 teaspoon baking soda
2/3 cup butter or magarine, melted and divided
1/2 cup boiling water
2 cups sugar
2 eggs
1-1/3 cups all-purpose flour
1 teaspoon vanilla extract
1/4 teaspoon salt
1 cup Hershey's Semi-Sweet Chocolate Chips
One-Bowl Buttercream Frosting (recipe follows)
Heat oven to 350F. Grease 13x9x2-inch baking pan or two 8-inch square pans.
Stir together cocoa and baking soda in large bowl; stir in 1/3 cup butter. Add boiling water; stir until mixture thickens. Stir in sugar, eggs and remaining 1/3 cup butter; stir until smooth. Add flour, vanilla and salt; blend completely. Stir in chocolate chips. Pour into prepared pan.
Bake 35 to 40 minutes for rectangular pan, 30 to 35 minutes for square pans or until brownies begin to pull away from sides of pan. Cool completely in pan on wire rack. Frost with One-Bowl Buttercream Frosting. Cut into squares. About 36 brownies.
One-Bowl Buttercream Frosting
6 tablespoons butter or margarine, softened
2-2/3 cups powdered sugar
1/2 cup Hershey's Cocoa
1/3 cup milk
1 teaspoon vanilla extract
Beat butter in medium bowl. Add powdered sugar and cocoa alternately with milk, beating to spreading consistency (additional milk may be needed). Stir in vanilla. About 2 cups frosting.
Recycle: vanilla extract bottle
Compost: eggshells

Friday, December 09, 2005

Reuben Casserole

I haven't posted in a while because I've been studying for an exam for my Master Gardeners' class. I didn't do as well as I wanted but I'm pretty sure I at least passed. In the meantime, I have been cooking. I will try to post a recipe every day until I'm caught up.

This one is a real departure for me. I saw it in a newsletter from BettyCrocker.com . It uses instant mashed potatoes, something I normally abhor. But I've always been a sucker for reuben sandwiches and I was curious as to how this would taste with mashed potatoes rather than the usual rye bread.

It was very easy to make. The only problem I had was with the canned sauerkraut. I rinsed and drained it in a colander but it was still too wet. I should have mashed it down good to get all of the liquid out of it. The resulting casserole was surprisingly good even with the instant mashed potatoes. I especially liked the caraway seed on the top. If you like reubens and don't mind instant mashed potatoes, give this one a try.

Verdict: Not bad, but I probably won't be making this one again.

Reuben Casserole
(Source: BettyCrocker.com )


3 cups hot water
1 cup milk
1/4 cup margarine or butter
1 tablespoon yellow mustard
1 package (7.2 ounces) Betty Crocker roasted garlic mashed potatoes
1 package (6 ounces) sliced corned beef, cut into 1/2-inch pieces
1 can (14 1/2 ounces) sauerkraut, rinsed well and drained
2 cups shredded Swiss cheese (8 ounces)
1 tablespoon caraway seed, if desired

Heat oven to 350F. Grease square baking dish, 8x8x2 inches.

Heat hot water, milk and margarine to rapid boil in 3-quart saucepan; remove from heat. Stir in mustard. Stir in 2 pouches Potatoes and Seasoning just until moistened. Let stand about 1 minute or until liquid is absorbed. Whip with fork until smooth.

Spread 1 1/2 cups of the potatoes in baking dish. Top with corned beef. Spread sauerkraut over corned beef. Spoon remaining potatoes over top; spread gently. Sprinkle potatoes with cheese and caraway seed.

Bake uncovered about 20 minutes or until cheese is golden brown.

Recycle: mustard bottle, sauerkraut can

Monday, December 05, 2005

Date Bars

I have a "three-strike" rule. I like to try things three times before I give up on them. In my garden, that means planting something in three different places before deciding I just can't grow it. With cookbooks, it means trying three different recipes before consigning them (permanently) to the bookshelf. So, despite the crumb cake fiasco, I wanted to try another recipe from the Nestle VeryBestBaking Holiday 2005 leaflet that I received in the mail.

I've had my eye on the Date Bars recipe for a while. I've never made date bars. I thought it would be something different for me. Being a confirmed chocoholic, I have a very bad tendency to only make chocolate cakes/cookies/bars etc. I try to force myself to try other flavors.

My first problem with this recipe was that my grocery store doesn't sell chopped dates. I had to buy whole ones and chop them myself, a rather sticky business. Then I made the crust. Uh, oh. Not enough liquid. It didn't come together. At all. I literally spooned the "crust" into the pan, carefully poured the filling over it and then spooned the rest of the "crust" over the top. Even as I put the pan in the oven, I knew this was going to be a disaster.

It smelled great while it baked. It didn't look too bad coming out of the oven. It was difficult getting a piece out of the pan. Then I tasted it. It was delicious. Beyond delicious. It was almost better than chocolate. I'm ordering you to drop everything, buy dates and make this. NOW. Try increasing the butter to 3/4 cup. That's what I'm going to do when I make this again. And again. And again.

Verdict: Yum! This one's a keeper.

Date Bars
(Source: Nestle VeryBestBaking Holiday 2005 leaflet)


1 pkg. (8 oz.) chopped dates
3/4 cup Nestle Carnation Evaporated Milk
2 tablespoons granulated sugar
1 teaspoon vanilla extract
1/2 cup (1 stick) butter or margarine, softened
1/2 cup packed light brown sugar
1 cup all-purpose flour
3/4 cup quick-cooking oats
1/2 teaspoon salt
1/2 teaspoon ground cinnamon

Preheat oven to 400F. Grease 8-inch-square baking pan.

Combine dates, evaporated milk, sugar and vanilla extract in medium saucepan. Cook, over medium-low heat, stirring occasionally, for 8 to 10 minutes or until thickened. Remove from heat.

Beat butter and brown sugar in large mixer bowl until creamy. Beat in flour, oats, baking soda, salt and cinnamon. With floured fingers, press half of crust mixture onto bottom of prepared baking pan. Spread date filling over crust. Top with remaining crust.

Bake for 20 to 25 minutes or until golden. Serve warm. Cut into bars.

Recycle: evaporated milk can, vanilla extract bottle

Friday, December 02, 2005

Crockpot Chinese Beef and Pea Pods

Crazygramma posted an SOS on her garden blog alerting me to a beef crockpot recipe she had posted on her new recipe site, Family Food Favorites . If you haven't already done so, I urge you to visit this site. Do it when you have some time. There are so many incredible recipes posted by Crazygramma and other fabulous cooks that you'll want to linger.

Like her other recipes that I have tried, this one is simple and delicious. I cheated and bought beef already cut into strips rather than cutting my own. And I used fresh pea pods but cooked them for only 5 minutes because I like my veggies crisp and lightly cooked.

Crazygramma notes "I also add mushrooms and bean sprouts in and use low sodium soy sauce and consomme as I found the original recipe too salty for my taste." I didn't find it too salty but I will add the mushrooms and bean sprouts next time. Finally! A crockpot recipe that I actually like. Thanks Crazygramma for another fantastic recipe.

Verdict: Yum! This one's a keeper.


Crockpot Chinese Beef and Pea Pods

1 ( 1 to 1 1/2 pound) flank steak
1 (10 1/2 oz) can beef consomme
1/4 cup soy sauce
1/4 tsp. ground ginger
1 bunch green onion, sliced
2 tbs. cornstarch
2 tbs. cold water
1 (7 oz) package frozen Chinese peas partially thawed, or fresh ones

Thinly slice flank steak diagonally across the grain. Combine strips in crock-pot with consomme, soy sauce, ginger and onions. cover and cook on low for 5-7 hours.

Turn crockpot to high, stir in cornstarch that has been dissolved in the cold water. Cook on high for 10 minutes.

Drop in pea pods the last 5 minutes, longer if using fresh peas.

Serve over hot rice.

Donate: Campbell soup labels to your local school

Recycle: soup can

Compost: unused portion of green onions, strings from pea pods

Monday, November 28, 2005

Holiday Spritz Cookies

I don't normally make Christmas cookies. Holiday baking was never a tradition in the house I grew up in. Yet, somehow I acquired a cookie press. It has been in the back of one of my cupboards for the longest time. I can't remember how it got there. It must have been a gift from someone. I do remember using it once. I tried out a pressed cookie recipe from my old reliable, Betty Crocker. The cookies tasted like, well, pressed cookies, nothing to get excited about and certainly not good enough to become part of the holiday traditions in my own home.

Also lost in the mists of time is the origin of a pressed cookie recipe that has been in my "Recipes to Try" folder for the longest time. Today I finally decided to give it a whirl. Big mistake! While the dough and the resulting cookies taste great, the dough is much too stiff to use in the cookie press. The one I have even has a trigger, making it easier to use and easier to control the amount of dough for each cookie. It is also easy on my arthritic hands. Nonetheless, none of the tips I tried resulted in an actual shaped cookie and some of them were impossible to squeeze any dough through. I finally hit on the idea of using the bar shape and made ribbon cookies. At last I was able to actually squeeze out the dough fairly easily and into a recognizable shape. This is another one of those recipes that leaves me scratching my head and wondering if anyone actually tried it out before publishing it?

Verdict: What were they thinking???

Holiday Spritz Cookies
(Source: Unknown)


2 1/2 cups sifted flour
1/2 tsp. baking powder
1 cup softened unsalted butter
3/4 cup sugar
dash of salt
1 egg
1 tsp. vanilla extract

Sift together flour and baking powder. Cream butter, sugar and salt; add egg and vanilla. Beat flour into butter mixture. Add food coloring if desired. Press through cookie press with a star tip and place on a cold, ungreased cookie sheet. Bake 10-12 minutes in a 350 degree oven.

Makes 45 cookies.

Recycle: vanilla extract bottle

Compost: eggshell

Friday, November 25, 2005

Old-fashioned Chicken Pies

Many years ago, a woman I worked with used to buy First magazine. She was generous enough to allow me to photocopy any recipes I saw that appealed to me. Some them turned out to be quite good and I am still cooking them. One such recipe is for chicken pot pies. I have loved them since I was a child. Swanson Chicken Pot Pies were my idea of heaven.

The problem with most pot pie recipes is that they make one large pie and involve frozen vegetables. This recipe appealed to me because it makes six individual pies and uses only fresh ingredients. The day after Thanksgiving, I use leftover turkey to make them instead of chicken. As you can see from the date of the magazine, these pot pies have been a holiday tradition in my house for over a decade.

Chicken stock is not something I ordinarily have hanging around the house. Canned broth is fine, but I prefer using ingredients I already have in the house. I substitute chicken bouillon for the stock/broth using a ratio of one cube per cup of water. In this case, I use 2 cubes in 1 3/4 cups water. Ditto for the light cream called for. Since I have Half & Half for my coffee, I use that instead.

I don't ordinarily like recipes that involve a lot of steps and use a lot of bowls and pans. And I will be the first to admit that rolling out pastry for six pies is a royal pain but I just love the buttery crust. They can be made ahead of time, refrigerated and then reheated in the microwave or even frozen and then thawed and reheated. This recipe takes a lot of time and effort but it is one of the very few that I feel is worth the trouble.

Verdict: Yum! This one's a keeper.

Old-fashioned Chicken Pies
(Source: First magazine, 2/10/92)

1 lb. boneless chicken breasts
1 3/4 cups chicken stock or canned broth
2 3/4 cups flour
salt & pepper
6 oz. butter, chilled
1/3 cup vegetable shortening
3 carrots
1/2 lb. mushrooms
1/2 teaspoon dried thyme
1 cup light cream
2 scallions
1 tablepoons chopped fresh parsley
1 egg

Put the chicken breasts in a frying pan with 1/2 cup stock. Cover and bring to a simmer. Reduce heat and continue simmering, turning once, until chicken is just cooked through, about 5 minutes. Remove chicken, let cool and tear into pieces. Strain broth and reserve.

Combine 2 1/2 cups of the flour and 3/4 teaspoon salt. Cut in 1/4 lb. of the butter and the shortening until the mixture resembles coarse meal.

Toss in 7 to 8 tablesppons cold water, a tablespoon at a time. When the ingredients begin to clump together, press into a ball, wrap and refrigerate.

Cut carrots in half lengthwise and then into approximately 1/4" slices. Bring to a boil in a large pot of salted water and cook until tender, about 5 minutes. Drain. Slice mushrooms. In a large saucepan, melt remaining 4 tablespoons butter over medium heat. Add mushrooms, thyme, 1 teaspoon salt and 1/2 teaspoon pepper. Cook until tender, about 5 minutes.

Stir in remaining 1/4 cup flour and cook 1 minute. Gradually stir in reserved chicken-cooking liquid, remaining 1 1/4 cups stock and the cream. Bring to a boil and cook 1 minute, stirring all the while. Remove from heat, pour off 1 1/2 cups sauce and reserve. Chop scallions, stir chicken, carrots, scallions and parsley into the remaining sauce.

Heat oven to 425F. Beat the egg with 1 tablespoon water. Divide the dough into 12 pieces. On a lightly-floured work surface, roll 6 of them and fit into 5" pie pans. Fill with the chicken mixture. Roll remaining dough, top pies and flute edges. Cut vents in the top crusts.

Brush tops lightly with egg mixture. Put pies on a cookie sheet and bake until golden brown, about 35 minutes. Brush tops of pies again with egg mixture after 15 minutes.

Recycle: chicken broth can

Compost: carrot parings, unused portions of scallions and eggshell

Monday, November 21, 2005

OldRoses' Melt In Your Mouth Brownies

There was a big IT conference at my company this weekend. They brought in the IT staff from all of our offices in Europe and North America for two days of meetings. For some of these people, it was their first time in the US. One of them was a gentleman from the Hamburg office of our parent company. He had also been given the task of bringing back chocolate for his (female) co-workers. Specifically, they asked if he could please buy brownies. Apparently brownies are not available in Germany. He had never had them and was curious to taste the ones served at the lunch that was brought in during the meetings.

I'm sure you've tasted these so-called brownies. They are gooey and flat with a horrible chemical aftertaste. I told him these were not "real" brownies. Since he wasn't leaving immediately after the conference, I had time to bake authentic brownies for him to take back to his office.

The recipe I use is extremely simple. It was a Betty Crocker recipe. I merely substituted butter or margarine for the vegetable shortening called for in the original recipe. The resulting brownies are extremely rich and do literally melt in your mouth. I added a cup of chopped nuts (also included in the original recipe) to the brownies that are currently on their way to Hamburg to give the recipients the "authentic" brownies experience but I don't use nuts when I make them for myself. I am not a big fan of nuts in my cakes and cookies. This is a one-bowl recipe, always popular with me, and I have found that a whisk is the best thing to stir the ingredients with. The batter will be stiff. Stirring it will give you a good workout!

Verdict: Yum! This one's a keeper.


OldRoses' Melt In Your Mouth Brownies
(Source: OldRoses )

4 ounces unsweetened chocolate
2/3 cup butter or margarine
2 cups sugar
4 eggs
1 teaspoon vanilla
1 1/4 cups all-purpose flour
1 teaspoon baking powder
1 teaspoon salt

Heat oven to 35oF. Grease baking pan, 13x9x2 inches. Melt chocolate and butter in the microwave for 2 minutes. Stir until completely melted. Mix in sugar, eggs and vanilla. Stir in remaining ingredients. Spread in pan.

Bake 30 minutes or until brownies start to pull away from sides of pan. Do not over bake. Cool slightly before cutting.

Recycle: vanilla bottle

Compost: eggshells

Friday, November 18, 2005

OldRoses' Better Than The Blue Box Macaroni & Cheese

The weather has finally turned cold. The kind of cold that gets into your bones and makes you long for comfort food. The ultimate comfort food for me is macaroni and cheese. When my daughter was young, she loved Kraft macaroni and cheese. I was delighted, both because she was a very picky eater and because she could prepare it herself. One day I checked the ingredients on the box. I was appalled. This wasn't food. This was a chemistry experiment. I instituted a new rule: "If you can't pronounce it, you shouldn't be eating it". I also started looking for a recipe for macaroni and cheese.

We ate a lot of really bad macaroni and cheese for months as I tried recipe after recipe. Finally I threw in the towel and decided to invent my own recipe. I started by combining the best parts of two recipes. It turned out so well, my daughter pronounced it "better than the Blue Box". I quit while I was ahead.

A few things you should bear in mind when making this recipe. First, it calls for Rotelle, but you can use the traditional elbow pasta or your favorite pasta. We tried a few different kinds of pasta and decided that we liked the Rotelle best. Secondly, be sure to get the sharp process American cheese. If you get the regular American cheese, it will be bland. Unless you prefer it that way! And last, but not least, you must, must, must grease the casserole dish. This recipe doesn't just stick to the casserole, it fuses to it. It becomes one with the casserole dish.

Verdict: Yum! This one's a keeper.


OldRoses' Better Than The Blue Box
Macaroni & Cheese
(Source: OldRoses )

16 ounces Rotelle
2 tablespoons butter or margarine
2 tablespoons flour
1/2 teaspoon salt
1/4 teaspoon pepper
2 cups milk
16 ounces sharp process American cheese

Heat oven to 375F. Cook Rotelle in boiling salted water for 15 minutes. While the pasta is cooking, melt butter in saucepan over low heat. Blend in flour, salt and pepper. Cook over low heat, stirring until mixture is smooth and bubbly. Remove from heat. Stir in milk. Heat to boiling, stirring constantly Boil and stir until thickened. Add cheese and stir until completely melted. Grease 2-quart casserole. Combine macaroni and cheese mixture in casserole. Cover; bake 30 minutes. Uncover; bake 15 minutes longer.

6 to 8 servings

Monday, November 14, 2005

Toll House Crumbcake

Somehow when I signed up up Nestle's VeryBestBaking.com site, I gave them my snail mail address because they are sending me recipes and coupons at home. Which is not such a bad thing. I now have a very nice leaflet with lots of new baking recipes. I decided to use the coupon for chocolate chips and try the crumbcake recipe. I have always loved crumbcake and coffee. What could be better than crumbcake, chocolate and coffee?

Unlike the last recipe I tried, this one very clearly says to grease the pan. The cake part of the recipe combined beautifully. The topping, however, came up short. Very short. There just wasn't enough of it to cover the entire pan. And it is added before baking which means that it bakes into the cake. In my opinion, a crumbcake topping should be added after the cake is baked so that it is "crumbs", not part of the cake. Chocoholic that I am, I thought I would never find myself saying that there are just too much chocolate chips. I would prefer more cake and fewer chips. The cake itself is nothing special so it is completely overpowered by the chocolate. This recipe was very disappointing.

Verdict: Not bad, but I don't think I will be making this one again.

Toll House Crumbcake
(Source: Nestle VeryBestBaking Holiday 2005 leaflet)


Ingredients Topping

1/3 cup packed brown sugar

1 tablespoon all-purpose flour

2 tablespoons butter or margarine, softened

1/2 cup chopped nuts

2 cups (12-oz. pkg.) Nestle Toll House Semi-Sweet Chocolate Mini Morsels, divided

Cake

1 3/4 cups all-purpose flour

1 teaspoon baking powder

1 teaspoon baking soda

1/4 teaspoon salt

3/4 cup granulated sugar

1/2 cup (1 stick) butter or margarine, softened

1 teaspoon vanilla extract

3 large eggs

1 cup sour cream

Directions

Preheat oven to 350F. Grease 13 x 9-inch baking pan.

Combine brown sugar, flour and butter in small bowl with pastry blender or two knives until crumbly. Stir in nuts and 1/2 cup morsels.

Combine flour, baking powder, baking soda and salt in small bowl. Beat granulated sugar, butter and vanilla extract in large mixer bowl until creamy. Add eggs, one at a time, beating well after each addition. Gradually add flour mixture alternately with sour cream. Fold in remaining morsels. Spread into prepared baking pan; sprinkle with topping.

Bake for 25 to 35 minutes or until wooden pick inserted in center comes out clean. Cool in pan on wire rack.

Recycle: vanilla extract bottle, plastic sour cream container

Compost: eggshells

Friday, November 11, 2005

Poppy Seed Bread

Are you as sick of lemon poppy seed as I am? So when I saw a recipe without the word "lemon" in it, I gave it a second look. Hmmm...almond extract. Now that sounds good! Baked in a bundt or tube pan. Wait a sec. Is this a cake or a bread? I had to make it and find out.

I had a couple of problems with this recipe right off the bat. It says to pour the batter into the pan with no mention of the usual grease and/or flour. I know there is a cup of butter in it, but I wasn't comfortable just pouring the batter into an ungreased pan. I gave the bundt pan I was using a light coating of cooking spray. I did have trouble coaxing the final product out of the pan. But when it did finally decide to come out, it came out in one piece. The other issue I had was with the butter. The recipe calls for 1 cup of butter or margarine. It doesn't say soften or melt it before adding it to the batter. I couldn't see how it could be combined with the other ingredients and then whipped into a light and fluffy concoction unless it was at least softened first which is what I did.

The final product looked gorgeous. It's definitely sweet, more like a cake than a tea bread. The almond flavoring is overwhelming though. 1 1/2 teaspoons of almond extract is much too much. I would want to at least cut it in half. I think just a hint of almond flavoring is more palatable.

Verdict: Not bad, but I probably won't be making this again.


Poppy Seed Bread
(Source: MomsMenu.com )


1 1/2 cups sugar

1 cup butter or margarine

3 eggs

1 1/2 tsp. almond extract

1 1/2 tsp. vanilla

3 cups flour

1 1/2 cups milk

1 tablespoon poppy seeds

1 1/2 tsp. baking powder

1 1/2 tsp. salt

Preheat 350 degree oven. Combine sugar, butter, eggs, and extracts. Mix on medium speed, scrape bowl often until light and fluffy, 2-3 minutes. Add remaining ingredients. Beat 1-2 minutes more until mixed. Pour into bundt or tube pan. Bake 50-65 minutes until done. Cool 10 minutes. Sprinkle with powdered sugar. Slice into medium thin pieces and place on serving plate for guests.

Recycle: almond extract and vanilla extract bottles

Compost: eggshells

Monday, November 07, 2005

Crockpot Chicken Stew

I've noticed that I seem to be trying only poultry recipes. That's because I haven't found any recipes featuring beef or pork that attract me. Maybe I should post a few of my own recipes just for variety sake.

As you can see, I am still trying to find a good crockpot recipe. This one sounded good as well as easy. I work nights so I usually arrive home exhausted and just wanting to sleep in the mornings. There's not a lot of preparation involved with this recipe so I was able to just slice the onion, cube the potatoes, mix the seasonings and throw everything into the crockpot before heading off to bed. What a treat to get up to a wonderful aroma and a freshly cooked meal.

Unfortunately, it didn't live up to its billing. There is not enough liquid in this recipe. When I think of stew, I think of gravy. There is none here. I don't know which is worse, the dry chicken or the dry veggies. The chicken was well seasoned because the instructions are to sprinkle the spices over the chicken but none of it made it to the veggies or what little liquid there was so both were pretty tasteless. I'm adding this one to the ever growing pile of failed crockpot recipes.

Verdict: What were they thinking???

Crockpot Chicken Stew


1 whole, cut-up chicken, fat removed
1 pound baby carrots
3 large potatoes, cubed
1 large sweet onion, very thinly sliced
ground pepper
1/4 tsp. thyme
1/4 tsp. basil
1/4 tsp. oregano
1 can lowfat cream of chicken soup
1 tbsp. Worcestershire sauce (optional)

Place half of the vegetables in the crockpot, then add the chicken pieces. Mix the spices and sprinkle evenly over the chicken. Add the remainder of the vegetables and top with the soup. Cover and cook on low for 8 to 10 hours, or until chicken is tender and the vegetables are done. Remove the chicken with a slotted spoon and remove from bones. Replace the chicken back and stir, then serve.

Notes: You can also substitute boneless chicken, about 3 pounds. Then just cut it up for shred at the end. Thighs or breasts will work also.

Donate: Campbell soup labels to your local school

Recycle: soup can

Compost: onion skins

Friday, November 04, 2005

"Art" Lee the Real Estate Gourmet Chef's Ground Turkey and Tofu Stir Fry

I know that I have mentioned before that gardeners love to share recipes. I'm currently attending a class to become certified as a Master Gardener and one of my classmates has been sharing his recipes with his fellow students. According to his website he is a gardener, an artist a linguist, and an entrepreneur. Truly a Renaissance man. I can vouch for the fact that he is a darned good cook also!

His latest recipe intrigued me because of its flexibility. You can tailor it to your family's tastes by varying the ingredients and amounts of seasonings. And it only uses one pan, a very important consideration for cooks like me with no dishwasher. I was able to prepare it and cook it in the time that it took to cook the rice. Don't you just love it when everything finishes cooking at once? I loved it made with ground turkey and kale. I'll definitely be trying his suggested variations also.

Verdict: Yum! This one's a keeper.


"Art" Lee the Real Estate Gourmet Chef's
Ground Turkey and Tofu Stir Fry


1 12 to 16 oz container tofu, drained (reserve liquid)

1 lb ground turkey (may substitute beef, lamb, chicken or pork or omit if vegetarian)

1 tablespoon cooking oil

1 medium onion - diced

1 teaspoon miso paste (omit if you can't get it or don't like it)

Handful of kale (or greens of your choice such as mustard, spinach, green onions, etc.) rough chopped

Garlic (fresh or powdered), soy, ground black pepper, ginger to taste (as strong as you want)

1/8 cup white wine (optional)

1. Slice tofu into 1 inch thick slices. Pan fry in cooking oil until brown on both sides. Remove from pan.

2. In same pan that you cooked tofu, cook diced oniion for 3 minutes.

3. Add ground turkey to onions, stir, and cook until brown over medium heat.

4. Mix in bowl miso, garlic, soy, black pepper, ginger, wine and reserved tofu liquid (optional). Pour over turkey and onions.

5. Add kale.

6. Add browned tofu slices.

7. continue cooking for 5 - 7 minutes.

8. Serve over rice (may substitute mashed potatoes or pasta).

Recycle: cooking oil bottle, wine bottle

Cmpost: onion skin, kale stems, garlic skins