Friday, March 31, 2006

Shrimp Fra Diavolo

We have a small lounge area with seating in the ladies' room at work. Periodically, someone leaves magazines there. I'm not sure why. They are of the fashion and women's general interest variety. I , of course, turn immediately to the recipes. The latest "Family Circle" magazine featured a tasty Italian meal: mozzarella-garlic bread, shrimp fra diavolo, romaine with parmesan curls and rustic pear pie. I don't think I've ever had a pear pie. I'm looking forward to trying it. In the meantime, I made the shrimp fra diavolo.
Two pounds of linguine was way too much for me. I used one box (one pound). And an entire teaspoon of hot pepper flakes was also too much. This came out fiery more than spicy. And lastly, the shrimp was more garlicky than I care for. But with a few minor adjustments, this will definitely become part of my regular rotation of recipes. It was that good!
Verdict: Yum! This one's a keeper!
Shrimp Fra Diavolo
(Source: Family Circle Magazine April 1, 2006)


3 tablespoons olive oil
1 large red onion, cut in half, then thinly sliced
1 teaspoon minced garlic
1 teaspoon hot pepper flakes
1/2 cup red wine
3 cups marinara sauce
1/4 teaspoon black pepper
2 pounds linguine
1 1/2 pounds cleaned large shrimp
1/2 teaspoon minced garlic

Bring a large pot of water to a boil.

Heat 1 tablespoon of the olive oil in a large nonstick skillet over medium heat; add onion and cook 5 minutes unti soft. Add garlic and pepper flakes; cook 1 minute. Add wine; cook 3 minutes. Stir in marinara and black pepper; simmer 5 minutes.

Meanwhile, lightly salt water and add linguine; cook until tender but still firm, about 8 to 10 minutes.

When linguine is almost done, heat a large nonstick skillet over medium-high heat; add remaining oil. Add shrimp and cook, stirring, until pink, about 2 minutes. Scatter garlic on top and toss.

Drain pasta thoroughly and place in large serving bowl. Toss with marinara sauce; place shrimp on top and serve.

Recycle: olive oil bottle, wine bottle, marinara sauce bottle

Compost: onion skins, garlic skins

Monday, March 27, 2006

Buttermilk Layer Cake with Chocolate Satin Frosting

I can't believe I fell for it! Again! I gave up years ago trying recipes from "gourmet" sources like "Gourmet Magazine" and "The New York Times Magazine" because they were always incredibly complicated, used a lot of pans, and utensils, were time consuming and never, ever worked out for me. I've been good literally for decades. Then I saw this recipe last week. I think I fell for it because it is supposedly from "Joy of Cooking", a cookbook that many people swear by.

So, let's go over the many, many ways that this recipe failed. First clue: it uses vegetable oil to grease the cake pans. I used Crisco. The pans are greased, but not floured so, of course, the layers stuck to the pans like glue. I had to pry them out, in pieces. Seriously, do people really not flour their cake pans? Since I've only seen this in recipes from the NYT Magazine section, I'm convinced that it is a joke on the rest of us by the snooty food editors who know very well that cake will stick to pans that haven't been floured! To add insult to injury, the layers didn't cook in the middle either. Based on experience, this is the fault of the recipe, not my oven.

Let's move on to the frosting. Whoever heard of using a food processor to mix frosting? I didn't boil the cream or use a food processor. Microwave and KitchenAid, like a normal person. I was in a hurry when I made this cake so I probably didn't allow the frosting to set long enough. It was a bit runny as you can see from the picture.

It's too bad that this recipe didn't work out well because it actually tasted pretty good. I liked the light texture of the layers. At least the part that actually cooked! And the cream was delightful in the frosting. Hopefully I learned my lesson (again!) and it will be another two decades before I try another recipe from this source.

Verdict: What were they thinking???
Buttermilk Layer Cake with Chocolate Satin Frosting
(Source: The New York Times Magazine, March 19, 2006)

Buttermilk Layer Cake
Vegetable oil for greasing pans
2 1/3 cups cake flour
1 1/2 teaspoons baking powder
1/2 teaspoon baking soda
1/4 teaspoon salt
3 large eggs
1 teaspoon vanilla
6 ounces butter
1 1/3 cups sugar
1 cup buttermilk

Chocolate Satin Frosting
1 cup heavy cream
6 ounces unsweetened chocolate, cut into chunks
3 cups confectioners' sugar
6 tablespoons unsalted butter, cut into small pieces
1 teaspoon vanilla

Preheat oven to 350 degrees. Grease two 9-inch cake pans and set aside. Sift together the cake flour, baking powder, baking soda and salt; set aside. In a small bowl, whisk together the eggs and vanilla.

Using a mixer on medium speed, beat the butter until creamy. Over the course of 3 minutes, beat in the sugar. Over 2 minutes, add the egg mixture. Reduce the speed to low and alternate adding the flour and buttermilk in three parts,scraping the bowl.

Divide the batter between the pans and smooth the tops. Bake until light golden brown and a toothpick inserted in the center comes out clean, 25 to 30 minutes. Cool for 10 minutes, then unmold onto a rack to cool completely before frosting.

Frosting: Bring the cream to a boil. Remove from heat and add chocolate. Cover and set aside for 10 minutes. Scrape into a food processor and add the confectioners' sugar, butter and vanilla. Process until smooth, then 1 minute more. Set aside at toome temperatur until thickened into a spreadable consistency.

To frost cake, place 1 layer on a cake plate, rounded side down, trimming if necessary so it lies flat. Spread with a third of the frosting, top with the second layer and frost the remainder of the cake.

Adapted from "Joy of Cooking"

Recycle: vegetable oil bottle, vanilla bottle

Compost: eggshells

Friday, March 24, 2006

Beef in Red Wine

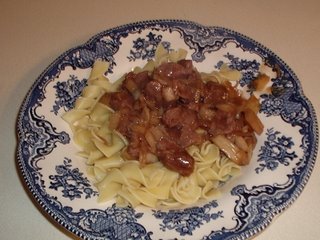
Still in search of crockpot recipes, this one caught my eye. Yes, I am just as sick of beef cooked in red wine as you are. This recipe, though, has an interesting variation: onion soup mix. I love onions and I especially love onions with beef. After making this dish, I realize there is a huge difference between onions and onion soup mix. It had a weird taste that I later realized was a result of all the chemicals that comprise the soup mix. If I ever make this recipe again, I will omit the onion soup mix.

Verdict: Not bad, but I probably won't be making this again.

Beef in Red Wine
(Source: BHG.com )


1-1/2 pounds beef stew meat, trimmed and cut into 1-inch cubes
2 medium onions, cut up
2 beef bouillon cubes or 1 envelope (1/2 of a 2.2-ounce package) onion soup mix
3 tablespoons cornstarch
Salt
Black pepper
1-1/2 cups dry red wine
Hot cooked whole wheat pasta (optional)

1. Place the beef and onions in a 3-1/2- or 4-quart slow cooker. Add bouillon cubes. Sprinkle with cornstarch, salt, and pepper. Pour red wine over all.

2. Cover and cook on low-heat setting for 10 to 12 hours or on high-heat setting for 5 to 6 hours. If desired, serve over pasta. Makes 6 servings.

Recycle: red wine bottle

Compost: onion skins

Monday, March 20, 2006

Deep Chocolate Brownies

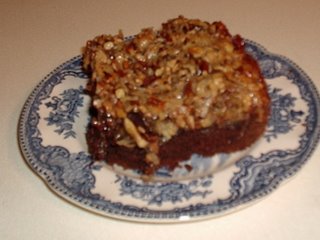
Deep . . . Chocolate . . . Brownies . . . Just the name stirs me, chocoholic that I am. Then there are the ingredients. Bittersweet chocolate . . . Chocolate chips . . . Butterscotch topping . . . Coconut . . . Pecans . . . I couldn't wait to make this. And be disappointed. You would think I would know better by now.
The batter was incredibly stiff resulting in dry, dry, dry brownies. I don't care for dry cakes and brownies. I much prefer moist. Theye also tasted burned to me. Then I realized it was the bittersweet chocolate. Too bitter. The brown sugar just didn't take enough of the edge off of it for me. This is a good thing for many people who don't care for very sweet chocolate. I am not one of them.
And I should know better by now than to use prepared toppings. I could taste the chemicals in it. I should have made my own. I bought finely chopped pecans rather than the coarsely chopped ones. Just a personal preference. I liked the resulting texture better than if there had been "chunks" of pecans.
Verdict: Not bad, but I definitely won't be making this again.
Deep Chocolate Brownies
(Source:BHG.com )

1 egg
1 cup butterscotch-flavored ice cream topping
2 cups coarsely chopped pecans
2 cups flaked coconut
3/4 cup butter, softened
1-1/2 cups packed dark brown sugar
8 ounces bittersweet chocolate, melted and cooled
2 eggs
2 teaspoons vanilla
2 cups all-purpose flour
1 teaspoon baking powder
1/2 teaspoon baking soda
1/2 teaspoon salt
1 12-ounce package semisweet chocolate pieces

1. Preheat oven to 350F. Lightly grease a 13x9x2-inch baking pan; set aside.

2. In a medium mixing bowl beat the 1 egg with an electric mixer on medium speed until fluffy and light colored. Stir in ice cream topping. fiold in pecans and coconut; set aside.

3. In a large mixing bowl beat butter with an electric mixer on medium to high speed for 30 seconds. Beat in brown sugar until fluffy. Beat in cooled chocolate, the 2 eggs, and vanilla. Stir together flour, baking powder, baking soda, and salt; beat or stir into chocolate mixture. Stir in chocolate pieces. Spread in prepared pan; spread nut mixture over batter. Bake about 35 minutes or until golden and set. Cool in pan on a wire rack. Cut into bars. Makes 24 bars.

Recycle: ice cream topping bottle, vanilla bottle

Compost: eggshells

Friday, March 10, 2006

Parmesan Chicken Breasts

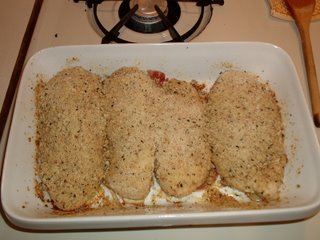
I don't need another chicken recipe. Really, I don't. And I already have an oven-baked "fried-chicken" recipe that I've been using for years. This looked like such an interesting variation that I had to try it. Parmesan cheese, garlic and basil. It could be Italian oven-baked "fried-chicken".

It was easy enough to put together. Six chicken breasts were way too much for me, so I only used four. Good thing because that's about all that the oil and garlic mixture covered. I don't know how I could have done six. There was plenty of bread crumb mixture however so I was able to sprinkle some more on top as suggested. It smelled really garlicky as it was baking and tasted very garlicky also. Believe it or not, it got more garlicky each day that it sat in my fridge (I cook for an entire week at a time). Now I love garlic, but this was too much even for me. And I really don't care for dishes where one taste overpowers all the others.

Verdict: Too garlicky. I won't be making this again.

Parmesan Chicken Breasts

2 tablespoons olive oil
1 clove garlic, minced
1 cup dry bread crumbs
2/3 cup grated parmesan cheese
1 teaspoon dried basil leaves
1/4 teaspoon ground black pepper
6 skinless, boneless chicken breast

Preheat oven to 350F. Lightly grease a 9x13 inch baking dish. In a bowl, combine the olive oil and garlic. In a pie plate or bowl mix the bread crumbs, parmesan cheese, basil, and pepper. Dip each chicken breast in the oil mixture, then in the bread crumb mixture. Arrange the coated chicken breasts in the prepared bvaking dish, and top with any of the remaining bread crumb mixture. Bake 30 minutes or untiol the chicken is no longer pink and juices run clear.

Recycle: olive oil bottle

Compost: garlic skins

Monday, March 06, 2006

Classic Sugar Cookies

I have a perfectly good sugar cookie recipe that I have used literally for years. Nonetheless, when I saw this sugar cookie recipe in a magazine, I had to try it out. My recipe uses a combination of almond extract and vanilla extract. This one uses only vanilla extract. My recipe calls for confectioner's sugar. This one calls for regular sugar. It's supposed to be for Christmas cookies but I used it for St. Patrick's Day.
I had problems with it right from the start. I looked and looked and looked but couldn't find a shamrock cookie cutter anywhere. So I used my scalloped edge round cookie cutter and green sugar. I took the recipe writer at their word and refrigerated the dough overnight. It fit my schedule better than 4 hours. Big mistake! The dough came out of the refrigerator rock hard. I had to let it warm up to room temperature before I could roll it out thereby defeating the entire purpose of refrigerating it.
Baking the cookies was also a problem. I know from prior recipes that my oven temperature is accurate so I baked the first batch of cookies for 12 minutes. They came out too brown. I baked the second batch for 11 minutes. Still too brown. The third batch baked for only 10 minutes and they still came out brown. The texture was also off. The edges were crispy and the centers chewy. I just didn't care for these cookies. BUT . . . I brought them to a committee meeting and they were a big hit. So it's a split decision.
Verdict: (Me) Not bad, but I don't think I'll be making these again.
(Committee Members) Yum! This one's a keeper.
Classic Sugar Cookies
(Source: Family Circle Magazine, December 2005)
1 1/2 cups all-purpose flour

1/2 teaspoon baking powder

1/8 teaspoon salt

1/2 cup (1 stick) unsalted butter, at room temperature

3/4 cup sugar

1 egg

3/4 teaspoon vanilla extract

Red and pink decorating sugar

1. In a large bowl, whisk together flour, baking powder and salt.

2. In a second large bowl, beat butter and sugar until smooth, about 2 minutes. Beat in egg and vanilla. On low speed, beat in flour mixture until just combined.

3. Gather dough; divide in half. Form each half into a disk. Wrap tightly in plastic wrap. Refrigerate 4 hours or as long as overnight.

4. Heat oven to 350F. Roll out one dough disk to 3/16- to 1/4-inch thickness. Cut into stars using a 2-inch star cookie cutter. Place on ungreased baking sheets; sprinkle with decorating sugar, and bake at 350F for 10 to 12 minutes until light golden around edges. Remove from baking sheets; cool on wire rack. Repeat with remaining half of dough. Gather scraps and refrigerate. Re-roll and cut into stars. Bake as directed. When completely cool, store in airtight containers for up to 2 weeks.

Makes: 3 1/2 dozen cookies

Recycle: vanilla extract bottle

Compost: eggshell

Friday, March 03, 2006

Flavorful Beef Stir-Fry

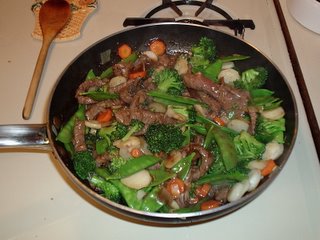
I know, I know. Another stir-fry recipe. But look at the ingredients! Broccoli! Carrots! Onions! Sliced water chestnuts! Now look at the picture. Isn't that gorgeous? And it tasted just as good as it looked. It was super-easy too. Not to mention fool-proof. The recipe calls for the pan to be covered for four minutes while the veggies simmer. There is no cover for this pan and I don't own one wide enough. No problem! I simmered without a cover and it still turned out great!

Verdict: Yum! This one's a keeper.

Flavorful Beef Stir-Fry
(Source: allrecipes.com )

2 tablespoons cornstarch
2 teaspoons sugar
6 tablespoons soy sauce
1/4 cup white wine, apple juice or water
1 pound boneless beef round steak, cut into thin strips
3 cups broccoli florets
2 medium carrots, thinly sliced
1 (6 ounce) package frozen pea pods, thawed
2 tablespoons chopped onion
2 tablespoons vegetable oil, divided
1 (8ounce) can sliced water chestnuts, undrained
hot cooked rice

In a bowl, combine cornstarch, sugar, soy sauce and wine, apple jiuce or water until smooth. Add beef and toss to coat; set aside.

In a large skillet, stir-fry broccoli, carrots, pea pods and onion in 1 tablespoon oil for 1 minute. Stir in water chestnuts. Cover and simmer for 4 minutes; remove and keep warm.

In the same skillet, stir-fry beef in remaining oil until meat reaches desired doneness. Return vegetables to pan; toss. Serve over rice.

Recycle: soy sauce bottle, vegetable oil bottle, water chestnut can

Compost: broccoli stem, carrot skins, onion skins