Wednesday, September 27, 2006

Vanishing Oatmeal Raisin Cookies

When I was a child, my grandmother always made oatmeal chocolate chip cookies for me. Much as I love(d) chocolate, the oatmeal part of the cookie was always my favorite. I asked her about the recipe once and she said it was on the oatmeal box. Unfortunately, she passed away not long after that while I was still too young to be baking myself.

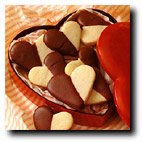
I tried to replicate those cookies for years. The recipe on the oatmeal box didn't taste anything like them. The recipes in the standard cookbooks didn't taste anything like them. I finally gave up. Those cookies will have to remain a fond memory.

I still enjoy oatmeal cookies, though. I especially like the oatmeal cookies part of Oatmeal Scotchies but when I tried them without the butterscotch chips, they weren't particularly outstanding. When I made oatmeal scotchies recently, I noticed a recipe for oatmeal cookies on the cover of the oatmeal box that was similar but with small differences. I had another meeting to go to for the Rutgers Gardens Volunteers and these seemed like a good choice to bring. Just one problem. I had to make them ahead of time and I wasn't sure if raisins could be frozen and then thawed successfully.

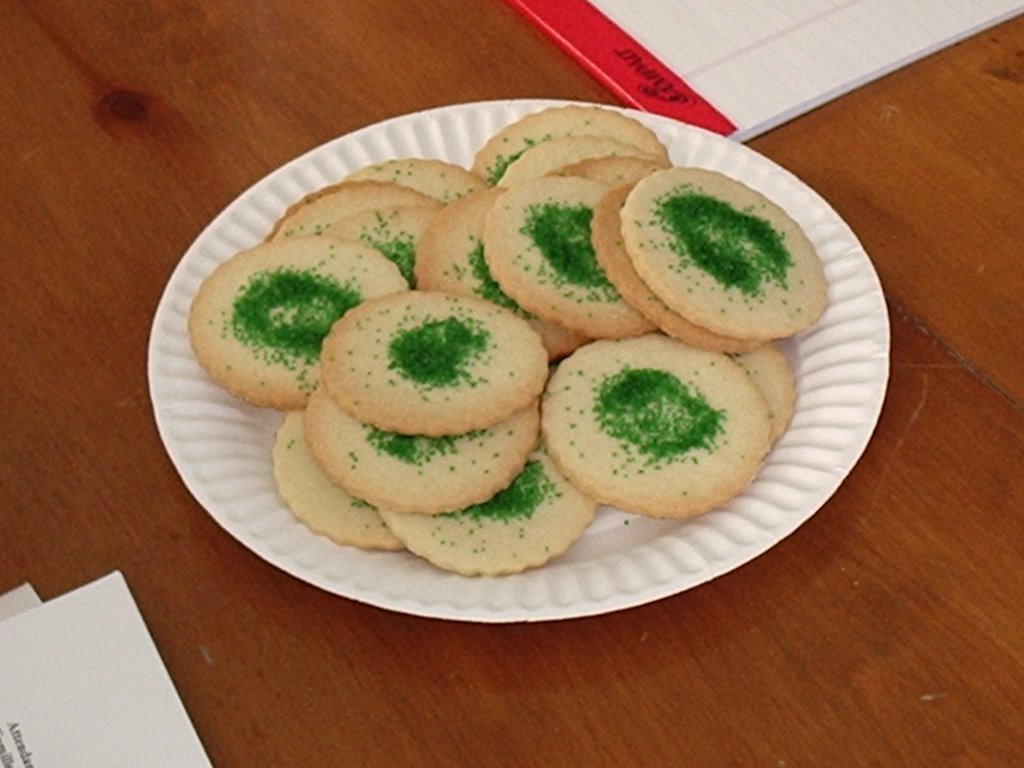
I consulted with another avid baker. She had never tried it with raisins specifically but had been successful with other dried fruits. I decided to go ahead with the experiment. Boy, am I glad I did! These cookies, while nothing like my grandmother's, are outstanding. Even frozen and then thawed, they were moist and delicious. And a big hit at the meeting.

Verdict: Yum! This one's a keeper!

Vanishing Oatmeal Raisin Cookies
(Source: Top of the Quaker Old-Fashioned Oatmeal box)

1 cup (2 sticks) margarine or butter, softened
1 cup firmly packed brown sugar
1/2 cup granulated sugar
2 eggs
1 teaspoon vanilla
1 1/2 cups all-purpose flour
1 teaspoon baking soda
1 teaspoon cinnamon
1/2 teaspoon salt (optional)
3 cups Quaker Oats (quick or old fashioned, uncooked)
1 cup raisins

1. Heat oven to 350 degrees
2. Beat together margarine and sugars until creamy.
3. Add eggs and vanilla; beat well.
4. Add combined flour, baking soda, cinnamon and salt; mix well.
5. Stir in oats and raisins; mix well.
6. Drop by rounded tablespoonfuls onto ungreased cookie sheet.
7. Bake 10 to 12 minutes or until golden brown.
8. Cool 1 minute on cookie sheet; remove to wire rack.

About 4 dozen

Bar Cookies: Bake 30 to 35 minutes in ungreased 13 x 9-inch metal baking pan.

Recycle: vanilla extract bottle

Compost: eggshells

Friday, September 15, 2006

Oatmeal Scotchies

Next Sunday is the Annual Master Gardeners' Picnic. It's Pot Luck everything. Bring a dish. Bring a drink. Bring a plant. Just one problem. I have a gazillion things to do this week and the day before, I will be at Cook College all day attending Home Gardener's School. Then I remembered I had a bag of butterscotch morsels in the freezer. I could make Oatmeal Scotchies cookies any time during the week and then freeze them until Sunday. Problem solved!

Oatmeal Scotchies are very easy. The recipe is straight off the back of the morsels package. They are simply oatmeal cookies with butterscotch morsels in them. The only change I make in this recipe is the same one I make in all my recipes using brown sugar. I prefer the granulated brown sugar because it is easier to use.

Verdict: Yum! This one's a keeper!


Oatmeal Scotchies
(Source: back of the chips bag)

1 1/4 cups all-purpose flour
1 teaspoon baking soda
1/2 teaspoon salt
1/2 teaspoon ground cinnamon
1 cup (2 stocks) margarine or butter, softened
3/4 cup granulated sugar
3/4 cup firmly packed brown sugar
2 eggs
1 teaspoon vanilla extract
3 cups quick or old fashioned oats, uncooked
1 12 ounce package (2 cups) butterscotch flavored morsels

Preheat oven to 375 degrees. In a small bowl, combine flour, baking soda, salt and cinnamon; set aside. In a large mixer bowl, beat margarine, granulated sugar, brown sugar, eggs and vanilla extract until creamy. Gradually beat in flour mixture. Stir in oats and butterscotch morsels. Drop by measuring tablespoonfuls onto ungreased cookie sheets.

Bake 7 to 8 minutes for chewy cookies or 9 to 10 minutes for crisp cookies. Let stand on cookie sheets 2 minutes. Remove from cookie sheets; cool completely on wire racks. Store tightly covered.

Makes about 4 dozen cookies.

Recycle: vanilla extract bottle

Compost: eggshells

Monday, September 11, 2006

Rurality Shrimp

The cool breezes of autumn are finally blowing and it's safe to go back into the kitchen. I've been wanting to try this recipe all summer. I found it on a blog called Rurality. It has wonderful nature photos. I'm a sucker for great photography. Someday I hope to able to own a nice camera and take a course or two on photography.

I only made two small changes to this recipe. I didn't have any linguine so I substituted thin spaghetti. I also used 15 oz diced tomatoes with Italian seasonings. I had slightly less than 1 lb of shrimp in my freezer. My biggest concern was the lack of any sweetener like sugar or carrots in the sauce. Pure tomato sauces are usually too acidic for me. This one most definitely was not. Perhaps it was the shrimp. Whatever it was, this dish was absolutely delicious. I'll definitely be making it again.

Verdict: Yum! This one's a keeper!

Rurality Shrimp
(Source: Rurality , April 7, 2006)

1 1/2 tsp garlic, chopped
1 medium onion
2 tbsp olive oil
8 oz can Italian whole plum tomatoes
1 lb cooked shelled shrimp
1 tsp oregano
1 tsp basil
8 oz crumble feta cheese
8 oz uncooked linguini
salt & pepper to taste

Cook linguini in salted water.

Saute garlic & onion on olive oil 3 - 5 minutes on Medium High heat (until tender). Add cooked shrimp, saute for 2 minutes, remove from pan but leave garlic & onion. Add tomatoes & liquid & stir.

Bring to a boil, reduce heat. Add shrimp, oregano & basil, salt & pepper. simmer 3 - 5 minutes. Pour over drained linguini & toss.

Add crumbled feta cheese at the table.

Recycle: diced tomatoes can

Compost: garlic skins, onion skins

Monday, May 22, 2006

Chocolate Fudge Cake

At long last, I have found the perfect chocolate cake. Well, almost perfect. It's a little dryer than I would like, but still much, much better than any other recipe I have tried. And I have tried a lot of chocolate cake recipes. This one was pictured on the cover of the February 2006 issue of "Family Circle" magazine. I was attracted to it because it uses both unsweetened chocolate AND cocoa powder. Usually, it's one or the other. Recipes with just cocoa powder are never "chocolatey" enough for me. Also, it uses sour cream in both the cake and the frosting. And the frosting uses both unsweetened chocoate and cocoa powder AND butter and vegetable shortening AND milk and sour cream. I had to try it!

This is actually my second try at making this cake. The first time, I was following the ingredients list rather than the recipe and left out a cup of water. The resulting batter was incredibly stiff and baked into very dry layers which were surprisingly good. That encouraged me to try it again. The cake is light and not too dry but not as moist as I would like. The frosting came together incredibly well and the taste is to die for. This is definitely going to be my signature chocolate cake.

Verdict: Yum! This one's a keeper!


Chocolate Fudge Cake
(Source: Family Circle Magazine February 2006)


Cake:
1/2 cup (1 stick) unsalted butter
4 ounces unsweetened chocolate, broken up
2 1/2 cups all-purpose flour
2 1/4 cups sugar
1 cup unsweetened cocoa powder
2 teaspoons baking soda
1/2 teaspoon baking powder
1 1/2 teaspoons salt
1 1/2 cups sour cream
3 eggs
2 teaspoons vanilla extract

Frosting:
4 ounces unsweetened chocolate, broken up
1/2 cup solid vegetable shortening
1/2 cup (1 stick) unsalted butter, softened
1/4 cup sour cream
1/3 cup milk
2 teaspoons vanilla extract
1/4 teaspoon salt
1 box (1 pound) confectioners' sugar
1/2 cup cocoa powder
Garnish: chocolate curls; berries

1. Heat oven to 350 degrees. Grease and flour three 9-inch round cake pans.

2. Cake: In a glass bowl, melt butter and chocolate to gether in microwave on high until melted and smooth, 1 to 1 1/2 minutes, stirring halfway through. Set aside. On low speed, mix flour, sugar, cocoa, baking soda, baking powder and salt in a large bowl until blended.

3. Add sour cream, eggs, 1 cup water, chocolate mixture and vanilla; beat 30 seconds on low, until dry ingredients are moistened. Increase to medium; beat 2 minutes. Pour into prepared pans.

4. Bake at 350 degrees for 40 minutes or until cake layers spring back when pressed.

5. Cool layers in pans on rack 10 minutes. Remove cakes to rack to cool.

6. Frosting: In a small glass bowl, melt chocolate in microwave on high for 1 minute. Stir until smooth. Set aside. Beat shortening, butter, sour cream, milk, vanilla, salt, 1 cup of the sugar and the cocoa powder in a medium-size bowl until creamy. Gradually beat in remaining sugar and melted chocolate until thick and smooth.

7. Place a cake layer on pedestal. Spread with about 2/3 cup frosting. Top with second layer; spread with about 2/3 cup more frosting. Top with remaining layer. Frost top and sides, swirling decoratively. Garnish with chocoate curls and berries.

Recycle: vanilla extract bottle

Compost: eggshells

Friday, March 31, 2006

Shrimp Fra Diavolo

We have a small lounge area with seating in the ladies' room at work. Periodically, someone leaves magazines there. I'm not sure why. They are of the fashion and women's general interest variety. I , of course, turn immediately to the recipes. The latest "Family Circle" magazine featured a tasty Italian meal: mozzarella-garlic bread, shrimp fra diavolo, romaine with parmesan curls and rustic pear pie. I don't think I've ever had a pear pie. I'm looking forward to trying it. In the meantime, I made the shrimp fra diavolo.
Two pounds of linguine was way too much for me. I used one box (one pound). And an entire teaspoon of hot pepper flakes was also too much. This came out fiery more than spicy. And lastly, the shrimp was more garlicky than I care for. But with a few minor adjustments, this will definitely become part of my regular rotation of recipes. It was that good!
Verdict: Yum! This one's a keeper!
Shrimp Fra Diavolo
(Source: Family Circle Magazine April 1, 2006)


3 tablespoons olive oil
1 large red onion, cut in half, then thinly sliced
1 teaspoon minced garlic
1 teaspoon hot pepper flakes
1/2 cup red wine
3 cups marinara sauce
1/4 teaspoon black pepper
2 pounds linguine
1 1/2 pounds cleaned large shrimp
1/2 teaspoon minced garlic

Bring a large pot of water to a boil.

Heat 1 tablespoon of the olive oil in a large nonstick skillet over medium heat; add onion and cook 5 minutes unti soft. Add garlic and pepper flakes; cook 1 minute. Add wine; cook 3 minutes. Stir in marinara and black pepper; simmer 5 minutes.

Meanwhile, lightly salt water and add linguine; cook until tender but still firm, about 8 to 10 minutes.

When linguine is almost done, heat a large nonstick skillet over medium-high heat; add remaining oil. Add shrimp and cook, stirring, until pink, about 2 minutes. Scatter garlic on top and toss.

Drain pasta thoroughly and place in large serving bowl. Toss with marinara sauce; place shrimp on top and serve.

Recycle: olive oil bottle, wine bottle, marinara sauce bottle

Compost: onion skins, garlic skins

Monday, March 27, 2006

Buttermilk Layer Cake with Chocolate Satin Frosting

I can't believe I fell for it! Again! I gave up years ago trying recipes from "gourmet" sources like "Gourmet Magazine" and "The New York Times Magazine" because they were always incredibly complicated, used a lot of pans, and utensils, were time consuming and never, ever worked out for me. I've been good literally for decades. Then I saw this recipe last week. I think I fell for it because it is supposedly from "Joy of Cooking", a cookbook that many people swear by.

So, let's go over the many, many ways that this recipe failed. First clue: it uses vegetable oil to grease the cake pans. I used Crisco. The pans are greased, but not floured so, of course, the layers stuck to the pans like glue. I had to pry them out, in pieces. Seriously, do people really not flour their cake pans? Since I've only seen this in recipes from the NYT Magazine section, I'm convinced that it is a joke on the rest of us by the snooty food editors who know very well that cake will stick to pans that haven't been floured! To add insult to injury, the layers didn't cook in the middle either. Based on experience, this is the fault of the recipe, not my oven.

Let's move on to the frosting. Whoever heard of using a food processor to mix frosting? I didn't boil the cream or use a food processor. Microwave and KitchenAid, like a normal person. I was in a hurry when I made this cake so I probably didn't allow the frosting to set long enough. It was a bit runny as you can see from the picture.

It's too bad that this recipe didn't work out well because it actually tasted pretty good. I liked the light texture of the layers. At least the part that actually cooked! And the cream was delightful in the frosting. Hopefully I learned my lesson (again!) and it will be another two decades before I try another recipe from this source.

Verdict: What were they thinking???
Buttermilk Layer Cake with Chocolate Satin Frosting
(Source: The New York Times Magazine, March 19, 2006)

Buttermilk Layer Cake
Vegetable oil for greasing pans
2 1/3 cups cake flour
1 1/2 teaspoons baking powder
1/2 teaspoon baking soda
1/4 teaspoon salt
3 large eggs
1 teaspoon vanilla
6 ounces butter
1 1/3 cups sugar
1 cup buttermilk

Chocolate Satin Frosting
1 cup heavy cream
6 ounces unsweetened chocolate, cut into chunks
3 cups confectioners' sugar
6 tablespoons unsalted butter, cut into small pieces
1 teaspoon vanilla

Preheat oven to 350 degrees. Grease two 9-inch cake pans and set aside. Sift together the cake flour, baking powder, baking soda and salt; set aside. In a small bowl, whisk together the eggs and vanilla.

Using a mixer on medium speed, beat the butter until creamy. Over the course of 3 minutes, beat in the sugar. Over 2 minutes, add the egg mixture. Reduce the speed to low and alternate adding the flour and buttermilk in three parts,scraping the bowl.

Divide the batter between the pans and smooth the tops. Bake until light golden brown and a toothpick inserted in the center comes out clean, 25 to 30 minutes. Cool for 10 minutes, then unmold onto a rack to cool completely before frosting.

Frosting: Bring the cream to a boil. Remove from heat and add chocolate. Cover and set aside for 10 minutes. Scrape into a food processor and add the confectioners' sugar, butter and vanilla. Process until smooth, then 1 minute more. Set aside at toome temperatur until thickened into a spreadable consistency.

To frost cake, place 1 layer on a cake plate, rounded side down, trimming if necessary so it lies flat. Spread with a third of the frosting, top with the second layer and frost the remainder of the cake.

Adapted from "Joy of Cooking"

Recycle: vegetable oil bottle, vanilla bottle

Compost: eggshells

Friday, March 24, 2006

Beef in Red Wine

Still in search of crockpot recipes, this one caught my eye. Yes, I am just as sick of beef cooked in red wine as you are. This recipe, though, has an interesting variation: onion soup mix. I love onions and I especially love onions with beef. After making this dish, I realize there is a huge difference between onions and onion soup mix. It had a weird taste that I later realized was a result of all the chemicals that comprise the soup mix. If I ever make this recipe again, I will omit the onion soup mix.

Verdict: Not bad, but I probably won't be making this again.

Beef in Red Wine
(Source: BHG.com )


1-1/2 pounds beef stew meat, trimmed and cut into 1-inch cubes
2 medium onions, cut up
2 beef bouillon cubes or 1 envelope (1/2 of a 2.2-ounce package) onion soup mix
3 tablespoons cornstarch
Salt
Black pepper
1-1/2 cups dry red wine
Hot cooked whole wheat pasta (optional)

1. Place the beef and onions in a 3-1/2- or 4-quart slow cooker. Add bouillon cubes. Sprinkle with cornstarch, salt, and pepper. Pour red wine over all.

2. Cover and cook on low-heat setting for 10 to 12 hours or on high-heat setting for 5 to 6 hours. If desired, serve over pasta. Makes 6 servings.

Recycle: red wine bottle

Compost: onion skins

Monday, March 20, 2006

Deep Chocolate Brownies

Deep . . . Chocolate . . . Brownies . . . Just the name stirs me, chocoholic that I am. Then there are the ingredients. Bittersweet chocolate . . . Chocolate chips . . . Butterscotch topping . . . Coconut . . . Pecans . . . I couldn't wait to make this. And be disappointed. You would think I would know better by now.
The batter was incredibly stiff resulting in dry, dry, dry brownies. I don't care for dry cakes and brownies. I much prefer moist. Theye also tasted burned to me. Then I realized it was the bittersweet chocolate. Too bitter. The brown sugar just didn't take enough of the edge off of it for me. This is a good thing for many people who don't care for very sweet chocolate. I am not one of them.
And I should know better by now than to use prepared toppings. I could taste the chemicals in it. I should have made my own. I bought finely chopped pecans rather than the coarsely chopped ones. Just a personal preference. I liked the resulting texture better than if there had been "chunks" of pecans.
Verdict: Not bad, but I definitely won't be making this again.
Deep Chocolate Brownies
(Source:BHG.com )

1 egg
1 cup butterscotch-flavored ice cream topping
2 cups coarsely chopped pecans
2 cups flaked coconut
3/4 cup butter, softened
1-1/2 cups packed dark brown sugar
8 ounces bittersweet chocolate, melted and cooled
2 eggs
2 teaspoons vanilla
2 cups all-purpose flour
1 teaspoon baking powder
1/2 teaspoon baking soda
1/2 teaspoon salt
1 12-ounce package semisweet chocolate pieces

1. Preheat oven to 350F. Lightly grease a 13x9x2-inch baking pan; set aside.

2. In a medium mixing bowl beat the 1 egg with an electric mixer on medium speed until fluffy and light colored. Stir in ice cream topping. fiold in pecans and coconut; set aside.

3. In a large mixing bowl beat butter with an electric mixer on medium to high speed for 30 seconds. Beat in brown sugar until fluffy. Beat in cooled chocolate, the 2 eggs, and vanilla. Stir together flour, baking powder, baking soda, and salt; beat or stir into chocolate mixture. Stir in chocolate pieces. Spread in prepared pan; spread nut mixture over batter. Bake about 35 minutes or until golden and set. Cool in pan on a wire rack. Cut into bars. Makes 24 bars.

Recycle: ice cream topping bottle, vanilla bottle

Compost: eggshells

Friday, March 10, 2006

Parmesan Chicken Breasts

I don't need another chicken recipe. Really, I don't. And I already have an oven-baked "fried-chicken" recipe that I've been using for years. This looked like such an interesting variation that I had to try it. Parmesan cheese, garlic and basil. It could be Italian oven-baked "fried-chicken".

It was easy enough to put together. Six chicken breasts were way too much for me, so I only used four. Good thing because that's about all that the oil and garlic mixture covered. I don't know how I could have done six. There was plenty of bread crumb mixture however so I was able to sprinkle some more on top as suggested. It smelled really garlicky as it was baking and tasted very garlicky also. Believe it or not, it got more garlicky each day that it sat in my fridge (I cook for an entire week at a time). Now I love garlic, but this was too much even for me. And I really don't care for dishes where one taste overpowers all the others.

Verdict: Too garlicky. I won't be making this again.

Parmesan Chicken Breasts

2 tablespoons olive oil
1 clove garlic, minced
1 cup dry bread crumbs
2/3 cup grated parmesan cheese
1 teaspoon dried basil leaves
1/4 teaspoon ground black pepper
6 skinless, boneless chicken breast

Preheat oven to 350F. Lightly grease a 9x13 inch baking dish. In a bowl, combine the olive oil and garlic. In a pie plate or bowl mix the bread crumbs, parmesan cheese, basil, and pepper. Dip each chicken breast in the oil mixture, then in the bread crumb mixture. Arrange the coated chicken breasts in the prepared bvaking dish, and top with any of the remaining bread crumb mixture. Bake 30 minutes or untiol the chicken is no longer pink and juices run clear.

Recycle: olive oil bottle

Compost: garlic skins

Monday, March 06, 2006

Classic Sugar Cookies

I have a perfectly good sugar cookie recipe that I have used literally for years. Nonetheless, when I saw this sugar cookie recipe in a magazine, I had to try it out. My recipe uses a combination of almond extract and vanilla extract. This one uses only vanilla extract. My recipe calls for confectioner's sugar. This one calls for regular sugar. It's supposed to be for Christmas cookies but I used it for St. Patrick's Day.
I had problems with it right from the start. I looked and looked and looked but couldn't find a shamrock cookie cutter anywhere. So I used my scalloped edge round cookie cutter and green sugar. I took the recipe writer at their word and refrigerated the dough overnight. It fit my schedule better than 4 hours. Big mistake! The dough came out of the refrigerator rock hard. I had to let it warm up to room temperature before I could roll it out thereby defeating the entire purpose of refrigerating it.
Baking the cookies was also a problem. I know from prior recipes that my oven temperature is accurate so I baked the first batch of cookies for 12 minutes. They came out too brown. I baked the second batch for 11 minutes. Still too brown. The third batch baked for only 10 minutes and they still came out brown. The texture was also off. The edges were crispy and the centers chewy. I just didn't care for these cookies. BUT . . . I brought them to a committee meeting and they were a big hit. So it's a split decision.
Verdict: (Me) Not bad, but I don't think I'll be making these again.
(Committee Members) Yum! This one's a keeper.
Classic Sugar Cookies
(Source: Family Circle Magazine, December 2005)
1 1/2 cups all-purpose flour

1/2 teaspoon baking powder

1/8 teaspoon salt

1/2 cup (1 stick) unsalted butter, at room temperature

3/4 cup sugar

1 egg

3/4 teaspoon vanilla extract

Red and pink decorating sugar

1. In a large bowl, whisk together flour, baking powder and salt.

2. In a second large bowl, beat butter and sugar until smooth, about 2 minutes. Beat in egg and vanilla. On low speed, beat in flour mixture until just combined.

3. Gather dough; divide in half. Form each half into a disk. Wrap tightly in plastic wrap. Refrigerate 4 hours or as long as overnight.

4. Heat oven to 350F. Roll out one dough disk to 3/16- to 1/4-inch thickness. Cut into stars using a 2-inch star cookie cutter. Place on ungreased baking sheets; sprinkle with decorating sugar, and bake at 350F for 10 to 12 minutes until light golden around edges. Remove from baking sheets; cool on wire rack. Repeat with remaining half of dough. Gather scraps and refrigerate. Re-roll and cut into stars. Bake as directed. When completely cool, store in airtight containers for up to 2 weeks.

Makes: 3 1/2 dozen cookies

Recycle: vanilla extract bottle

Compost: eggshell

Friday, March 03, 2006

Flavorful Beef Stir-Fry

I know, I know. Another stir-fry recipe. But look at the ingredients! Broccoli! Carrots! Onions! Sliced water chestnuts! Now look at the picture. Isn't that gorgeous? And it tasted just as good as it looked. It was super-easy too. Not to mention fool-proof. The recipe calls for the pan to be covered for four minutes while the veggies simmer. There is no cover for this pan and I don't own one wide enough. No problem! I simmered without a cover and it still turned out great!

Verdict: Yum! This one's a keeper.

Flavorful Beef Stir-Fry
(Source: allrecipes.com )

2 tablespoons cornstarch
2 teaspoons sugar
6 tablespoons soy sauce
1/4 cup white wine, apple juice or water
1 pound boneless beef round steak, cut into thin strips
3 cups broccoli florets
2 medium carrots, thinly sliced
1 (6 ounce) package frozen pea pods, thawed
2 tablespoons chopped onion
2 tablespoons vegetable oil, divided
1 (8ounce) can sliced water chestnuts, undrained
hot cooked rice

In a bowl, combine cornstarch, sugar, soy sauce and wine, apple jiuce or water until smooth. Add beef and toss to coat; set aside.

In a large skillet, stir-fry broccoli, carrots, pea pods and onion in 1 tablespoon oil for 1 minute. Stir in water chestnuts. Cover and simmer for 4 minutes; remove and keep warm.

In the same skillet, stir-fry beef in remaining oil until meat reaches desired doneness. Return vegetables to pan; toss. Serve over rice.

Recycle: soy sauce bottle, vegetable oil bottle, water chestnut can

Compost: broccoli stem, carrot skins, onion skins

Monday, February 27, 2006

Chocolate Mint Brownies

Do you like Junior Mints? I do. And I'm sure you've seen recipes for "Junior Mint Brownies" made with Junior Mints. But I like to make everything from scratch so I was excited to find this recipe that seemingly mimicked the Junior Mint recipes without using Junior Mints.

This recipe was nothing but problems. To begin with, I didn't record where I found it and despite numberous internet searches, couldn't locate a source. Scroll down to the recipe and see if you can find another problem. Right you are! There is no oven temperature specified. I used 350F, the temperature used to bake my other favorite brownie recipes. Here's something else I noticed: no baking powder or baking soda. As you can see from the picture, the brownie part stayed flat. Another missing detail: the recipe didn't specify what kind of chocolate to use in the brownie. I opted for unsweetened because of the amount of sugar. I didn't bother with the green food coloring because I didn't have any on hand. The frosting was very stiff and difficult to spread and waaaaaay too minty. It overpowered the chocolate flavors of the brownie and the top chocolate coating. The recipe says to spread the chocolate covering over the frosting. I just poured it on top and then tilted the pan around until most of the frosting was covered. Crude, but it worked. All in all, this recipe was a big disappointment.

Verdict: What were they thinking???

Chocolate Mint Brownies
(Source: Unknown)
Brownies:
2 squares choclate
1/2 cup butter
2 eggs
1 cup sugar
1 cup nuts

Frosting:
1 1/2 cups confectioners sugar
3 tablespoons butter
1 1/2 tablespoons cream
1 teaspoon peppermint extract
2 drops green food coloring

Chocolate covering:
1 square semi-sweet chocolate
1 square unsweetened chocolate
1 1/2 tablespoons butter

Cream 1/2 cup butter with 1 cup sugar. Add eggs and (melted, cooled) chocolate. Add flour and nuts. Mix well. Bake in a greased and floured 9 x 9-inch pan for 20 minutes. Mix frosting ingredients. Allow brownies to cool, frost and place in refrigerator. In double boiler, melt the ingredients for chocolate covering, cool slightly and spread over frosting. When set, cut into squares.

Recycle: peppermint extract bottle, green food coloring bottle

Compost: eggshells

Friday, February 24, 2006

Pizza

I've wanted to make pizza for years but every recipe I've ever come across uses prepared pizza sauce. I want to make my own. I found a promising recipe on the website of Sunset Magazine. I wasn't thrilled with their recipe for the dough. The first sentence was: "Start the dough at least 1 day ahead." Yeah, right. Like that's going to happen. I have enough cookbooks that it should have been easy to find another pizza dough reciep. Surprisingly, it wasn't. I finally found one in a 1996 edition of Betty Crocker (I own several editions). It was quick and easy but I wasn't happy with the taste. Too bland.

The pizza sauce recipe was one of those that sounds delicious on paper, but in reality is just terrible. I'm not a big fan of tomatoes. Tomato sauce, tomato soup, tomato juice are all fine but not tomatoes themselves. The diced tomatoes and tomato paste used in this recipe produced a sauce that was way too "tomato-y" for me. One pound of cheese was also way too much as was the 4 ounces of meat. I ended up using half that much for two pizzas. I opted for pepperoni and mushroom.

Verdict: What were they thinking???

Pizza
(Source: Betty Crocker and Sunset Magazine )


Pizza Dough

1 package regular or quick active dry yeast

1 cup warm water (105F to 115F)

2 1/2 cups all-purpose flour

2 tablespoons olive or vegetable oil

1/2 teaspoon salt

Olive or vegetable oil

Cornmeal

Quick Pizza Sauce

1 can (14 oz., or 1 3/4 cups) chopped or diced tomatoes, undrained

1 can (6 oz.) tomato paste

2 tablespoons chopped fresh basil leaves or 2 teaspoons dried basil

1 1/2 tablespoons extra-virgin olive oil

1 1/2 teaspoons dried oregano

1 1/2 teaspoons sugar

1/2 teaspoon chopped garlic

salt to taste

Toppings

4 cups shredded 100% whole-milk mozzarella cheese (1 lb.)

4 ounces meat such as thinly sliced salami or pepperoni

3 to 4 cups thinly sliced vegetables such as red onions, mushrooms, bell peppers or pitted ripe olives

2 to 4 tablespoons seasonings such as chopped fresh jalapeno chilies or minced garlic (optional)

Dissolve yeast in warm water in medium bowl. Stir in flour, 2 tablespoons oil and the salt. Beat vigorously 20 strokes. Cover and let rest 20 minutes.

Move oven rack to lowest position. Heat oven to 425F. Grease 2 cookie sheets or 12-inch pizza pans with oil. Sprinkle with cornmeal. Divide dough in half; pat each half into 11-inch cicle on cookie sheet with floured fingers. Prick dough thoroughly with fork. Bake about 10 minutes or until crust just begins to brown.

In a bowl, mix sauce ingredients. Spread 3/4 cup sauce over each crust to within 1 inch of edge. Sprinkle with cheese. Top with other ingredients. Bake at 425F about 10 minutes, until cheese is melted and pizzas are bubbly.

Recycle: diced tomato can, tomato paste can, olive oil bottle

Compost: garlic skins

Friday, February 17, 2006

Teriyaki Steak

Always in search of crockpot recipes/beef recipes, I was enticed by this one which fits both bills. Yes! Another Chinese/Japanese recipe. I happen to love teriyaki sauce and this is "make your own"! It seemed like one of those simple recipes that you could just throw into the crockpot without a lot of preparation. It was, but the end result was disappointing. It says to cook on low for 6 to 8 hours. I went with the shorter time because my crockpot tends to run a little hot. I don't know if that was the reason or if it was the recipe itself, but this came out tasting slightly burned. I was very disappointed.

Verdict: Not bad, but I don't think I'll be making this one again.


Teriyaki Steak
(Source: RecipeSource )

2 pounds boneless round steak

1 teaspoon ground ginger

1 tabelspoon sugar

2 tablespoons oil

1/2 cup soy sauce

1 clove garlic, crushed

3 scallions, chopped

1 can Chinese vegetables (optional)

Cut the steak into 1/8 inch slices. Combine the sauce ingredients and scallions in a small bowl. Place the meat in the crockpot and pour sauce over it all. Cover and cook on low for 6 to 8 hours. About 15 minutes before serving, add Chinese vegetables if desired. Serve with rice.

Recycle: oil bottle, soy sauce bottle, Chinese vegetables can

Compost: garlic skin

Monday, February 13, 2006

Best-Ever Chocolate Cake

BHG.com had a slide show on chocolate desserts. One of them was called "Best Ever Chocolate Cake". That sounds like a challenge to me! I looked at the ingredients and couldn't imagine how this recipe could be "Best Ever". First of all, it's made with cocoa. My experience has been that anything made with cocoa is not very "chocolatey". And I LIKE chocolatey. The frosting is made with sour cream! I couldn't even imagine what that must taste like. I accepted the challenge. Hey, it's Valentine's Day. Valentine's Day is all about chocolate!

My problems with this recipe started with the pans. The recipe calls for two 8x8x2-inch square or 9x 1 1/2-inch pans or one 13x9x2-inch pan. The accompanying illustration shows three round layers! Were they three 8-inch layers or three 9-inch layers? I took a look at the frosting recipe and found a clue. It supposedly frosts the tops and sides of two or three 8- or 9-inch cake layers or halve it to frost the top of a 13x9x2-inch cake. I opted for three 8-inch round pans. Turns out that was exactly right! They baked up beautifully.

The frosting was not as beautiful. An 8-ounce carton of sour cream is way too much. The frosting was too runny and much too plentiful for my three layers. I probably could have frosted two three layer cakes with it! It did nothing towards holding the layers together. When I cut the cake, it fell completely apart.

The taste was definitely not "best ever". As I expected, it wasn't chocolatey at all and even worse, it was dry, dry, dry. I like my chocolate cakes to be moist and chocolatey. I didn't care much for the frosting either. I just don't like my frosting to taste of chocolate chips!

Verdict: What were they thinking???

Best-Ever Chocolate Cake
(source: BHG.com )


3/4 cup butter, softened

3 eggs

2 cups all-purpose flour

3/4 cup unsweetened cocoa powder

1 teaspoon baking soda

3/4 teaspoon baking powder

1/2 teaspoon salt

2 cups sugar

2 teaspoons vanilla

1-1/2 cups milk

Chocoalte-Sour Cream Frosting

1. Allow butter and eggs to stand at room temperature for 30 minutes. Meanwhile, lightly grease bottoms of two 8x8x2-inch square or 9x1/2-inch round cake pans. Line bottom of pans with waxed paper. Grease and lightly flour waxed paper and sides of pans. Or grease one 13x9x2-inch baking pan. Set pans aside.

2. In a mixing bowl stir together the flour, cocoa posder, baking soda, baking pwoder; and salt; set aside.

3. In a large mixing bowl beat butter with an electric mixer on medium to high speed for 30 seconds. Gradually add sugar, about 1/4 cup at a time, beating on medium speed until well combined (3 to 4 minutes). Scrape sides of bowl; continue beating on medium speed for 2 minutes. Add eggs, one at a time, beating after each addition (about 1 minute total). Beat in vanilla.

4. Alternately add flour mixture and milk to beaten mixture, beating on low speed just until combined after each addition. Beat on medium to high speed for 20 seconds more. Spread batter evenly into the prepared pan(s).

5. Bake in a 350 degree F oven for 35 to 40 minutes for 8-inch pans and the 13x9x2-inch pan, 30 to 35 minutes for 9-inch pans, or until a wooden toothpick inserted in the center comes out clean. Cool cake layers in pans for 10 minutes. Remove from pans. Peel off waxed paper. Cool thoroughly on wire racks. Or place 13x9x2-inch cake in pan on a wire rack; cool thoroughly. Frost with desired frosting. Makes 12 to 16 servings.

Chocolate-Sour Cream Frosting: In a large saucepan melt 1 12-ounce package (2 cups) semisweet chocoate pieces and 1/2 cup butter over low heat, stirring frequently. Cool for 5 minutes. Stir in 1 8-ounce carton dairy sour cream. Gradually add 4-1/2 cups sifted powdered sugar (about 1 pound), beating with an electric mixer until smooth. This frosts tops and sides of two or three 8- or 9-inch cake layers. (Halve the recipe to frost the top of a 13x9x2-inch cake.) Cover and store frosted cake in the refrigerator.

Recycle: vanilla extract bottle

Compost: eggshells

Sunday, February 12, 2006

OldRoses' Chocolate-Dipped Valentine Heart Cookies

Your wish is my command. Susan requested my "regular" Valentine cookie recipe. It's a two parter. I saw the idea in that same "First Magazine" that I found so many recipes that became staples in my kitchen. This one was from the February 10, 1992 edition. I like to keep things simple, so I eliminated the white chocolate and assorted colored sugars, sprinkles tinted coconut, etc. that were suggested as toppings. I also doubled the amount of chocolate chips and shortening so there would be enough to cover all the cookies. Then I substituted my favorite sugar cookie recipe from my favorite cookbook, Betty Crocker, for the one used in the magazine. That one called for zest from 2 oranges. I wasn't thrilled with the thought of orange-flavored cookies. And I tinted the dough pink in honor of Valentine's Day. No pictures this time. You just have to imagine the Half-Hearted Valentine Cookies in pink!

Verdict: Yum! This one's a keeper.
OldRoses' Chocolate-Dipped Valentine Heart Cookies
(Source: OldRoses)
1 recipe Deluxe Sugar Cookies
Red food coloring
2 cups semi-sweet chocolate chips (12 ounces)
4 tablespoons shortening
Mix cookie dough as directed. Using red food coloring, tint dough pink. Cut out with heart shaped cookie cutters and bake as directed.
Melt chocolate chips and shortening in micro-wave in a deep bowl. Dip 1 side of each cookie into the chocolate and let excess drip off. Scrape bottom edge against bowl to remove last of the excess chocolate. Put on sheets of waxed paper to set.
Deluxe Sugar Cookies
(Source: Betty Crocker Cookbook)
1 cup butter or magarine, softened
1 1/2 cups confectioners' sugar
1 egg
1 teaspoon vanilla
1/2 teaspoon almond extract
2 1/2 cups all-purpose flour
1 teaspoon soda
1 teaspoon cream of tartar
Mix thoroughly butter, confectioners' sugar, egg, vanilla and almond extract. Blend in flour, soda and cream of tartar. Cover, chill 2 to 3 hours or overnight.
Heat oven to 375F. Divide dough in half. Roll each half 3/16 inch thick on lightly floured pastry cloth. Cut into desired shapes. Place on lightly greased baking sheet. Bake 7 to 8 minutes or until light brown on edge.
About 5 dozen 2 to 2 1/2 inch cookies
Recycle: vanilla extract bottle, almond extract bottle, food coloring bottle
Compost: eggshell

Friday, February 10, 2006

Sweet, Hot, and Sour Meatballs

I have to stop trying recipes that use prepared mustard. All I taste is the mustard. And there are just certain things that should never be eaten with mustard. Meatballs definitely fall into that category. I was intrigued by this recipe because of the unique combination of ingredients. Uniquely awful, as it turns out. What was I thinking? Mustard and apple juice and apple jelly? I have absolutely nothing good to say about this dish. The sooner I can get this posted and begin forgetting I ever made it or tasted it, the happier I will be.

Verdict: What were they thinking???


Sweet, Hot, and Sour Meatballs
(Source: BHG.com )
1/2 cup refrigerated or frozen egg product, thawed
1/2 cup fine dry bread crumbs
1/2 cup finely chopped onion
1/4 cup milk
1/2 teaspoon salt
1/2 teaspoon black pepper
1 pound bulk pork sausage
1 pound ground beef
3/4 cup apple jelly
1/3 cup spicy brown mustard
1/3 cup whiskey or apple jiuce
1-1/2 teaspoon Worcestershire sauce
Few dashes bottled hot pepper sauce
1. In a large bowl combine egg product, bread crumbs, onion, milk, salt, and pepper. Add sausage and beef; mix well. Shape into 48 meatballs. Place meatballs in a shallow baking pan. Bake, uncovered, in a 375 degree F oven about 30 minutes or until done (160 degree F). Remove from oven; drain.
2. Meanwhile, in a large saucepan stir together jelly, mustard, whiskey, Worcestershire sauce, and bottled hot pepper sauce. Heat and stir until jelly melts and mixture bubbles. Add meatballs, stirring gently to coat. Cook for 3 to 5 minutes or until sauce thickens slightly and meatballs are coated.
Makes 24 servings (48 meatballs)
Recycle: jelly jar, mustard jar, whiskey or apple juice bottle, Worcestershire sauce bottle
Compost: onion skins

Monday, February 06, 2006

Half-Hearted Valentine Cookies

I have a recipe for Valentine cookies that I have used for years. It's just a sugar cookie recipe that I tint pink, cut out with a heart-shaped cookies cutter and dip in a chocolate glaze. But I'm always on the lookout for new recipes and this one seemed an interesting variation. I was a bit leery of the peppermint extract and the plain color didn't appear terribly appetizing. I forged ahead anyways.

The cookie part of the recipe went fine other than the strong smell of peppermint. I ran into trouble with the glaze. The glaze I normally make is chocolate chips and shortening. This one is chocolate chips and butter. Richer (which is good!) but also thicker, which as it turns out, was not good. I broke a few cookies trying to scrape off the excess off of the back of them. I also ran out of glaze before I was halfway through because it was so thick. The thinner glaze that I normally use goes much further. I made another batch of glaze and soldiered on.

These cookies have to be refrigerated for the chocolate to set correctly. To accomplish this feat you need three to four cookie sheets covered with waxed paper and a nearly empty refrigerator. I'm fortunate. I live alone so my refrigerator is pretty empty most of the time. I can't imagine how a normal family with a full refrigerator could possibly fit that many cookie sheets in without emptying it out.

In the end, I felt it wasn't worth the effort. I just didn't care for peppermint cookies although the glaze was pretty good. I was rushing to finish these because I wanted to bring them to a meeting. I forgot to take pictures before I left. No matter, I could take pictures there. But I forgot my camera. No problem, I could take pictures of the leftovers when I got home. But there were no leftovers. Some of the attendees liked the cookies so much, they eagerly took home all of the leftovers. One woman even requested the recipe! I found the picture below on the Lane O Lakes website. I also noticed that they have changed the recipe for the glaze from butter to shortening.

Verdict: I didn't care for them, but other people loved them.

Half-Hearted Valentine Cookies
(Source: Favorite Brand Name Cookie Collection)

Cookies

3/4 cup sugar

1 cup Land O Lakes butter, softened

1 package (3 ounces) cream cheese, softened

1 egg

1 teaspoon peppermint extract

3 cups all-purpose flour

Glaze

1 cup semi-sweet real chocolate chips

1/4 cup Land O Lakes butter

For Cookies, in large mixer bowl, combine sugar, butter, cream cheese, egg and peppermint extract. Beat at medium speed, scraping bowl often, until light and fluffy. Add flour; beat until mixed. Divide dough into halves. Wrap in waxed paper. Refrigerate until firm, at least 2 hours.

Preheat oven to 375F. Roll out dough on lightly floured surface to 1/4-inch thickness. Cut out with floured heart-shaped cutters. Place 1 inch apart on ungreased cookie sheets. Bake for 7 to 10 minutes, or until edges are very lightly browned. Remove immediately; cool completely on wire racks.

For Glaze, in small saucepan, melt chocolate and butter, stirring occasionally, over low heat until melted, 4 to 6 minutes. Dip half of each heart into chocolate. Refrigerate on waxed paper-lined cookie sheet until chocolate is firm. Store, covered, in refrigerator.

Makes about 3 1/2 dozen cookies

Recycle: peppermint extract bottle

Compost: eggshell

Friday, February 03, 2006

Kung Pao Chicken

I seem to be making a lot of Chinese recipes lately. Not only do I like the flavors, but also the veggies. I'm not a big cooked veggie eater. Another leftover from my mother who couldn't cook. Her idea of making vegetables was to open a can, pour it into a pan and then boil it to death. Imagine my surprise years later to discover that veggies aren't supposed to be mushy and tasteless. I like them best raw now. My second favorite is steamed or stir-fried. This recipe calls for broccoli, not one of my favorites but with a good sauce, even broccoli can be tasty.

Szechuan is spicy and I love spicy. Crushed red pepper . . . yum! I tried substituting grated ginger from my frozen stock, but that didn't work well so I resorted to the dried. And I left out the peanuts. But it was still fantastic! I can't wait for shrimp to go on special at my grocery store. I think this would be even better made with shrimp instead of chicken.

Verdict: Yum! This one's a keeper.


Kung Pao Chicken
(Source: Cooking Light, December 2005)
1 tablespoon canola oil, divided
4 cups broccoli florets
1 tablespoon ground fresh ginger, divided
2 tablespoons water
1/2 teaspoon crushed red pepper
1 pound skinless, boneless chicken breasts, cut into 1/4-inch strips
1/2 cup fat-free, less-sodium chicken broth
2 tablespoons hoisin sauce
2 tablespoons rice wine vinegar
2 tablespoons low-sodium soy suace
1 teaspoon cornstarch
4 garlic cloves, minced
1 tablespoons coarsely chopped salted peanuts
Heat 1 teaspoon oil in a large nonstick skillet over medium-high heat. Add broccoli and 2 teaspoons ginger to pan; saute 1 minute. Add water. Cover; cook 2 minutes or until broccoli is crisp-tender. Remove broccoli from pan; keep warm.
Heat remaining 2 teaspoons oil in pan; add remaining 1 teaspoon ginger, crushed red pepper, and chicken. Cook 4 minutes or until chicken is lightly browned, stirring frequently.
Combine broth and next 5 ingredients (through garlic) in a small bowl, and stir with a whisk. Add broth mixture to pan; cook 1 minute or until mixture thickens, stirring constantly. Return broccoli mixture to pan; toss to coat. Sprinkle with peanuts.
Yield: 4 servings
Recycle: hoisin sauce bottle, rice wine vinegar bottle, soy sauce bottle
Compost: broccoli stem, garlic skins

Monday, January 30, 2006

Cheesecake Sampler

Cream cheese went on special this week so it was time to try out a cheesecake recipe from the free "Little Book of Cheesecakes" that I ordered a new cookbook to get. There are two recipes for New York style cheesecakes in it. One is a cheesecake sampler, i.e. each piece has a different topping, and the other is plain. They are made in different size pans which was the deciding factor for me. The plain one requires a 7" springform pan. My springform pan is a standard 9" one as required by the sampler recipe. So that's the one I made sans the myriad toppings.

This one is definitely an adventure. I don't think I've ever made anything that required 7 eggs and 3 containers of sour cream. Nor have I ever baked anything that had to sit in an unheated oven for 4 hours. It is also probably the heaviest baked good I have ever made. But in the end, it was all worth it. This is by far the best cheesecake recipe I have ever made and comes very close to being the best cheesecake I have ever tasted.

Verdict: Yum! This one's a keeper.

Cheesecake Sampler
(Source: Southern Living Little Book of Cheesecakes)


2 cups graham cracker crumbs
1/2 cup butter or margarine, melted
2 tablespoons sugar
4 (8-ounce) packages cream cheese, softened
1 3/4 cups sugar
7 large eggs
3 (8-ounce) containers sour cream
1 tablespoon vanilla extract


Combine first 3 ingredients; stir well. Press mixture firmly into bottom and up sides of a lightly greased 9-inch springform pan. Chill thoroughly.

Beat cream cheese at high speed with a heavy-duty electric mixer until fluffy. Gradually add 1 3/4 cups sugar, beating well. Add egs, 1 at a time, beating well after each addition. Add sour cream and vanilla; beat at low speed until smooth. Pour into prepared pan. Bake at 300 degrees for 1 hour and 25 minutes. Turn off oven, and leave cheesecake in oven 4 hours. (Do not open oven door.)

Remove cheesecake from oven; cool completely on a wire rack. Cover and chill 8 hours. Gently run a knife around edge of cheesecake to relese sides of pan; carefully remove pan; transfer cheesecake to a serving platter. Cut into 8 wedges; top each slice with desired Cheesecake Toppings.

Recycle: vanilla extract bottle

Compost: eggshells