Showing posts with label pies. Show all posts

Wednesday, December 15, 2010

Rustic Pear Pie

I’ve had a heavenly recipe for sweet potato pie bookmarked for quite a while. I was sure that I could use it for our Healthy Thanksgiving. Sweet potatoes are healthier than pumpkins. But, like regular potatoes, the problem was what was added to them to make the pie filling: butter, sugar, milk and eggs.

Back to the drawing board or, rather, my recipe basket. I have a large basket where I throw copies of interesting recipes I come across in print publications. I knew that somewhere in that basket was a recipe for a pear pie that did not involve most of the unhealthy ingredients found in pumpkin and sweet potato pie recipes. It took a little digging, but I found it. It was part of a menu from the April 1, 2006 issue of Family Circle Magazine.

The recipe calls for a prepared piecrust. I opted for a homemade one using a recipe from Martha Stewart. I called on A’s expertise (she works in the nutrition field) to determine which was healthier, shortening or butter. She recommended I go with butter because it has far less trans-fats than shortening. With this in mind, I used Martha’s Basic Pie Crust which makes enough for a single crust pie.

I liked this recipe because it uses a food processor to blend the ingredients. I was surprised at how effortlessly the pastry came together. I’m seriously considering using my food processor for all of my pie crusts despite the fact that it is a pain to clean. This was also the easiest pastry I have ever rolled. In the future, I think I will use a shortening crust with this recipe because when it came time to fold the pastry over the pear filling, the pastry was quite limp. Instead of forming a nice pocket as you would expect from a stiffer shortening crust, Martha’s butter crust was more like wrapping the filling in a scarf.

I discovered that my A&P carries three varieties of pears, Anjou, Bartlett and Bosc. I don’t know if there are any taste differences but in terms of size, three Bartlett pears weigh almost exactly 1 ½ pounds as called for in the recipe. The recipe doesn’t specify that you should peel the pears but I couldn’t imagine that leaving the skins on would enhance the flavor or texture, so I peeled them. Unlike the Mushroom-Wild Rice stuffing, the 1/8 teaspoon of nutmeg enhanced, rather than overpowered, the pears and brown sugar. I left out the butter and could also have skipped the milk and sugar on the crust.

The end result was delicious. The recipe recommends the pie be served warm but I also liked it straight out of the refrigerator the next day. I’ve now added another fruit pie to my small repertoire.

Verdict: Yum!! This one’s a keeper!!


Basic Pie Crust
(source: Martha Stewart)


1 ¼ cups all-purpose flour (spooned and leveled), plus more for rolling
½ teaspoon salt
½ teaspoon sugar
½ cup (1 stick) cold unsalted butter, cut into pieces
2 to 4 tablespoons ice water


In a food processor, briefly pulse flour, salt, and sugar. Add butter; pulse until mixture resembles coarse meal, with a few pea-size pieces of butter remaining. Sprinkle with 2 tablespoons ice water. Pulse until dough is crumbly but holds together when squeezed (if necessary, add up to 2 tablespoons water, 1 tablespoon at a time). Don’t overmix.

Turn dough out onto a large piece of plastic wrap. Fold plastic over dough; press to shape into a 1-inch-thick disk. Refrigerate until firm, at least 1 hour (or up to 3 days).

On a floured piece of parchment paper, roll dough to a 14-inch round with a floured rolling pin. Wrap dough around rolling pin, discarding paper; unroll over a 9-inch pie plate. Gently fit into bottom and up sides of plate (do not stretch dough).

Using kitchen shears, trim dough to a 1-inch overhang. Fold under itself to form a rim, and press to seal. Using thumb and forefinger, crimp rim of crust. Refrigerate until ready to use, up to 1 day.

One 9-inch crust.


Rustic Pear Pie
(source: Family Circle Magazine, April 1, 2006 issue)


3 ripe but firm Bartlett pears (about 1 ½ pounds total)
¼ cup light-brown sugar
⅛ teaspoon ground nutmeg
1 refrigerated prepared piecrust (from a 15-ounce box)
1 tablespoon unsalted butter, cut up
1 tablespoon heavy cream or milk


Heat oven to 400°.

Cut pears in half; remove cores. Cut in thin slices. In large bowl, toss with 3 tablespoons of the sugar and the nutmeg.

Place piecrust on work surface; gently roll out to 14 inches in diameter and place on ungreased baking sheet. Mound pear slices in center, leaving a 2-inch border. Dot butter over pears. Fold edge of crust up and partway over filling. Repair any tears by pressing pastry together. Brush pastry edge with cream. Sprinkle with the remaining sugar.

Bake on the bottom shelf at 400° for 35 minutes until filling is hot and crust is golden; place foil loosely over pie if crust browns too quickly. Let cool on pan or rack 10 minutes before serving. Can be baked ahead and reheated at 400° until warmed through. Serve with ice cream, if desired.

Compost: pear cores and skins

Wednesday, September 15, 2010

Piecrust

One would think by now that I would have learned the two most important rules in cooking: Never try out a new recipe when company is coming for dinner and never, ever enter an untried crust recipe in a pie baking contest.

Even I can’t believe that I had no idea how the crust tasted when I entered my pie on Saturday morning. Especially considering what I had gone through to get to that point. The Granny Smith apples that I had used in last year’s filling were a disaster. They were too tart and too hard. I don’t like my apple pies to be crunchy. Since I was going back to my regular filling, I decided that I needed to change my crust recipe. I took a peek into my Silver Palate Cookbook and fell in love. Pastry crusts with shortening or butter are familiar, but one with both? And who puts sugar in their pie crusts? I had to try it out.

I have arthritis in my hands, so mixing stiff pastries is difficult for me. I used chilled butter, but opted for room temperature shortening. Mixing wasn’t as difficult as I anticipated so I probably could have used chilled shortening also. As for the ice water, I distinctly remember the woman who gave me the cookbook and who was also the most fabulous cook I had ever met, told me that ice water in pie crusts was absolutely necessary. Cold water wouldn’t do. It had to be ice water. So I gamely filled my glass measuring cup with water and dropped ice cubes in to create my ice water.

I used a pastry blender to mix my ingredients but balked at tossing it with a fork after adding the ice water. In the past, I have tried using my favorite wooden spoon to blend in water with disastrous results. I always use my pastry blender. Judging from A’s comments after tasting the crust, perhaps I should have used a fork. I also skipped the "smearing" step. I couldn’t see the point.

Not surprisingly, the toughest part was trying to roll out chilled pastry. I couldn’t find my heavy maple rolling pin so I had to use my lighter everyday rolling pin. I wasn’t able to roll the pastry as evenly or as thinly I wanted. Big disappointment.

Something I should have remembered about pastry dough using butter is that it browns/burns more easily than pastry dough using shortening. I should have left my aluminum foil edging on longer than I usually do. I wasn’t happy with how brown the edges became.

As for the big taste test, I was happy with it because it tasted much less flour-y and dough-y than my usual Betty Crocker recipe. A had a different take on it. She pointed out that it was tough. There are two things that can make a crust tough: too much flour and too much handling. I think that I was guilty of both.

A just got a new silicone mat that she is raving about. I am still using my old fashioned pastry cloth to roll my pastry. I have to use a lot of flour to keep my pie crusts from sticking to it and my rolling pin. I’m definitely going to take A’s advice and invest in some new technology.

And now I understand the "smearing" step. In my zeal to mix the water and dry ingredients, I probably went overboard with the pastry cutter. If I had tossed it with a fork and then smeared the result on the counter (or a new-fangled silicone mat), I could have mixed the ingredients just as effectively but with a lot less handling.

I’m going to try this recipe again but follow the directions to the letter. If the result is still not great, I have plenty of time to find a new crust recipe for next year’s apple pie baking contest!

Verdict: Needs a do-over


Piecrust
(Source: The Silver Palate Cookbook)


2 ½ cups unbleached all-purpose flour
2 teaspoons granulated sugar
1 teaspoon salt
8 tablespoons (1 stick) sweet butter, chilled
6 tablespoons vegetable shortening, chilled
5 to 6 tablespoons ice water, as needed

Sift flour, sugar and salt into a mixing bowl. Add chilled butter and shortening. Working quickly and using your fingertips or a pastry blender, rub or cut fat into dry ingredients until the mixture resembles coarse meal.

Sprinkle on ice water, 2 to 3 tablespoons at a time, and toss with a fork. Turn dough out onto your work surface, and, using the heel of your hand, smear dough away from you, about ¼ cups at a time. Scrape it up into a ball and wrap in wax paper. Chill in refrigerator for 2 hours.

Roll dough out to ¼-inch thickness on a floured work surface. Line a 9-inch pie plate with half of the dough. Crimp edges for a single-crust pie.

For prebaking, line dough in the pie plate with foil and fill with beans or rice. Bake in a 425°F oven for 8 minutes, then remove beans and lining. Prick bottom of dough with a fork and return pie plate to oven to 10 to 13 minutes longer, or until crust is golden brown.

Makes one 9-inch double crust, or two 9-inch single crusts.

Wednesday, January 27, 2010

Pecan Pie

Pecan pie seemed like the obvious choice for dessert for the Nutty Thanksgiving. Only, I’d never made it before and was a bit uncertain about it. I wasn’t sure what all went into one, and for some reason was expecting it to be somewhat complicated.

After a bit of online research, I discovered that some recipes call for molasses. I liked this because I had had to purchase some to make gingerbread, and I wasn’t sure what I was going to do with the rest, so I was glad to find a way to use some of it up.

This particular recipe caught my attention not only because it uses molasses but also because the writer claimed that it was not overly sweet. I like pecan pie, but it can be too sweet, and I wanted to avoid that.

And the writer was correct. This pie is tasty and not obnoxiously sweet. We both agreed on that. It’s also ridiculously easy. Especially if you use a purchased pie crust (which I didn’t , as is probably obvious from the photo). Literally, a child could make this. You just mix everything and pour it over the pecans, and they magically rise to the top. Why have I never tried this before?

Verdict: Yum! This one's a keeper!

Pecan Pie
(source: Simply Recipes, http://simplyrecipes.com/recipes/pecan_pie/

2 eggs, slightly beaten
1 cup light corn syrup
1/4 cup brown sugar
1 Tbsp molasses
2 Tbsp melted butter
2 Tbsp flour
1/4 teaspoon salt
1 teaspoon vanilla
1 1/4 cups pecans, coarsely chopped

1 9-inch pie shell, chilled for an hour if freshly made, defrosted for 10 minutes if frozen.

Preheat oven to 375°F. Spread pecans along the bottom of the pie shell. Mix the remaining ingredients and pour over pecans. The pecans will rise to the surface of the pie.

Bake at 375°F for 45-50 minutes until the filling has set. About 20 minutes into the cooking you may want to use a pie crust protector, or tent the edges of the pie crust with aluminum foil to prevent the pie crust edges from burning.

Remove from oven and let cool completely.

Serves 8.

Recycle: corn syrup bottle, molasses jar, vanilla bottle

Compost: eggshells

Sunday, December 27, 2009

Chocolate Tart with Hazelnut Shortbread Crust

As long as I was going to be doing something completely different for Christmas dinner, I wanted something really spectacular for dessert. It would have to be chocolate and totally unlike anything I had ever attempted. That’s a pretty tall order. I surprised myself, finding exactly what I wanted rather quickly: Chocolate Tart with Hazelnut Shortbread Crust. Mmmm…chocolate…hazelnut…shortbread. Perfection.

I decided to go all out and buy a tart pan rather than making do with a pie plate. And so began The Great Tart Pan Hunt. The hunt spanned two days and three malls. I visited kitchen specialty stores including my favorite, Williams Sonoma, and various department stores. And came up empty. Either the store(s) didn’t carry tart pans or they had tart pans but in the wrong size or carried a glorified pie plate (slanted sides) with little ridges on the inside giving the illusion of a tart pan as opposed to a tart pan with straight, crimped sides.

In the end, I was forced to do what I had been trying to avoid. I went to Amazon.com. There, I found a nice selection of tart pans in various sizes, manufacturers and materials. I read all of the reviews and ordered that one that best suited my recipe. I hate malls, especially during the holiday season, but in these difficult economic times, I was willing to make an exception and brave the crowds to help out my local brick and mortar stores. But I can’t help them if they don’t have the merchandise I need.

I had another briefer hunt, for unflavored gelatin. Three grocery stores before I found anything other than Jello. Buying Kahlua was a whole lot easier. In fact, I had a choice of sizes and purchased a smaller bottle. The recipe called for 1 tablespoon so normally I would have left it out, but I had other plans for the Kahlua. I did skip the hazelnut oil, substituting canola oil. I happened to have whole-wheat flour on hand. Not the pastry flour as called for in the recipe, but I thought I could substitute it with no problem. Another substitution that I made that worked out well was lightly rubbing canola oil on the tart pan in place of the recommended cooking spray of which I had none.

I used the egg whites from the two yolks instead of dried egg whites. There is a note accompanying this recipe that dried egg whites are pasteurized and a wise choice when making an uncooked filling. Thankfully, using raw egg whites was not detrimental to my health and I was able to sample this dish and review it.

When I first read over this recipe, it seemed incredibly complex. I hate recipes that have too many steps, but I found that by following each step exactly, everything flowed beautifully. It was surprisingly easy to make.

As for the taste, well that was a little disappointing. The hazelnut shortbread crust was heavenly. It would make a great cookie. The filling was too light, both the texture and the taste. I would have preferred a denser texture and more chocolate-y taste. Overall though, it wasn’t bad.

Verdict: Not bad, but I won’t be making this again


Chocolate Tart with Hazelnut Shortbread Crust
(source: EatingWell: November/December 2008)


Crust
1 cup whole-wheat pastry flour
¼ cup all-purpose flour
½ cup hazelnuts
¼ cup sugar
½ teaspoon salt
4 tablespoons cold unsalted butter, cut into small pieces
2 tablespoons hazelnut oil, or canola oil
1 tablespoon ice water

Filling
1 ½ teaspoons unflavored gelatin
1 tablespoon water
¾ cup low-fat milk
2 large egg yolks
2 ½ tablespoons plus ¼ cup sugar, divided
1 tablespoon all-purpose flour
2 ounces unsweetened chocolate, finely chopped
1 tablespoon coffee liqueur, such as Kahlua (optional)
4 dried egg whites, reconstituted according to package directions (equivalent to 2 egg whites)
1/8 teaspoon cream of tartar

Preheat oven to 400°F.

To prepare crust: Coat a 9-inch tart pan with cooking spray. Combine whole-wheat pastry flour, ¼ cup all-purpose flour, hazelnuts, ¼ cup sugar and salt in a food processor; process until the nuts are finely ground. Add butter one piece at a time, pulsing once or twice after each addition, until incorporated. Add oil and ice water and pulse just until incorporated. Turn the dough out into the prepared pan (it will be crumbly), spread evenly and press firmly into the bottom and all the way up the sides to form a crust.

Bake the crust until set and the edges are beginning to brown, about 15 minutes. Let cool on a wire rack.

To prepare filling: Sprinkle gelatin over water in a small bowl; let stand, stirring once or twice, while you prepare the rest of the filling.

Heat milk in a medium saucepan over medium heat until steaming (but not boiling); remove from the heat to cool slightly.

Whisk egg yolks, 2 ½ tablespoons sugar and 1 tablespoon flour in a medium bowl until combined. Gradually whisk in ½ cup of the hot milk. Whisk the egg yolk mixture into the pan with the remaining hot milk. Return to the heat and cook, stirring constantly, until the mixture thickens enough to coat the back of a spoon (do not boil), about 1 minute. Remove from the heat; whisk in chocolate until completely melted. Whisk in the softened gelatin and coffee liqueur (if using) until smooth.

Beat reconstituted egg whites and cream of tartar in a large bowl with an electric mixer on low speed until frothy. Increase speed to high and beat until soft peaks form. Gradually add the remaining ¼ cup sugar and beat until stiff peaks form, 3 to 5 minutes. Gently fold the chocolate custard into the egg whites until blended. Spoon the filling into the crust; smooth the top with the back of a spoon and chill, uncovered, until set, about 1 hour.

Recycle: oil bottle, milk bottle, Kahlua bottle

Compost: egg shells

Thursday, November 26, 2009

The Wooden Spoon Cooks Go Nuts!


A and I had so much fun doing a themed Valentine’s Day Dinner that we decided to cook a themed Thanksgiving Dinner. A suggested “nuts” which is appropriate for the season as well as our state of mind. We dove into cookbooks and surfed the net looking for dishes with nuts as ingredients and/or “nuts” in their title. Stay tuned for the recipes and our reviews.

We hope that you enjoy our Nutty Thanks giving as much as we did.

Sunday, September 21, 2008

The Wooden Spoon Cooks Face-off in a Bake-off

Hageman Farm, a nineteenth century farmhouse preserved by The Meadows Foundation, held their first annual Fall Festival today. In keeping with the autumnal theme and heirloom apples that were offered to the public to try, an Apple Pie Tasting Contest was held. The chairperson of the committee that oversees Hageman Farm invited the Wooden Spoon cooks to participate.

We took up the challenge with gusto. Last night saw us in our respective kitchens, furiously peeling and slicing apples and carefully rolling out pastry. Then came the nerve-wracking drive this morning to the site, each of us with one eye on the road and the other on our precious cargo. Both pies made it intact, joining the other entrants in the antique dining room.


We were able to relax for a while before the judging began. We toured the beautiful site, inspecting the careful renovations underway at the farmhouse, carriage house and cowbarn. Photos of Hageman Farm can be seen on Flickr.

Then the eagerly anticipated judging began. Participants were asked to wait outside while their pies were being evaluated on crust, appearance, filling and flavor. We sat on a bench under a tree and pretended to admire the zinnias lining the walk to the porch while making nervous small talk.


After what seemed like an eternity, the judges announced that they had reached their decision and the bakers filed into the dining room. Imagine our excitement to hear that the there had been a virtual tie for the third place between A’s pie and OldRoses’ pie! Since only one award could be given, the judges ruled in favor of OldRoses.


Did they make the right choice? We invite our readers to decide for themselves. Try A’s apple pie recipe and OldRoses’ apple pie recipe. Then leave us a comment to let us know which pie was the winner in your kitchen.

After the contest, the pies were offered to the public to taste. A took the opportunity to try the other entries. She has decided to adjust the spices in her recipe. OldRoses had another event to attend today so she didn’t have a chance to try the other pies. But keeping in mind the judges’ seeming preference for tartness, she is going to change the variety of apples used in her recipe.

Be sure to check back with us next September to see what tweaks we made to our apple pie recipes and how we fared in the Hageman Farm Second Annual Apple Pie Tasting Contest.

Saturday, September 20, 2008

OldRoses' Apple Pie

A and I have been invited to participate in an apple pie baking contest tomorrow. The timing couldn’t be more perfect. I always make my annual apple pie in September when the Macintosh apples are in season. Like my blueberry pie and pumpkin pie, I use a recipe from my trusty Betty Crocker cookbook. The only changes I have made is to use Macintosh apples instead of the Granny Smith that are called for in the recipe and add extra shortening to the crust to make it flakier.

I’m very nervous about this pie. Not only is appearance (not one of my strong suits) critical, but it has to be baked in a foil pan. I always bake my pies in the same pie plate that I’ve had since my college days. I have no idea exactly how old it is. It came from the house of a friend’s grandparents that was being cleaned out. It’s ugly, but I swear by it.

I’ve never baked a pie in a foil pan. I have no idea how much filling it will hold or how it will affect the cooking in the oven. I’m just going to have to cross my fingers and hope for the best.

Verdict: Yum!! This one’s a keeper!!

Apple Pie
(source: Betty Crocker Cookbook)


OldRoses’ Pie Crust
2 cups all-purpose flour
1 teaspoon salt
¾ cup shortening
5 tablespoons cold waer


Filling
¾ cup sugar
¼ cup all-purpose flour
½ teaspoon nutmeg
½ teaspoon cinnamon
Dash salt
6 cups thinly sliced Macintosh apples (approximately 6 medium)


Heat over to 425°F.

Stir together sugar, flour, nutmeg, cinnamon and salt; mix with apples. Set aside.

Measure flour and salt into bowl. Cut in shortening thoroughly. Sprinkle in water and mix until all flour is moistened and dough almost cleans side of bowl. (1 to 2 teaspoons water can be added if needed.)

Gather dough into ball; shape nto flattened round on lightly floured pastry cloth. (For two-crust pie, divide dough in half and shape into 2 flattened rounds). With floured rolling pin, roll dough 2 inches larger than inverted pie pan. Fold pastry into quarters; unfold and ease into pan.

Turn apple filling into pastry-lined pan. Trim overhanging edge of pastry ½ inch from rim of pan. Cover with top crust; seal and flute. Make slits in top crust to let steam escape. Cover edge with 2- to 3-inch strip of aluminum foil to prevent excessive browning; remove foil last 15 minutes of baking.

Bake 40 to 50 minutes or until crust is brown and juice bgins to bubble through slits in crust.

Makes one 9” pie.

Compost: apple peels and cores

Sunday, January 13, 2008

A's Top Secret Apple Pie

There’s nothing better than the aroma of an apple pie baking. (Except maybe the aroma of a batch of cranberry–orange relish simmering on the stove.) So I offered to take an apple pie to our Thanksgiving dinner (and I’m sorry for the delay in getting this recipe posted; the holidays are always hectic). The recipe I use is one I came up with after some experimentation. It’s basically a combination of several recipes with some tweaking of the spices. I’m not a huge fan of cinnamon, or more accurately, I prefer more complex flavors, so my recipe has more than just cinnamon in it. I saw lemon juice and zest used in another recipe and added them to mine as I’d already learned the value of lemon zest from my experiences with German cookie recipes. Germans use lemon zest in recipes a lot; it adds a wonderful, sweetish touch, not sour like you might think.

This may sound odd, but I’m not particularly picky about a) the crust recipe, or b) which apple varieties I use. I haven’t done a lot of experimenting, but I can’t say I’ve noticed a huge flavor difference due to variety. As for the crust recipe, this one is from epicurious.com, but feel free to use your own favorite. I know people have serious differences of opinion as to whether crusts should be made with lard or butter or Crisco or what, but I’m not going to go there. I usually use margarine simply because that’s what I usually have on hand. I have noticed, though, that dough made with margarine seems to need considerably less water. In case you aren’t already familiar with my favorite trick for moving pie crusts without cracking them, you can read about it in this post.

Then there’s the issue of baking temperature. My Better Homes and Gardens cookbook says to bake at 400 degrees for 50 minutes. Other recipes I’ve seen suggest baking at 400 for only the first 10 or 15 minutes, then turning the oven down to 375 and baking for an hour or more. I don’t have a strong preference on this point either. The main thing, I’ve found, is to get the pie to the point where the juices are bubbly and thickening, otherwise the pie will be runny. Of course, you also have to watch so the crust doesn’t burn!

One final note: When I started baking apple pies, they would end up with a huge gap between the top crust and the fruit, because the fruit cooks down as the pie bakes. I eventually discovered that this can be mitigated by carefully arranging the apple slices so they’re packed in well, rather than just dumping the slices in the crust.

Verdict: Yum! This one’s a keeper!

A's Top Secret Apple Pie


Crust: (source: Jasper White's Cooking from New England | June 1998, via epicurious.com)

2 cups flour
½ teaspoon salt
12 tablespoons (1 ½ sticks) unsalted butter, cold
about 7 tablespoons water, ice cold

Filling:

2 tablespoons flour
½ teaspoon cinnamon
½ teaspoon ginger
¼ teaspoon nutmeg
½ teaspoon vanilla
¼ cup packed brown sugar
½ cup sugar
grated peel and juice of 1 lemon
5-6 apples

1. Mix together the flour and salt. Cut the butter into pieces the size of a walnut (about 1 1/2 tablespoons). Mix the flour and butter together in a large bowl, using only your hands, until the butter begins to break up.

2. When the flour has just begun to pick up a little color from the butter, add the water, a bit at a time, and mix until the dough starts to come together. Since the exact amount of water needed will always vary, you have to develop a feel for how much to use.

3. Remove the dough from the bowl to a floured surface and knead briefly, just until the dough begins to smooth out. Wrap in waxed paper or plastic wrap and refrigerate immediately. Allow the dough to rest for at least 30 minutes.

4. Mix together all the filling ingredients except the lemon juice and apples in a large bowl. Peel, core, and slice the apples . Add the apples to the bowl, squirt with lemon juice, and stir to coat with the other ingredients.

5. Divide the dough in half. Place one half on a floured surface; return the other half to the refrigerator. You may need to let the dough warm up for a few minutes until it’s pliable enough to be rolled without cracking. Pat it into a flat circle, then roll it into a thin (about ¼ inch thick) circle. Line a 9” pie pan, then add the filling.

6. Roll out the other half of the dough. Transfer it to the pie plate and cut vents, for a solid top crust. For a lattice top, cut the dough into strips and lay them evenly vertically across the pie. Then lay the remaining strips horizontally, carefully flipping back alternate vertical strips to “weave”. Then wet the edges where the two crusts join, to form a seal. Using your thumb and index finger, crimp them together.

7. Bake at 400 degrees for about 50 minutes, or until the juices are thick and bubbly and the crust is golden. If parts of the crust brown too quickly, cover with foil.

Recycle: vanilla bottle, spice containers (if glass or plastic)

Compost: apple peelings and cores (Note: I understand you’re not supposed to compost citrus peels; the bugs don’t like them.)

Saturday, October 06, 2007

Blueberry Pie

Fall is late this year. Normally by now the weather has cooled off and I am cooking up a storm. This year the temperatures have stayed in the 80’s and even slipped into the 90’s a few times in September and October. The weather reports keep promising cooler temperatures and much needed rain but Mother Nature has other plans. My annual apple pie has been delayed.

Fortunately, we had a brief cool spell in July so I was able to bake my annual blueberry pie. As I noted on my pumpkin pie recipe, it’s one three pies that I make each year. All of them are straight out of my trusty Betty Crocker cookbook except for the crusts to which I have added extra shortening on the advice of an elderly aunt who made the best pie crusts I have ever tasted.

One important note on this one. The lemon juice is there for a reason. I made the mistake of making this pie once without it. It turned out cloyingly sweet. The lemon juice gives the blueberries a little tang.

Verdict: Yum! This one’s a keeper!

Blueberry Pie
(Source: Betty Crocker Cookbook)


OldRoses’ Pie Crust
2 cups all-purpose flour
1 teaspoon salt
¾ cup shortening
5 tablespoons cold water

Filling
½ cup sugar
⅓ cup all-purpose flour
1 tablespoon lemon juice
4 cups fresh blueberries

Heat oven to 425°.

Stir together sugar, flour; mix with blueberries. Add lemon juice. Set aside.

Measure flour and salt into bowl. Cut in shortening thoroughly. Sprinkle in water and mix until all flour is moistened and dough almost cleans side of bowl. (1 to 2 teaspoons water can be added if needed).

Gather dough into ball; shape into flattened round on lightly floured pastry cloth. (For two-crust pie, divide dough in half and shape into 2 flattened rounds). With floured rolling pin, roll dough 2 inches larger than inverted pie pan. Fold pastry into quarters; unfold and ease into pan.

Turn desired filling into pastry-lined pie pan. Trim overhanging edge of pastry ½ inch from rim of pan. Turn blueberry mixture into pastry-lined pie pan. Cover with top crust; seal and flute. Make slits in top crust to let steam escape. Cover edge with 2- to 3-inch strip of aluminum foil to prevent excessive browning; remove foil last 15 minutes of baking.

Bake 35 to 45 minutes or until crust is brown and juice begins to bubble through slits in crust.

Makes one 9” pie.

Recycle: lemon juice bottle

Compost: spoiled and bruised berries, berry stems

Tuesday, December 26, 2006

Toasted Coconut-Chocolate Chunk Pecan Pie

I wanted to do a completely different Christmas menu this year. I've made roast beef, onion soup and cheesecake for years. This year I wanted to spread my wings a little. I bought one of those spiral cut hams and made an intriguing dessert from a recipe card I received in the mail as part of an offer for Christmas with Southern Living 2006. I was disappointed with another Southern Living cookbook that I had ordered so I threw out everything except the two recipe cards that interested me.

I was going to buy a deep dish pie plate, not solely for this recipe, but also to have on hand for other deep dish recipes. For some reason, I couldn't find one. Not just one I liked. At all. Does no one bake any more? I guess not. So I resorted to a foil pan from the grocery store which made it extremely difficult to maneuver this pie in and out of the oven. The foil pan kept bending. I needed three hands, two for the pie and one to open and close the oven door and slide the rack in and out.

I skipped the purchased pie crust and made my own. I have no idea why they shielded the crust at the end of the baking time. I went with my tried and true method of shielding the crust until the last 15 minutes of baking time. I imagine their way results in a burned or overdone crust. If you try their method, please let me know how it turned out. I'm really curious.

I didn't toast the coconut. I'm not sure if that makes a big difference in taste and/or texture. I was surprised that the morsels went in whole rather than pre-melted. My guess is that 1 1/4 hours in the oven are supposed to be sufficient to melt them. It wasn't. They just softened a little. Nor was it long enough to cook the pie all the way through. The center was still runny when I took it out. It looked good and it tasted good, it just didn't cook right.

Verdict: What were they thinking???

Toasted Coconut-Chocolate Chunk Pecan Pie


1 (15-ounce) package refrigerated pie crusts
1/3 cup butter or margarine, melted
1 cup sugar
1 cup light corn syrup
4 large eggs, lightly beaten
1 teaspoon vanilla extract
1/4 teaspoon salt
1 1/2 cups pecan halves
1 cup sweetened flaked coconut, toasted
3/4 cup semi-sweet chocolate chunks or morsels

Unroll 1 piecrust, and place on a lightly floured surface; lightly brush top crust with water. Unroll remaining crust, and place over bottom crust; gently roll into a 10" circle. Fit into a 9" deep-dish pieplate; fold edges under, and crimp.

Stir together butter and next 5 ingredients in as large bowl, stir well. Stir in pecans and remaining ingredients. Pour filling into piecrust.

Bake at 325 degrees F for 1 hour and 15 minutes or until set, shielding crust after 45 minutes with aluminum foil, if necessary. Cool completely on a wire rack. Yield: 8 to 10 servings.

Recycle: corn syrup bottle, vanilla extract bottle

Compost: eggshells

Thursday, November 23, 2006

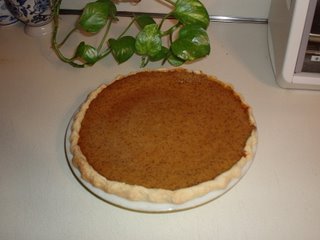
Pumpkin Pie

I only bake pies three times a year. Blueberry, when the blueberries are in season, apple when the Macintoshes are in season and a pumpkin pie at Thanksgiving. With the exception of the crust, there is nothing special about my pies. They are straight out of my trusty old Betty Crocker cookbook. I can see all of you foodies shuddering in horror! Rest assured that I have received many compliments on my pies over the years.

So much for the fillings. The pastry was another story. I was dissatisfied with Ms. Crocker's pastry. So I asked an elderly relative what made her pie pastry so flaky. She said she used lots of shortening. So I increased the amount of shortening in my own pastry and voila! Magic. Not only are they much better and flakier, they are also much easier to roll.

One other thing to bear in mind when making this pie: use evaporated milk. I've tried other things like Half & Half (when I found myself with no evaporated milk) and it's just not as good.

Verdict: Yum! This one's a keeper!


Pumpkin Pie
(Source: Betty Crocker Cookbook)


OldRoses' Pie Crust
1 cup all-purpose flour
1/2 teaspoon salt
1/2 cup shortening
3 tablespoons cold water

Filling
2 eggs
1 can (1 pound) pumpkin (2 cups)
3/4 cup sugar
1/2 teaspoon salt
1 teaspoon cinnamon
1/2 teaspoon ginger
1/4 teaspoon cloves
1 2/3 cups evaporated milk

Heat oven to 425 degrees.

Pastry
Measure flour and salt into bowl. Cut in shortening thoroughly. Sprinkle in water and mix until all flour is moistened and dough almost cleans side of bowl (1 to 2 teaspoons water can be added if needed).

Gather dough into ball; shape into flattened round on lightly floured pastry cloth. With floured roling pin, roll dough 2 inches larger than inverted pie pan. Fold pastry into quarters; unfold and ease into pan.

Trim overhanging edge of pastry 1 inch from rim of pan. Fold and roll pastry under, even with pan; flute.

Filling
Beat eggs slightly; beat in remaining ingredients. Pour into pastry-lined pie pan. (To prevent spills, place pie pan on oven rack or on open oven door when filling with pumpkin mixture.) Cover edge of pastry with 2- to 3-inch strip of aluminum foil to prevent excessive browning. Bake 15 minutes.

Reduce oven temperature to 350 degrees. Bake 45 minutes longer or until knife inserted in center comes out clean. (Remove foil last 15 minutes of baking.) Cool. Serve with sweetened whipped cream.

Makes one 9" pie.

Recycle: pumpkin can, evaporated milk can

Compost: eggshells