Showing posts with label cakes. Show all posts

Thursday, September 09, 2010

Orange-Scented Bittersweet Chocolate Cake

Obviously dessert for the Valentine dinner had to involve chocolate. That was a given. And the theme was “pairings”, so it had to be chocolate-something. I considered chocolate-raspberry, but raspberries aren’t in season now, so I decided on chocolate-orange instead. This recipe sounded good, but not difficult to put together. Frankly, after the Buche de Noel, I wanted something simple. (The original recipe includes a blood orange compote served on the side, but I skipped that.)

The ingredients don’t require comment, except for the chocolate. The recipe specifically states that the chocolate should not exceed 61% cacao. After perusing the available options at the grocery, I decided to go all out and get the Ghirardelli 60% cacao. Unfortunately, I had written on my shopping list the one pound of chocolate required for the cake, but forgot to add to that the additional 6 oz needed for the glaze. Realizing this on the morning of the dinner, I opted to make the glaze out of ordinary chocolate chips. Oh, and light rather than dark corn syrup. I don’t use corn syrup very often as it is, and really can’t see keeping two bottles of the stuff.

This recipe goes together really easily. You don’t even need a mixer, just a couple bowls and a spoon or whisk. Also you can just melt the chocolate/butter mixture in the microwave.

The recipe calls for a 10” cake pan with 2” high sides. I just used my 9” springform pan. You do want high sides because this recipe makes quite a bit; my pan was full. I’m wondering whether a 10” pan may be essential in this case. I did bake it until the tester came out with “moist crumbs attached”, which turned out to be over an hour (although I have doubts about my oven’s thermostat). But the cake was dry on the outer edges and maybe a little bit underdone in the middle. Which is not entirely a bad thing, because the middle was moist and fudgy.

I’m not sure why the recipe suggests applying the glaze only in the center. I would apply it all over, like a frosting.

The flavor was absolutely out of this world. It totally blew me away. It also blew away my coworkers, when I took the leftovers in the next week. Cut the pieces small, because it is heavy and rich. Very chocolatey without being too sweet. It also freezes beautifully. I don’t see anything wrong with making the glaze from regular semisweet chocolate chips. Whether the cake itself would be as good made with regular chocolate chips, I don’t know. I may have to do some research on this point…

Verdict: Yum! This one's a keeper!

Orange-Scented Bittersweet Chocolate Cake
(source: Epicurious.com)


Cake:

2 cups all purpose flour
3/4 teaspoon baking powder
1/2 teaspoon salt
1 pound bittersweet chocolate (do not exceed 61% cacao), chopped
1 cup (2 sticks) unsalted butter, cut into 8 pieces
1 1/4 cups sugar
1 cup (packed) golden brown sugar
1 tablespoon Grand Marnier or other orange-flavored liqueur
2 teaspoons finely grated orange peel
4 large eggs
3/4 cup sour cream


Glaze:

6 ounces bittersweet chocolate (do not exceed 61% cacao), chopped
1/2 cup (1 stick) unsalted butter, cut into 4 pieces
2 tablespoons dark corn syrup

For cake:
Position rack in center of oven and preheat to 325°F. Lightly butter 10-inch-diameter cake pan with 2-inch-high sides. Line bottom of pan with parchment paper; butter parchment.

Whisk flour, baking powder, and salt in medium bowl to blend. Combine chocolate and butter in large metal bowl. Set bowl over saucepan of simmering water; stir until chocolate-butter mixture is melted and smooth. Remove bowl from over water; add both sugars, orange liqueur, and orange peel and whisk until blended (mixture will look grainy). Add eggs, 2 at a time, and whisk until just blended after each addition. Whisk in sour cream. Add flour mixture and stir in with rubber spatula just until incorporated. Transfer batter to prepared pan; spread evenly.

Bake cake until tester inserted into center comes out with moist crumbs attached, about 50 minutes. Cool cake in pan on rack 30 minutes. Run small knife around sides of cake to loosen. Invert cake onto rack; peel off parchment. Cool cake completely (center may sink slightly).

For glaze:
Combine chocolate and butter in small metal bowl. Set bowl over saucepan of simmering water; stir until chocolate-butter mixture is melted and smooth. Whisk in corn syrup. Cool glaze until barely warm but still pourable, about 10 minutes.

Pour glaze onto center of cake. Using small offset spatula, spread glaze over top of cake, leaving 1/2-inch plain border around top edge. Let stand at room temperature until glaze sets, about 2 hours. DO AHEAD: Can be made 2 days ahead. Cover with cake dome and store at room temperature.

Recycle: liqueur bottle, sour cream carton, corn syrup bottle

Compost: eggshells

Monday, April 05, 2010

Blondies

Chocoholic that I am, I have a strange paritality for Blondies. I’ve only tasted commercially prepared ones. My search for a decent recipe so that I can whip up my own whenever the mood strikes, has so far proved fruitless.

This past weekend during my search for a new cake/cookie/brownie recipe to try, I ran across a cookbook that I wasn’t aware that I owned, Our Best Recipes by Better Homes and Gardens. Published in 2003, it features recipes from their past as well as contemporary offerings. One of those recipes is for Blondies.

It was love at first sight. I had all of the ingredients on hand except the chocolate chips. And it can be made in one bowl with only a wooden spoon for mixing. I melted, stirred, spread and sprinkled, then popped it in the oven with much anticipation. One direction I didn’t follow which I should have was to cut them while warm. I waited until the following day when they were rock hard from spending the night in the fridge. Cue the pizza cutter.

My anticipation was for naught. When I finally tasted them the following day when any home-baked good is at its most flavorful, these were strangely tasteless. My search for a Blondie recipe continues.

Verdict: What were they thinking???

Blondies
(source: Our Best Recipes by Better Homes and Gardens)


2 cups packed brown sugar
⅔ cup butter
2 eggs
2 tsp. vanilla
2 cups all-purpose flour
1 tsp. baking powder
¼ tsp. baking soda
1 cup semisweet chocolate pieces (6 oz.)
1 cup chopped nuts

Preheat oven to 350°F. Grease a 13x9x2-inch baking pan; set aside. In a medium saucepan, combine brown sugar and butter; heat and stir over medium heat until butter melts and mixture is smooth. Cool slightly. Using a wooden spoon, stir in eggs, one at a time; stir in vanilla. Stir in flour, baking powder, and baking soda.

Spread batter in prepared baking pan. Sprinkle with chocolate pieces and nuts. Bake for 25 to 30 minutes or until a wooden toothpick inserted near center comes out clean (avoid chocolate pieces). Cool slightly on a wire rack. Cut into bars while warm.

Makes 36 bars.

Recycle: vanilla bottle

Compost: eggshells

Saturday, March 27, 2010

Outrageous Carrot Cake

Who can resist a recipe that is billed as “outrageous”? I certainly can’t. I’ve been making the same carrot cake recipe for years. It’s from the Soft As Silk cake flour box. It tastes alright, but I would prefer something denser and moister. It was also my first taste of cream cheese frosting. Who knew it was that good?

At first glance, the two recipes are identical. A closer look revealed some differences. The outrageous recipe uses canola oil. The SAS recipe uses mayo. The outrageous recipe uses only cinnamon. The SAS recipe uses cinnamon plus allspice or ginger. The outrageous recipe includes carrots, pineapple, walnuts and coconut. The SAS recipe has no coconut. Although it wasn’t what I was looking for, I was intrigued enough to give it a whirl.

Looking over the baking directions, I was struck by the fact that you must bake the layers on different racks and then turn and reverse them. I understand that this is necessary to ensure that they bake evenly, but I was taught that you should open the oven door as little as possible to keep the temperature even. Uneven temperatures will prevent your cakes from baking properly.

I elected to bake all three layers on the same rack. When I checked them after the recommended 25 minutes, I discovered that the edges were rapidly overbaking and pulled away from the sides of the pans. 15 minutes of cooling in the pans later, I discovered that the layers were very greasy when I removed them from the pans. I’m not sure if it was because I elected to grease the pans instead of spraying them with nonstick cooking spray (banned in my kitchen) or because the recipe uses canola oil instead of my usual mayo.

The taste was too cinnamon-y and I intensely disliked the texture of the coconut in the cake. Add that to the greasiness of the cake and I see no reason to call this recipe “outrageous”. The frosting was really good, though.

Verdict: What were they thinking???

Outrageous Carrot Cake
(source: Cooking Club of America)


Cake
3 cups all-purpose flour
2 teaspoons baking soda
1 teaspoon salt
1 tablespoon plus 1 teaspoon ground cinnamon
6 eggs
2 ½ cups sugar
1 ½ cups canola oil
2 ½ cups finely grated carrots (about 6 carrots)
2 (8-oz.) cans crushed pineapple in juice, well-drained
1 cup shredded sweetened coconut
1 cup finely chopped walnuts

Frosting
12 oz. cream cheese, softened
1 cup unsalted butter, softened
2 teaspoons vanilla extract
6 cups powdered sugar
1 ½ cups finely chopped walnuts, if desired

Evenly space 2 baking racks in oven. Heat oven to 350°F. Spray bottom and sides of 3 (9x2-inch) round cake pans with nonstick cooking spray. Line bottoms with parchment paper; spray parchment with nonstick cooking spray.

Sift flour, baking soda, salt and cinnamon into medium bowl.

In large bowl, beat eggs and sugar at medium speed 1 to 3 minutes or until thickened and slightly lighter in color. Beat in oil at low speed. Stir in flour mixture until blended. Stir in carrots, pineapple, coconut and 1 cup walnuts until blended. Divide batter evenly among pans. Bake 25 minutes; turn and reverse cake pans. Bake an additional 10 minutes or until toothpick inserted in center comes out clean and cake pulls slightly away from sides of pan. Cool in pans on wire rack 15 minutes. Invert onto wire rack; remove parchment. Cool completely.

To make frosting, beat cream cheese and butter in large bowl at medium speed 3 minutes or until blended and smooth. Beat in vanilla. Add powdered sugar; beat at low speed 1 minute or until blended and smooth.

Place 1 cake layer on serving platter or cardboard round; spread with 1 cup frosting. Repeat. Top with remaining cake layer; spread top and sides with thin layer of frosting. Coat sides with another smooth layer of frosting; spread remaining frosting on top. Press 1 ½ cups walnus onto sides of cake. Refrigerate leftovers.

Cake can be made up to 2 days ahead and refrigerated, or 3 weeks ahead and frozen. To freeze, place cake in freezer until frosting is firm; wrap in plastic wrap, then heavy-duty foil. To defrost, place in refrigerator overnight; remove wrapping. Serve at room temperature.

20 servings

Recycle: canola oil bottle, pineapple cans, vanilla extract bottle

Compost: egg shells, carrot peels

Sunday, February 28, 2010

One Egg Cake

While searching for something new and different to bake, I started pulling all of my cookbooks off the shelf, including The 1896 Boston Cooking-School Cook Book, the first edition of Fannie Farmer’s classic cookbook. I’ve often skimmed through it because the recipes are fascinating as well as a fascinating look at life over a century ago. I’ve never made any of the recipes, but they are fun to look at. Take for instance the recipe for Mock Turtle Soup. There are no turtles in it. Instead, the first ingredient is “1 calf’s head”, not something one usually sees in the market today.

One recipe did catch my eye. It was entitled "One Egg Cake". Could this possibly be the long lost birthday cake recipe that I have spent decades looking for? It is significantly different from the Betty Crocker Dinette Cake recipe that I have been baking. Betty uses shortening, Fannie uses butter. Betty uses vanilla, Fannie doesn’t. I’ve never made a cake without vanilla, have you? Just for fun, I decided to try the recipe.

If you think baking is an art today, back in Fannie’s day it was practically alchemy. Just getting the temperature correct in the oven was a challenge. There were no gas or electric stoves then. Stoves used coal. Oven thermometers were unreliable in those days. Fannie’s advice on achieving and maintaining the correct oven temperature for baking? "…experience alone has proved the most reliable teacher." My oven is a modern gas one so I turned to Betty for the correct 350°F temperature.

I would be curious to see a selection of pans from Fannie’s era. Nowhere does she discuss cake pans or their sizes. For the One Egg Cake recipe, she specifies a shallow pan. The amounts of the ingredients were similar to the Dinette Cake recipe, so I used my usual square 8x8x2 pan.

There are no instructions in the recipe for beating the batter. That is covered in the introduction to the chapter on cakes along with buttering and filling the pan, and removing the cake from the pan. I followed Betty’s instructions for the Dinette Cake recipe. I have no desire to beat cake batter by hand. I use a Kitchenaid stand mixer.

The batter came together beautifully and the cake baked perfectly. Unfortunately, this was not the long lost recipe. But it was a delicious butter cake and a fun trip through culinary history.

Verdict: Not bad, but I won’t be making this again.


One Egg Cake
(source: The 1896 Boston Cooking-School Cook Book)


¼ cup of butter
½ cup sugar
1 egg
½ cup of milk
1 ½ cups flour
2 ½ teaspoons baking powder.

Cream the butter, add sugar gradually, and egg well beaten. Mix and sift flour and baking powder, add alternately with milk to first mixture. Bake thirty minutes in a shallow pan. Spread with Chocolate Frosting.

Recycle: milk jug

Compost: egg shell

Sunday, February 21, 2010

Brickle Bundt Cake

I try to bake every weekend, but A’s Orange-scented Bittersweet Chocolate Cake was a hard act to follow. Time to try something completely different. I dived into my collection of toffee bits collection and came up with a Brickle Bundt Cake. I liked that it used sour cream. My experience has been that cakes made with sour cream are very moist. There is nothing worse than a dry cake.

I didn’t use the walnuts as called for in the recipe because I am not fond of nuts in my cakes. But I have to admit that the nuts would have definitely added flavor and texture to the toffee bits.

The batter came out very thick and stiff. I was unable to spoon the batter into the pan in thirds. The best that I could do was to put half in the pan, sprinkle the toffee mixture over it and then add the other half. I sprinkled the remaining toffee mixture over the top and hoped for the best, i.e. that it wouldn’t burn in the oven. Not to worry, the cake batter baked over it.

Another challenge was getting the cake out of the pan. No matter how well you grease and flour a pan, melting sugar is going to fuse to it. The toffee mixture that I so carefully sprinkled in the batter, oozed out of it and stuck like glue, making it next to impossible to get the cake out of the pan in one piece.

The glaze had a weird taste to it. I’m chalking it up to the powdered sugar that I used. It’s leftover from the Christmas cookies and may have picked up some odors in the interim.

When all was said and done, this cake was very bland. Walnuts in the toffee mixture would have given it a little flavor but not enough to make a real difference. This was a huge disappointment.

Verdict: Too bland – I won’t be making this again

Brickle Bundt Cake
(source: Hersheys.com )


1 1/3 cups (8-oz. pkg.) toffee bits, divided
1 ¼ cups sugar, divided
¼ cup chopped walnuts
1 teaspoon ground cinnamon
½ cup (1 stick) butter, softened
2 eggs
1 teaspoon vanilla extract
2 cups all-purpose flour
1 ½ teaspoons baking powder
1 teaspoon baking soda
¼ teaspoon salt
1 container (8 oz.) dairy sour cream
¼ cup (1/2 stick) butter, melted
Powdered Sugar Glaze (recipe follows)

Heat oven to 350°F. Grease and flour 12-cup fluted tube pan or 10-inch tube pan. Set aside ¼ cup toffee bits for topping. Combine remaining toffee bits, ¼ cup sugar, walnuts and cinnamon; set aside.

Beat remaining 1 cup sugar and ½ cup butter in large bowl until fluffy. Add eggs and vanilla; beat well. Stir together four, baking powder, baking soda and salt; gradually add to butter mixture, alternately with sour cream, beating until blended. Beat 3 minutes. Spoon one-third of the batter into prepared pan. Sprinkle with half of toffee mixture. Spoon half of remaining batter into pan. Top with remaining toffee mixture. Spoon remaining batter into pan. Pour melted butter over batter.

Bake 45 to 50 minutes or until wooden pick inserted in center comes out clean. Cool 10 minutes; remove from pan to wire rack. Cool completely.
Prepare glaze; drizzle over cake. Sprinkle remaining ¼ cup toffee bits over top.

12 to 14 servings.

Powdered Sugar Glaze: Combine 1 cup powdered sugar, 1 tablespoon milk and ¼ teaspoon vanilla extract. Add additional milk, 1 teaspoon at a time, until of drizzling consistency.

About ½ cup glaze

Recycle: vanilla extract bottle, sour cream container, milk bottle

Compost: egg shells

Sunday, February 14, 2010

Valentine’s Day at The Wooden Spoon


Orange-scented Bittersweet Chocolate Cake

We thought that our Honey themed Valentine’s dinner was going to be a hard act to follow but thanks to a colleague of A, BioBabe, who suggested a theme of “Harmonious Pairings” honoring traditional Valentine’s Day couples, we had a wide range of recipes to choose from. For each dish, we looked for a recipe with a “pair” of ingredients. We also made sure to have some holiday red with red potatoes, red pearl onions, beet bread an, thanks to A’s ingenious use of purple carrots, even the soup was a dark pink.

I think it’s safe to say that this year’s dinner easily surpasses our first menu. Thanks BioBabe!

Sunday, February 07, 2010

Buche de Noel 2

When OldRoses suggested we each do a Buche de Noel for the holiday party, I admit I had mixed feelings. I liked the idea of trying to make one, but I know they’re fairly time-consuming to make, and the party was in early December, which is the busiest time of year for me.

Oldroses told me around Thanksgiving that she had selected a coffee-flavored recipe, and suggested I do a plain one. A few days later, I went online to do some recipe research. Google “Buche de Noel” and you’ll get a ton of hits. I came across a recipe for an orange-flavored one. I liked that idea, knowing that orange and chocolate can be a great combination. Eventually I found a recipe I liked and printed it out.

After rereading the recipe for the cake, I turned my attention to the recipe underneath it, for the frosting. It was for a buttercream frosting, the type of buttercream that involves beating egg whites, then adding in a warm sugar syrup and other ingredients. The thing is, the egg whites don’t ever get cooked (unless the sugar syrup is hot enough?). This made me kinda nervous. This Buche was going to be sitting out for a couple of hours at least, and I didn’t want to risk poisoning my fellow gardeners. They might not give me my plot back next year. Besides, this particular recipe called for 7 egg whites and over 3 cups (1 ½ lbs!) of butter. AAAIIIIEEEE! So I went back online and did some more research. But every recipe I looked at used either a buttercream similar to this one, or a whipped cream-based frosting, which to me just didn’t sound right, flavor-wise. Finally I gave up and went to bed in despair.

Sometimes a good night’s sleep helps. The next morning I woke up and thought, hey, what about that chocolate cake frosting? The ganache with a pound of chocolate in it? Yeahhhh…..That recipe does include cream, but at least you heat the cream at the beginning of the process.

Since this is, after all, a French dish, I also consulted my two Julia Child cookbooks. “Mastering the Art of French Cooking” doesn’t include a Buche recipe, but “The French Chef Cookbook”, which is based on her first TV series, does. She also uses a buttercream frosting, but for the cake she suggests two or three possibilities, including an orange-almond sponge cake. This sounded even better to me than the orange cake I’d previously found. Also, she gives very detailed instructions.

Many recipes tell you to roll the cake up and let it cool, then unroll and frost it. Julia, however, recommends frosting the cake at once, because if you’ve overbaked it, you might not be able to unroll it again. This sounded prudent to me. Thus, operations were spread over three evenings.

Day 1: make the frosting, so that the cake could be frosted as soon as it was done. The frosting is actually pretty quick and easy to make. I probably could have made it while the cake was cooling. (This would also have avoided the problem I ran into the next day; see below.) Oh, and I didn’t use fancy high-priced chocolate. I just used ordinary chocolate chips. One pound is 2 2/3 cups. And you don’t really need a whisk; a spoon works just fine. When the frosting was finished, I set it, saucepan and all, in the refrigerator overnight.

Day 2: make and frost the cake.

Julia gives detailed directions for buttering and flouring the pan. I used parchment paper instead of waxed, and cooking spray instead of melted butter. Worked just fine.

The pan, by the way, is supposed to be a jelly roll pan, which is 11 x 17 x 1”. Fortunately, I do own such a pan. Unfortunately, it doesn’t fit inside my oven. My range is so small that when the pan is in the oven, the door is open a couple inches. But the alternative would have been to cart everything over to a friend’s house, and with a fragile cake like this, that didn’t seem like such a good idea. So I made the cake at home, and compensated by rotating the pan halfway through the baking time.

The cake itself went together just fine. I’ve baked sponge cakes before so I wasn’t too worried about that part. Julia uses a large whip to mix the yolks etc.; a mixer also works. I should comment on the almonds, though. I used finely ground ones that a friend sent me from Germany, where they’re a pretty standard grocery item. They’re more finely ground than a nut topping, but not as fine as a flour. It might be possible to duplicate this using a food processor. Julia suggests a blender or meat grinder; I don’t think food processors existed yet when that book was written.

The trouble began once the cake was in the oven. Julia says to be careful not to overbake it, otherwise it’ll crack when you try to roll it. I left it in the oven a minute or two over the 10 suggested, and it did spring back when I touched it, and it was starting to brown around the edges, but it was so soft I’m wondering whether it was a little underdone. I’ve had my doubts lately about my oven’s thermostat, plus the door was a bit open.

Next, Julia says to sprinkle a thin layer of powdered sugar over the top of the cake. She does say that the powdered sugar should be in a sieve, but that part is in the list of ingredients, which in my cookbook is on the page before that part of the cooking instructions. (I’ve rewritten her recipe below to rearrange the several instructions that were in the list of ingredients.) As a result, I didn’t sift the powdered sugar first, and there were hard lumps of sugar that stuck to the surface of the cake. I was able to pick some of them off, but some of them got embedded in the cake, and would have made holes if I’d pulled them out, so I left them. Also, this made the surface of the cake sticky. I’m wondering whether flour would have been better than sugar. I have read somewhere the suggestion to use powdered sugar rather than flour when rolling out cookies because the sugar won’t make them tough like too much flour will; maybe that’s why Julia suggests sugar.

While the cake was cooling, I pulled the saucepan of frosting out of the refrigerator. It was stiff. About the consistency of fudge, in fact. Way too stiff to apply. It was in a metal saucepan, so I couldn’t microwave it. So, I just set the whole pan in the still-warm oven for about 15 minutes, stirring it frequently, until it got soft enough to spread over the top of the cake without tearing it up. Oh, by the way, the frosting recipe as written does make enough to fill and frost the cake. I was concerned about that, so I kept the filling layer rather thin. I should have used about 2/3 of the frosting as filling and saved only about 1/3 to frost the outside.

Rolling up the cake turned out to be not a problem. The cake did crack a bit toward the end, but the frosting covers that. After carefully moving the log to a serving platter covered with wedges of waxed paper, I applied the remaining frosting over the top and sides of the log, then pulled a fork over the frosting, using short strokes. Then I pulled out the wedges of waxed paper. This is a trick Julia mentions elsewhere, and that I’d learned years ago to keep your serving plate clean. Then I put the whole thing in the refrigerator and made myself a cup of tea.

Day 3: decorations. Often you see these decorated with marzipan or meringue mushrooms that look like the ordinary white culinary mushrooms. But those mushrooms don’t grow on trees. Unless it’s a fallen log, maybe, and would you burn a log that was that rotted? No, the mushrooms I’ve seen on trees are shelf fungi. (Also lichens, but I couldn’t think of a way to make those…) It so happens there’s a tree stump just down the street from where I live that has a nice growth of these, so I was able to get a good look at some.

I decided to try making an ivy vine curling up the log. The mention somewhere of marzipan mushrooms gave me the idea of making it out of marzipan. So I bought a can, and colored part of it green by kneading in a couple drops of green food coloring. Rolling a thin rope for the vine was easy; shaping the leaves was harder. I ended up printing out images of ivy leaves, then cutting them out and using them to cut leaves from a thin layer of the green marzipan. (I believe it’s possible to purchase little ivy-leaf-shaped cutters if you really want to get into this.) I then added a few shelf fungi - simple half-circles of plain marzipan.

And the result? The flavors of the chocolate frosting and the orange cake went very well together. The orange was strong enough to balance all that chocolate. But there was a bit of a problem with texture. The frosting, as I noted, is very dense and heavy, especially when cold, but the cake is light and fragile. So when you cut into it, the cake gets smooshed. Maybe that’s why all those other recipes use a whipped cream filling. Duh! So I would recommend finding something lighter for the filling. For frosting the outside, you could use what I used, or something lighter, but you can get away with a strong chocolate flavor. Or give up on the chocolate altogether and let the orange be the predominant flavor.

Verdict: Has potential, but needs a little tweaking.

Bûche de Noël


Orange-Almond Sponge Sheet

(source: The French Chef Cookbook)

3 tbsp butter

¾ cup ground (see below) blanched almonds

3 eggs

rind of 1 orange

2/3 cup granulated sugar

1/3 cup strained orange juice

¼ tsp almond extract

¾ cup sifted plain bleached cake flour

Scant ¼ tsp cream of tartar

Pinch of salt

1 tbsp granulated sugar

Powdered sugar

Melt the butter and let cool to tepid. Reserve 1½ tbsp for the cake. Paint the inside of a jelly roll pan (11” x 17” x 1”) with some of the rest of the melted butter. Line with a 12 x 21-inch piece of waxed paper, letting ends extend beyond edges of pan. Butter the paper, roll flour over it, covering entire inside surface, and knock out excess flour.

Grind the almonds in a blender, or put them through a meat grinder with part of the 2/3 cup sugar.

Preheat oven to 375 degrees.

Separate the eggs; place the yolks in a large mixing bowl, and the whites in a clean, dry smaller bowl. Be sure that there is no speck of yolk in with the whites. Grate the orange rind into the bowl with the yolks. Using a large wire whip, gradually beat in the 2/3 cup sugar. Beat vigorously for a minute or two until the mixture is thick and pale yellow. Beat in the orange juice, then the ground almonds, almond extract, and flour.

Beat the egg whites for a moment at moderate speed; when they begin to foam, add the cream of tartar and salt. Beat at top speed until egg whites form soft peaks, sprinkle in the 1 tbsp sugar and beat a few seconds more until egg whites form stiff peaks when lifted with a spoon or spatula.

Scoop the egg whites over the yolk mixture. Rapidly and delicately fold together, using a rubber spatula; when almost blended, rapidly fold in the melted butter ½ tbsp at a time. Immediately turn the batter into your prepared pan, smoothing over the entire surface. Bang pan briefly on table, to even the mixture, and set in middle level of preheated oven.

Bake for about 10 minutes. Cake is done when barely starting to color, when top is lightly springy or spongy if pressed with fingers, and when the faintest line of separation shows between cake and sides of pan. Do not overcook, or cake will break when rolled; it must be soft and spongy.

Remove from oven and sprinkle top of cake with a 1/16 inch layer of powdered sugar in a sieve. Cover with a sheet of waxed paper. Rinse a towel in cold water, wring it out, and lay over the waxed paper. Turn cake upside down and let cool for 20 minutes.

To unmold, loosen paper lining at one end of pan. Holding paper flat on table, gradually lift off pan, starting at the loose-paper end. Carefully dislodge paper from long sides of cake, then peel it off the top. Trim brown edges all around cake; they will crack when rolled. The cake is now ready for filling, which should be done immediately.

It is usually safest to fill and roll the cake promptly. But if you have not overbaked it, you can risk storing it as follows: sprinkle with powdered sugar, cover with waxed paper, roll up in the damp towel, and refrigerate in a plastic bag. The risk is that the cake may dry out, lose its sponginess, and then be unrollable.


Chocolate Ganache Frosting

(source: www.epicurious.com, from their Double Chocolate Layer Cake recipe)

1 pound fine-quality semisweet chocolate such as Callebaut

1 cup heavy cream

2 tablespoons sugar

2 tablespoons light corn syrup

Finely chop chocolate. In a 1 1/2- to 2-quart saucepan bring cream, sugar, and corn syrup to a boil over moderately low heat, whisking until sugar is dissolved. Remove pan from heat and add chocolate, whisking until chocolate is melted. Cut butter into pieces and add to frosting, whisking until smooth.

Transfer frosting to a bowl and cool, stirring occasionally, until spreadable (depending on chocolate used, it may be necessary to chill frosting to spreadable consistency).


Recycle: almond extract bottle, corn syrup bottle


Compost: eggshells

Wednesday, December 09, 2009

Buche de Noel

When I agreed to the Buche de Noel Bake-off, I was certain that I had several recipes at home. I distinctly remembered seeing them. My memory was faulty, however. When I finally took a look at my numerous cookbooks, not a single one had a recipe for a Buche de Noel, not even my beloved Betty Crocker International Cookbook.

Normally at this point, I would have hit the internet but my computer monitor was in its death throes and reading anything on it was next to impossible. I was planning on replacing it during the Black Friday sales. The Gardens’ Holiday Party was the following week which was too close for me. I like to have lots of time to research.

Time to get creative. I pulled out all the cooking magazines and articles with Christmas recipes that I had cut out of newspapers and magazines over the years and voila! I found what I was looking for in the same Woman’s Day Great Holiday Baking Ideas from December 1980 that I had used to made the rum cake recipe. You can tell that this is an old recipe. The nut filling calls for cocktail peanuts and the frosting uses margarine! What I found attractive is that the frosting is coffee (“mocha” in modern parlance) instead of the usual chocolate.

I allotted an entire day to make this recipe but it was faster and easier than I had anticipated. My one complaint about the cake portion (other than the near-death experience in a ShopRite parking lot) is that it uses too many bowls. You need one for the egg whites, one for the egg yolks and a third for the sifted dry ingredients. Three dirty bowls and I hadn’t even made the filling or frosting yet. I don’t have a dishwasher so this is a real hardship.

I skipped the peanuts in the nut filling. I could have substituted something more appropriate but I didn’t want a “crunchy” log. Just as I feared, when I tried to roll up the log after spreading it with the filling, I found that if I rolled it too tightly, the filling was squeezed out of it but if I rolled it too loosely, it wouldn’t hold its shape and unrolled. I compromised, rolling it up somewhere between tightly and loosely resulting in a round log with minimal oozing of the filling.

At this point in the recipe, you are instructed to cut a diagonal slice about 2-inches at its wide side from one end of the rolled cake and reattach it to look like a branch. I’m not good at this artsy stuff. By this time, I had a new monitor and could explore the world of Buche de Noel making. After looking at numerous photos of the finished product, it was clear that the only bakers able to pull this off were professionals. The homemade logs with branches looked, well, homemade.

The frosting was the most difficult part. Two tablespoons of instant coffee is too much. Or maybe it’s just me. I don’t like strong coffee. I’m more of a café au lait person. Then there was the problem of the consistency. Even with 3 ½ cups of confectioners’ sugar, the frosting was a little runny. I tried refrigerating it briefly but then it became too stiff and the texture was grainy.

Eventually, I ended up with a sad, half-rolled-up Yule log covered with both runny and grainy frosting. It looked a little bare so I fished a cheesy decoration from an old wreath out of my Christmas decorations box for a festive touch.

Yes, I know. You’re not laughing at me, you’re laughing with me.

Verdict: Not bad, but I don’t think I’ll be making this one again.


Buche de Noel
(source: Woman's Day Great Holiday Baking Ideas, December 1980)


Cake
1 cup cake flour
1/3 cup cocoa
1 ½ teaspoons baking powder
¾ teaspoon salt
4 eggs, separated
1 cup sugar
3 tablespoons water
½ cup confectioners’ sugar

Cream Nut Filling
1 ¼ cups heavy cream
½ cup confectioners’ sugar
½ cup finely chopped cocktail peanuts

Coffee Frosting
½ cup heavy cream
2 tablespoons instant coffee
½ cup margarine
3 ½ cups confectioners’ sugar

Grease and line with waxed paper a 15x10x1-inch jelly roll pan; set aside. Sift together cake flour, cocoa, baking powder and salt; set aside. In large bowl of mixer, beat egg whites until stiff but not dry. In small bowl of mixer beat egg holds until thick and lemon colored. Gradually beat sugar and water into yolks. Fold egg yolk mixture into beaten egg whites alternately with flour mixture. Turn into prepared jelly roll pan; spread smoothly. Bake in 350°F oven 15 to 20 minutes or until cake springs back when pressed gently with finger. Immediately turn out onto a towel sprinkled with confectioners’ sugar. Remove waxed paper. While cake is hot, roll up in towel starting from narrow end. Cool thoroughly on wire rack. Unroll cake; remove towel and spread cake with Cream Nut Filling. Roll again. Cut a diagonal slice about 2-inches at its wide side, from one end of tolled cake. Set in place with a little Coffee Frosting on the side of rolled cake to resemble a cut branch. Cover entire cake with remaining Coffee Frosting. Mark with spatula for a bark effect. Refrigerate until serving time. Makes 10 to 12 servings.

Cream Nut Filling
Beat 1 ¼ cups heavy cream with ½ cup confectioners’ sugar just until stiff peaks form. (Do not overbeat.) Fold in ½ cup finely chopped cocktail peanuts.

Coffee Frosting
Heat ½ cup heavy cream with 2 tablespoons instant coffee until coffee dissolves; cool. Cream ½ cup margarine until light and fluffy. Gradually add cooled cream and enough confectioners’ sugar, about 3 ½ cups, to make a spreadable frosting.

Recycle: instant coffee bottle

Compost: eggshells
Sunday, November 22, 2009

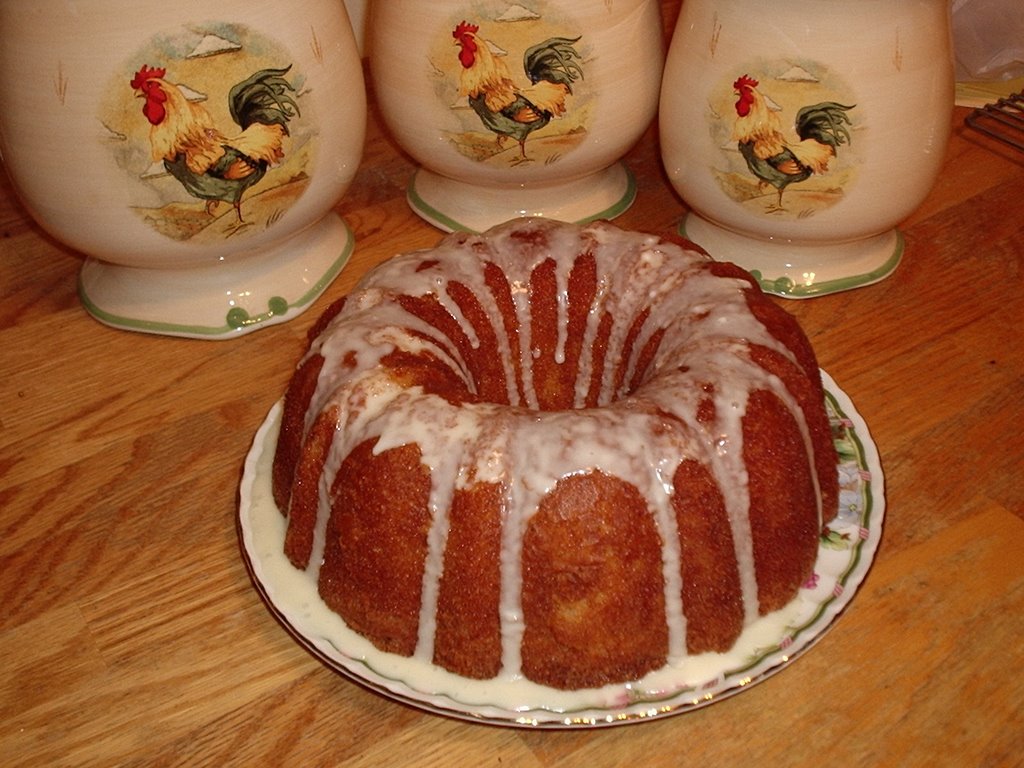
Maple Pear Upside-Down Cake

It is absolutely true that you can’t teach an old dog new tricks. This old dog went all Pavlov when she saw a recipe for a pear upside-down cake rather than the more usual pineapple upside-down cake. She completely ignored that (1) the recipe was featured in the New York Times and (2) not a single recipe from that illustrious publication has ever worked for her. And do you know why she ignored past experience? Because (everyone say it with me) this time it will be different.

Except that it wasn’t. Making matters worse, the fallout from this disaster may have adverse consequences on Thanksgiving. I am keeping my paws fingers crossed.

I am unsure of the variety of pears that I purchased. They weren’t labeled. They were, however, the biggest darn pears that I have ever seen. I bought four as specified in the recipe, but only needed half that many to affect the overlapping circle on the top of the cake.

Cooking the maple syrup and brown sugar topping was not a problem. While it was cooling, I made the cake batter. Which, when finished, bore a striking resemblance to BisQuick. My problems began when I poured the brown sugar maple syrup mixture into the cake pan. It seemed like a lot. But I forged ahead confident that the chefs behind the recipe in their infinite wisdom, knew what they were doing.

Pear slices were arranged in an attractive circle, batter was spooned into the pan and then carefully spread to cover the pears. The pan was slid into the oven and the timer set for 45 minutes. The trouble began at the twenty minute mark when the first eruption of brown sugar/maple syrup escaped from the pan and landed on the bottom of the oven where it sizzled into a sticky, blackened mess. As the minutes ticked by, the eruptions grew more frequent, the sizzling almost constant. Thirty minutes in, smoke was billowing out of the stove as the boiling mixture intended as a delicate syrup for the pears turned my oven into a bubbling cauldron of burning sugar.

I made the decision to remove the cake early rather than risk burning down my house. Repeat after me: The motto of the New York Times is “All The News That’s Fit to Print” NOT “All The Recipes Fit to Print”. If there is any doubt in your mind, I invite you to take a look into my blackened and still smoking oven.

Normally, my oven is pretty clean. Clean enough that I feel confident in baking my Thanksgiving pies and breads and then roasting the turkey. The following day, while everyone else is out bargain-hunting, I am on my knees in the kitchen cleaning my oven sure in the knowledge that I won’t need to clean it again until after the Christmas roast beef.

This year, thanks to the New York Times (note to self: “All The NEWS That’s Fit to Print”), I will be cleaning my oven twice in one week. No matter how carefully I rinse, it always smells of oven cleaner afterwards which leads me to wonder how that acrid aroma will affect the turkey.

In case you’re still wondering, the much maligned Maple Pear Upside-Down Cake was delicious. I will be making it again, but with a lot less brown sugar and maple syrup and definitely not a few days before Thanksgiving.

Verdict: Needs a Do-Over


Maple Pear Upside-Down Cake
(source: The New York Times, November 11, 2009)


11 tablespoons butter
¾ cup maple syrup
¼ cup packed brown sugar
3 to 4 pears, peeled, cored and thinly sliced
¾ cup granulated sugar
1 teaspoon vanilla
2 large eggs
1 ½ cups flour
1 ½ teaspoons baking powder
¼ teaspoon salt
½ cup milk

Heat oven to 350 degrees. Melt 3 tablespoons butter in a small pan over medium heat; add maple syrup and brown sugar and cook, stirring, until sugar dissolves. Bring to a boil and cook for another 2 minutes; remove from heat and set aside. When mixture has cooled a bit, pour it into a 9-inch baking pan and arrange pear slices n an overlapping circle on top.

With a handheld or standing mixer, beat remaining 8 tablespoons butter and the sugar until light and fluffy. Add vanilla and eggs, one egg at a time, continuing to mix until smooth. In a separate bowl, combine flour, baking powder and salt.

Add flour mixture to butter mixture in three batches, alternating with milk; do not overmix. Carefully spread batter over pears, using a spatula to make sure it is evenly distributed. Bake until top of cake is golden brown and edges begin to pull away from sides of pan, about 45 to 50 minutes; a toothpick inserted into center should come out clean. Let cake cool for 5 minutes.

Run a knife around edge of pan; put a plate on top of cake and carefully flip it so plate is on bottom and pan is on top. Serve warm or at room temperature.

Yield: 8 to 10 servings.

Recycle: maple syrup bottle, vanilla bottle

Compost: pear peels and cores, eggshells

Wednesday, October 14, 2009

Dinette Cake with Chocolate Butter Frosting

When I was a child, the custom in our family was that the Birthday Boy or Girl chose the dinner menu and the birthday cake. My mother wasn’t much of a baker, so most birthday cakes were made from mixes. Except mine. I always requested the one cake that she made from scratch. She called it a “One Egg Cake”. The recipe had been cut out of a newspaper or magazine years before and carefully saved . . . I just realized that I don’t know where she kept it.

It was a plain vanilla cake made in a square 8x8 or 9x9 pan and frosted with chocolate butter frosting. Cakes may have come from boxes, but frostings were always homemade. Chocolate butter or vanilla butter, straight out of my mother’s old Betty Crocker cookbook.

In my teens, disaster struck. The precious One Egg Cake recipe disappeared. We searched high and low but it was never seen again. I began a fruitless quest to find a substitute. As an adult, when I purchased my own Betty Crocker cookbook, one of the first recipes that I tried was “Dinette Cake” which called for one egg and was made in a square 8x8 or 9x9 pan. It was close, but not the cake from my childhood. Luckily, my newer edition Betty Crocker cookbook still had the same chocolate and vanilla butter frostings recipes.

It may not be quite the same, but at least I no longer have to wait until my birthday to have a one egg cake frosted with chocolate butter frosting.
Verdict: Yum!! These are keepers!!


Dinette Cake
(source: Betty Crocker)


1 ½ cups cake flour or 1 ¼ cups all-purpose flour
1 cup sugar
1 ½ teaspoons baking powder
½ teaspoon salt
¾ cup milk
⅓ cup shortening
1 egg
1 teaspoon vanilla

Heat oven to 350°F. Grease and flour square pan, 8x8x2 or 9x9x2 inches. Measure all ingredients into large mixer bowl. Blend ½ minute on low speed, scraping bowl constantly. Beat 3 minutes high speed, scraping bowl occasionally. Pour into pan.

Bake 35 to 40 minutes or until wooden pick inserted in center comes out clean. Cool.


Chocolate Butter Frosting
(source: Betty Crocker)


⅓ cup soft butter or margarine
2 ounces melted unsweetened chocolate (cool)
2 cups confectioners’ sugar
1 ½ teaspoons vanilla
About 2 tablespoons milk

Mix thoroughly butter and cooled chocolate. Blend in sugar. Stir in vanilla and milk; beat until frosting is smooth and of spreading consistency.

Fills and frosts two 8- or 9-inchy layers or frosts a 13x9-inch cake.

To fill and frost three 8-inch layers, use ½ cup soft butter or margarine, 3 ounces melted unsweetened chocolate (cool), 3 cups confectioners’ sugar, 2 teaspoons vanilla and about 3 tablespoons milk.

Recycle: milk bottle, vanilla bottle
Compost: eggshell

Tuesday, September 15, 2009

Quick Chocolate Cake

Woo hoo! Summer is over. The cooler temps of fall have tempted me back into the kitchen. So this past weekend when I experienced a sudden urge for chocolate, instead of opening the freezer to check out the ice cream situation, I turned on the oven.

Normally when I have an urge for chocolate, I bake brownies. They are fast and easy. But in this case, I had no butter in the house. My thoughts then turned to cakes. Coincidentally, I had just finished the last of the Half & Half (used in a pinch when I have no milk) that morning. What to do, what to do?

I know! This is a great opportunity to try out that recipe I saw in Better Homes and Gardens for a chocolate cake that uses no eggs and no milk. It is made in one bowl and bakes in a 9x13x12-inch pan like brownies. Instead of frosting, the recipe suggests ice cream, whipped cream or a dusting of powdered sugar. Plus, the recipe is the brainchild of a BHG reader so it has to work, right? Who submits recipes that don’t work?

So I greased up my brownie pan, dumped all of the ingredients at once into a bowl and mixed. The recipe says to beat until the “well combined”. I did but it didn’t have the consistency of cake batter. I beat some more. No dice. Crossing my fingers, I poured the rather runny batter into the pan and popped it into the oven.

And forgot to set the timer. No problem! I’ll just take it out when the sides start to pull away from the pan. Which they did. Before the middle finished baking. Experience has taught me that if I had left it in the oven, the edges of the cake would have burned before the batter in the middle baked all the way through. So out it came.

After it cooled, I tried a piece from the cooked edge. The texture was very light as was the taste. I could barely taste any chocolate. No way that this would stand up to ice cream or whipped cream. Those require a dense cake with a strong chocolate flavor. All baked goods taste better the second day, so I tried another piece the following day. Still light texture but with a stronger chocolate flavor.

Yes, this is a quick chocolate cake but it’s not a very good one. I should have realized that there was a good chance that this recipe would neither work nor taste very good. The reader who submitted the recipe wrote the following in the category of Favorite to Make: “I love to bake pies!”

Verdict: What were they thinking???

Quick Chocolate Cake
(Source: Better Homes and Gardens Magazine, July 2009)


3 cups all-purpose flour
2 cups sugar
2 cups cold water
⅔ cup vegetable oil
½ cup unsweetened cocoa powder
2 tsp. baking soda
2 tsp. white vinegar
1 tsp. salt
1 tsp. vanilla

Heat oven to 350°F. In large mixing bowl combine all ingredients. Beat with electric mixer on medium to high speed until well combined. Pour batter in a greased 9x13x2-inch baking pan.
Bake 35 minutes or until a toothpick inserted near center comes out clean. Serve with ice cream or whipped cream, or dust with powdered sugar.

Recycle: vegetable oil bottle, vinegar bottle, vanilla bottle

Sunday, July 26, 2009

Raspberry Blueberry Vanilla Cheesecake

One of my coworkers has her birthday at the end of July – blueberry season here. The last couple of years I have made blueberry pies for the occasion. This year I decided to try something a little different. The idea of doing a blueberry cheesecake occurred to me. I went looking online for a recipe and found this one that also includes raspberries. The reviews were really positive, so I decided to try it.

Since I already had some almonds, I decided to use them instead of hazelnuts. I also left out the vanilla beans, which are expensive, and skipped the heating-the-cream step; instead, I added another teaspoon of vanilla extract to the filling. I also used lowfat sour cream. I didn’t want to try using lowfat cream cheese or substituting anything for the whipping cream because I wasn’t sure how that would affect the texture of the cake.

Like the recipe for Nanaimo Bars, this recipe takes a long time, but can be done in stages. In this case, I needed the cake for a Friday afternoon, but was able to make it over three evenings.

The recipe is pretty well written, but a few comments may be helpful. First, it tells you to use a 9-inch springform pan with 2 ¾ inch high sides. The reason for this is that the pan is FULL by the time you add the sour cream topping. Fortunately, when I refrigerated the cake before adding the final fruit layer, it shrank down about ¼ inch from the top of the pan, which gave me room to add the jam and fruit. Speaking of which, the directions say to “brush” the jam onto the cake, and then “brush” the rest of the jam over the fruit. I just dripped the jam on with a spoon, and then spread it over the top of the cake with the back of the spoon. This worked okay for the first application, but using a soft pastry brush would probably have been better for glazing the fruit.

As you see in the photo, I had run the crust only about halfway up the sides of the pan, not realizing how much space the filling was going to take. Whether I should have spread the crust out thinner, or whether the crust recipe ought to be enlarged to make maybe 1 ½ times as much, I’m not sure. The crust seemed hard when I ate it, and I was thinking I should have spread it thinner, but my boss said he thought it was just right, and I wasn’t inclined to argue with him.

When I realized the pan was going to be FULL, I was afraid that, because the crust didn’t go all the way up the sides, the filling would leak out during baking, but it didn’t. Well, actually, when I removed the foil from around the bottom of the pan, it was buttery (both the foil and the bottom of the pan). I think some of the butter seeped down when the crust baked. But I don’t think the batter itself leaked out. In any case, wrapping the bottom of the pan with foil is a good idea.

This cheesecake came out beautifully, with a lighter, creamier texture than cheesecakes often have. It went over very well with my coworkers. Even the woman who doesn’t care for cheesecake liked it. The vanilla beans might have added something if I’d used them; as it was, the vanilla flavor wasn’t that pronounced, but then it didn’t dominate either. This is a great cake for a summer party.

Verdict: Yum!! This one's a keeper!!

Raspberry Blueberry Vanilla Cheesecake
(source: www.epicurious.com; originally published in Bon Appetit, August 1997)


For crust
1 1/2 cups ground shortbread cookies
1 cup hazelnuts, toasted, husked
1/4 cup sugar
1/4 cup (1/2 stick) unsalted butter, melted
1 teaspoon vanilla extract

For filling
2 vanilla beans, split lengthwise
1/3 cup whipping cream

3 8-ounce packages cream cheese, room temperature
1 cup sugar
1/2 cup sour cream
2 teaspoons vanilla extract
4 large eggs

2 6-ounce baskets fresh raspberries
2 6-ounce baskets fresh blueberries
1 tablespoon cornstarch

For topping

1 cup sour cream
3 tablespoons sugar
1 1/2 teaspoons vanilla extract

1/3 cup seedless raspberry jam

Make crust:
Preheat oven to 350°F. Finely grind ground cookies, nuts and sugar in processor. Add butter and vanilla; process until moist crumbs form. Press onto bottom and up sides of 9-inch-diameter springform pan with 2 3/4-inch-high sides. Wrap outside of pan with foil. Bake until crust is light golden, about 15 minutes. Cool. Maintain oven temperature.

Make filling:
Scrape seeds from vanilla beans into heavy small saucepan; add beans. Add cream and bring to boil. Cool completely. Discard beans.

Using electric mixer, beat cream cheese and sugar in large bowl until smooth. Add vanilla-cream mixture, sour cream and vanilla extract and beat until well blended. Beat in eggs 1 at a time.

Gently mix 1 basket raspberries, 1 basket blueberries and cornstarch in medium bowl. Pour 2/3 of filling into crust. Sprinkle berry mixture over. Pour remaining filling over berries to cover. Bake until cake is golden and begins to crack around edges but still moves slightly in center when pan is shaken, about 1 hour 10 minutes. Let cool 10 minutes (cake will fall).

Make topping:
Mix sour cream, sugar and vanilla in small bowl to blend.

Gently press down any raised edges of cake. Spoon topping evenly over cake. Bake 10 minutes. Cool cake on rack. Refrigerate overnight. (Can be prepared 2 days ahead. Keep refrigerated.)

Melt jam in small saucepan over low heat. Brush some jam over top of cake. Arrange remaining berries atop cake. Gently brush berries with remaining jam. (Can be made 8 hours ahead. Keep chilled.)

Run small sharp knife around pan sides to loosen cake. Remove pan sides. Place cake on platter. Serve cold.

Recycle: vanilla bottle, sour cream container, berry baskets (if possible), jam jar

Compost: eggshells, hazelnut husks, vanilla beans


Wednesday, April 01, 2009

Bishop's Cake

My introduction to pound cake came at the Bronx Zoo during one of family’s rare vacations. I don’t remember why we hadn’t breakfasted at the hotel or in one of the many inexpensive diners in Manhattan but I do remember being confronted with a single serving package containing a slice of yellow cake as my morning repast.

I had neither seen nor tasted pound cake prior to that morning. Based on the light texture and flavor of this novel confection, I couldn’t understand why it was called “pound” cake. At the time I chalked it up to being something British and named after their currency.

Years later when I started baking and tried to duplicate the airy texture and delicate flavor that I remembered, I discovered why it was called “pound” cake. Every recipe that I tried produced a dense, heavy cake that tasted mainly of vanilla.

A few weeks ago, while browsing through my Silver Palate cookbook, I came across this recipe. I’m not sure why they call it “Bishop’s Cake”. It’s nothing like a traditional Bishop’s Cake. The note that goes with this recipe refers to it as pound cake. What caught my eye were the 5 eggs and the lemon juice.

Five eggs means five egg whites which when whipped enough should provide a lighter texture and the lemon juice in addition to vanilla might recreate the flavor that I associate with pound cake.

I beat this batter longer than called for in the recipe. And I struggled with the aluminum foil. I struggled even more getting the cake out of the bundt pan. But in the end, it was all worth it. While not exactly what I was hoping for, this is the closest I’ve ever come to recreating the pound cake of my youth.

Verdict: Yum!! This one’s a keeper!!

Bishop’s Cake
(source: The Silver Palate Cookbook: Delicious Recipes, Menus, Tips, Lore from Manhattan's Celebrated Gourmet Food Shop)


½ pound (2 sticks) sweet butter
2 cups granulated sugar
2 cups unbleached all-purpose flour
1 tablespoon fresh lemon juice
1 teaspoon vanilla extract
5 eggs


Preheat oven to 350°F. Grease and flour a 10-inch bundt pan.

Cream butter and sugar gradually; beat until fluffy.

Sift flour and add to butter mixture. Stir just enough to blend.

Add lemon juice and vanilla; stir well. Add eggs, one at a time, missing well after each addition.

Pour batter into the prepared bundt pan. Bake for 1 hour and 15 minutes, or until a cake tester inserted into the center of the cake comes out clean. (after 30 minutes, cover cake closely with aluminum foil.)

When cake is done, cool in its pan on a cake rack for 10 minutes. Remove from pan and cool completely.

8 to 10 portions.

Recycle: vanilla bottle

Compost: egg shells

Sunday, March 15, 2009

Special Dark Picnic Cake

I’ve been in the mood for cookies but I couldn’t find any cookie recipes that really grabbed me so I turned to my personal cookbook. Nope, still not cookie recipes that screamed “Make me!”. So I turned to the cake section. Perhaps I could find something chocolate-y.

Special Dark Picnic Cake is a recipe that I probably originally found on a chocolate chip package. The recipe is available on the Hershey’s site, along with other chocolate recipes. Hmmm, there’s a couple of cakes that I would love to try.

This was a good chance also to test my oven. Since this is a recipe that I have made many times and know that it bakes correctly, if it didn’t cook all the way through like the Red Velvet Cake, then I would know that the problem was with my oven and not that recipe. I’m happy to report that the problem is with the recipe. This cake baked up just fine.

I’ve never followed the directions exactly when making this cake. I just pour the water into the bowl with the chocolate chips and butter and stick the whole thing in the microwave. Ditto the frosting. As a matter of fact, I should have read the directions for the frosting a little more closely! I was wondering why the frosting was so runny. I omitted the step in the refrigerator. Fortunately, this is a sheet cake, not layers, so the consistency of the frosting wasn’t critical.

This is a very easy cake to make that is “Dark” in name but light in texture.

Verdict: Yum!! This one’s a keeper!

Special Dark Picnic Cake
(source: Hersheys.com)


1 cup dark chocolate chips
¼ cup butter or margarine
1 ⅓ cups boiling water
2 ⅓ cups all-purpose flour
1 ¼ cups sugar
½ cup dairy sour cream
2 eggs
2 teaspoons baking soda
1 teaspoon salt
1 teaspoon vanilla extract


Heat oven to 350°F. Grease and flour 13 x 9 x 2 –inch baking pan.

Combine chocolate chips, butter and water in large mixer bowl; stir with spoon until chocolate is melted and mixture is blended. Gradually add flour, sugar, sour cream, eggs, baking soda, salt and vanilla; beat on low speed of electric mixer until smooth. Pour batter into prepared pan.

Bake 35 to 40 minutes or until wooden pick inserted in center of cake comes out clean. Cool completely in pan on wire rack. Frost.

Special Dark Frosting


¼ cup butter or margarine
1 cup dark chocolate chips
1 ½ cups powdered sugar
¼ cup milk
½ teaspoon vanilla extract


Place butter and chocolate chips in medium microwave-safe bowl. Microwave at HIGH (100%) 1 minutes; stir. If necessary, microwave at HIGH 15 seconds at a time, stirring after each heating, until chocolate is melted and mixture is smooth when stirred. Gradually beat in powdered sugar, milk and vanilla, beating until smooth.

Refrigerate 15 to 20 minutes or until of desired spreading consistency. Makes about 1 ⅔ cups frosting.

Recycle: sour cream container, vanilla extract bottle

Compost: eggshells
Tuesday, March 10, 2009

Red Velvet Cake

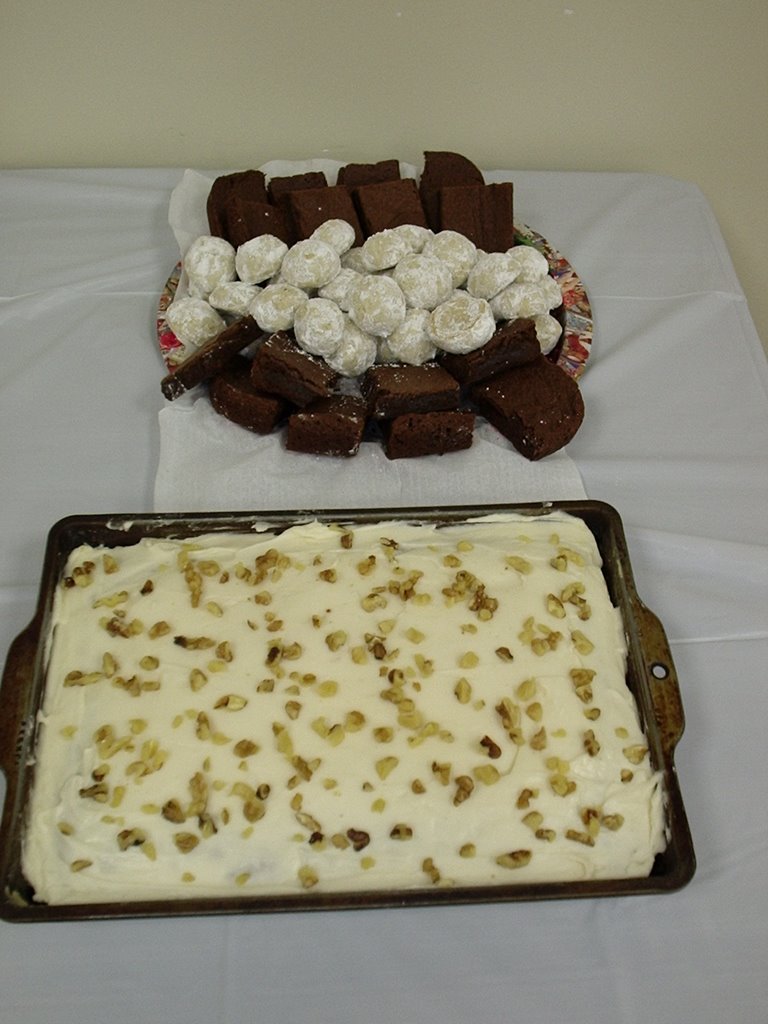
This seems to be my week to plunge into the culinary unknown. Red velvet cake has intrigued me for a long time. A southern tradition, it was unknown in upstate New York where I grew up. I only became aware of it with the advent of the internet with its plethora of recipe sites and blogs. Most of the recipes I have seen use a cream cheese frosting. I came across this version with the more authentic butter roux frosting on BHG.com. I just had to try it.

The cake was easy to make and other than the intense red color, seemed to be just the right consistency and amount for three 8" pans. When the layers came out of the oven, even after the full 30 minutes baking time, they were not cooked in the centers. Judging by the "doneness" of the edges, I think this recipe would be better made in 9" pans.

The frosting was fun to make. Cooking the milk and flour was like making pudding. It blended well into the butter and sugar mixture. My fears that the roux would make it too heavy were unfounded. This is a light, easy to spread frosting which generously frosts three 8" layers.

My problem with this recipe is the taste. I just don’t like Red Velvet Cake! It’s too sweet even for my overactive sweet tooth. On the other hand, the frosting isn’t sweet enough. And I particularly don’t like the gritty texture.

Note: the picture below is from the site. My version was not nearly as attractive because the layers did not cook fully, creating a cratered cake.

Verdict: Not bad, but I don’t think I’ll be making this again.

Red Velvet Cake
(source: BHG.com)


3 eggs
¾ cup butter
3 cups all-purpose flour
2 tsp. unsweetened cocoa powder
2 ¼ cups sugar
1 ½ tsp. vanilla
1 1-oz. bottle red food coloring (2 Tbsp.)
1 ½ cups buttermilk
1 ½ tsp. baking soda
1 ½ tsp. vinegar
1 recipe Buttercream Frosting

Let eggs and butter stand 30 minutes. Preheat oven to 350°F. Grease and flour three 8 x 1 1/2 –inch round baking pans; set aside.

In medium bowl combine flour, cocoa powder, and ¾ tsp. salt; set aside. In large mixing bowl beat butter on medium-high 30 seconds. Add sugar and vanilla; beat until combined. One at a time, add eggs; beat on medium after each. Beat in food coloring on low.

Alternately add flour mixture and buttermilk to egg mixture; beat on low-medium after each just until combined. Stir together baking soda and vinegar. Add to batter; beat just until combined.

Spread in prepared pans. Bake 25-30 minutes or until pick inserted near centers comes out clean (cakes may appear marbled). Cool in pans on wire racks 10 minutes. Remove from pans; cool.

Prepare Buttercream Frosting. Place layer flat side up on plate. Spread top with ¾ cup frosting. Stack layer, flat side up; spread top with ¾ cup frosting. Stack final layer, flat side down; spread remaining frosting on top and sides. Makes 16 servings.

Buttercream Frosting: In medium saucepan whisk together 1 ½ cups whole milk, ⅓ cup flour, and dash salt. Cook and stir over medium heat until thickened and bubbly. Reduce heat; cook and stir 2 minutes more. Transfer to small bowl; cover surface with plastic wrap. Refrigerate until cooled (do not stir). In large bowl beat 1 ½ cups softened butter, 1 ½ cups sugar, and 2 tsp. vanilla on medium 5 minutes until light and fluffy and sugar is almost dissolved. Add cooled milk mixture, ¼ cup at a time; beat on low after each until smooth.

Recycle: vanilla bottle, food coloring bottle, vinegar bottle

Compost: eggshells

Monday, November 17, 2008

Chewy Cocoa Brownies

After an unnaturally warm start to the month of November, cooler temperatures have finally begun to prevail. And just in time too! I have a few days off from work before beginning the nightshift (don’t ask, trying to understand my work schedule would only make your head hurt) and several new recipes to try.

Time to test my theory about cocoa brands. I made the brownie recipe on the label of the Nestle Cocoa container.

I liked this recipe right from the start. Most recipes that use cocoa instead of baking powder tend to be dry. This recipe calls for 2 tablespoons of water to be added to the batter. I think that’s what did the trick.

The batter came together easily. It was stiff without being too stiff. It baked up in about 20 minutes. The range of times, 18 to 25 minutes was a little wide. That did give me pause. But by keeping an eye on the edges of the brownies, I was able to time it just right.

The results were deeply chocolaty unlike the results I get from Hershey’s cocoa. And chewy as promised. I’m definitely going to hang on to the is recipe so that I can make brownies any time regardless of whether I have baking chocolate or cocoa on hand.

Next time I’m feeling flush, I may spring for some those expensive cocoas to see if they are as good as the snooty recipes say that they are.

Verdict: Yum! This one’s a keeper!

Chewy Cocoa Brownies
(source: back of the Nestle cocoa container)


1 ⅔ cup granulated sugar
¾ cup (1 ½ sticks) butter or margarine, melted
2 tablespoons water
2 large eggs
2 teaspoons vanilla extract
1 ½ cups all-purpose flour
¾ cup cocoa
½ teaspoon baking powder
¼ teaspoon salt
¾ cup chopped nuts (optional)
Powdered sugar

Preheat oven to 350°F. Grease 13 x 9-inch pan.

Combine sugar, butter and water in large bowl. Stir in eggs an vanilla extract. Combine flour, cocoa, baking powder and salt in medium bowl; stir into sugar mixture. Stir in nuts. Spread into prepared baking pan.

Bake for 18 to 25 minutes or until wooden pick inserted in center comes out slightly sticky. Cool completely in pan on wire rack. Sprinkle with powdered sugar. Cut into bars.

Makes 2 dozen brownies.

Recycle: vanilla extract bottle

Compost: eggshells

Tuesday, January 15, 2008

Chocolate Mousse (Moose!) Torte

A few years ago, I decided to make this recipe for a potluck lunch at work. I wrote “Chocolate Mousse Torte” on the signup sheet. About a week before the lunch, an e-mail went around listing what everyone was bringing. My contribution appeared as “Chocolate Mouse Torte”. At first I considered going to the secretary and throwing a fit, and then I thought, “hey, maybe I can do something with this…..” So I looked high and low for a chocolate mouse. The best I could find was a chocolate computer mouse, and I would have had to order it online and pay for overnight shipping in order to get it on time, and I decided I didn’t want it that badly. So I started to look around for a moose, to emphasize that it’s supposed to be a MOOSE, er, MOUSSE, cake. By this time it was only a couple of days until the lunch, and I’d given up hope of finding a chocolate moose; I was willing to use about anything that would fit on a cake. Finally at a craft store I found a small plastic moose that was part of one of these miniature Christmas villages, so I used that.

A couple of months ago I was in a Hallmark store and decided to check out the new Christmas ornaments, which had just come out. Among them was – of all things – one called “Chocolate Moose”. It’s actually plastic, of course, but the body looks like a layered chocolate torte, the head is shaped like a piece of chocolate candy, the antlers are forks, and around its neck is a wreath with bonbons attached. So I decided to bake the chocolate mousse (moose) torte for the upcoming holiday potluck of the Rutgers Gardens volunteers, and decorate it with this moose. (Disclaimer: I am not a Hallmark employee and have no connection with them except that I buy their stuff.)

The recipe is fairly simple, but gives impressive results. It’s also nice for working people in that it can be spread out over (at least) two days: bake the bottom layer and melt the chocolate in the cream on the first day, let everything cool overnight, then whip the cream and apply on the second day. It’s helpful to be familiar with whipping technique, because the bottom layer is a sponge cake – where the volume comes from the air that you beat into the egg whites – and the top layer is basically whipped cream. I like Julia Child’s description of a sponge cake in her French Chef Cookbook: “You will note that there is no baking powder; the lightness of the cake depends entirely on beautifully beaten egg whites which are folded into the batter with such speed and delicacy that they retain their volume and the maximum of their puffing abilities.”

You will also note that there is no flour in this recipe. Instead, the original recipe, which is from Germany, calls for ground hazelnuts, which are probably the most commonly used nut there. I use ground almonds instead. Both of these can be purchased already ground in Germany, so they have it easy. I haven’t been able to find them here, and I have a couple of favorite recipes that call for ground almonds, so I got a friend to send me some. If you don’t have such connections, you could probably use a blender or food processor. You want them ground fairly fine, finer than a nut topping but not as fine as flour.

The original recipe also calls for the bottom layer to be moistened with rum flavoring before adding the marmalade. I’m not a big fan of rum flavoring, so I skip this step. The marmalade gives a nice little tang and also seals in crumbs, but you can leave it out too if you want.

The cream is whipped with a stabilizer sold in the US as “Whipit”. It comes in small paper packets, like the way they used to sell Kool-Aid without sugar. I’ve been able to find it in the bakery aisle of several supermarket chains. The recipe called for three packets, but the first time I made this cake the whipped cream had a metallic off-flavor, so I cut back to two packets. Then this last time I refrigerated the cream and chocolate mixture for about 24 hours, and it became surprisingly thick, like pudding. Whether that was due to the long refrigeration, or the brand of chocolate, I don’t know. I used only one packet of Whipit, and the result was a frosting that spread beautifully.

The original recipe uses metric units, so I have converted them as well as I could, and give both in case anyone has metric utensils.

But, back to the Rutgers Gardens party: OldRoses and I snuck off during dinner, found a suitably picturesque spot to set up the cake and moose, and had a blast doing the photo shoot. Too late I discovered that all the pictures were dark. I've done the best I can, but the moose doesn't come out as well as I'd hoped...

Verdict: Yum! this one's a keeper!

Chocolate Mousse Torte
(source: Schwartau Recipe Service, Germany)


Bottom layer:

6 eggs
125 grams (about 3/8 cup) sugar
100 grams (1 cup) ground hazelnuts or almonds
10 grams (2 tbsp) cocoa powder

Separate the eggs. Beat the egg whites until stiff. Beat the yolks with the sugar until creamy and pale yellow. Stir in the cocoa and ground nuts. Fold in the beaten egg whites. Pour into a 10” springform pan. Bake in a preheated 350 degree oven for about 50 minutes. Let cool.


Top layer:

600 milliliters (about 2 ½ cups) whipping cream
5 oz. bittersweet chocolate (or 5/6 cup bittersweet chocolate chips)
1-2 packets Whipit
orange marmalade

Heat the cream, add the chocolate, and stir until the chocolate is completely melted and well mixed with the cream. Cool the mixture thoroughly in the refrigerator. Beat until creamy, add the Whipit, and then beat until very stiff.

Spread a thin layer of marmalade over the bottom layer of the cake. Spread the whipped cream over the top and sides, putting most of it on the top. Decorate with grated chocolate. Chill at least 2 hours before serving. Store any remaining torte in the refrigerator.


Compost: eggshells

Saturday, November 10, 2007

Bonnie Butter Cake with French Silk Frosting

Long, long ago when I was a young woman, the mother of the man I was then dating came to visit him. Not only were we serious enough that he wanted to introduce me to his mother, but since it was also her birthday, he wanted to show off my culinary talents and asked me to bake her a cake. I wanted to impress her but there was no internet back then and I only owned one cookbook, my trusty Betty Crocker cookbook.

I found a recipe in it for a three layer cake. Three layers! French frosting! At that time, I impressed easily. I also was blissfully unaware of the old adage that you should never make a brand new recipe for company. Betty Crocker never lets me down. The cake came out perfectly. Too perfectly.

His mother refused to believe that I had baked it. She accused me of buying a cake at a bakery and trying to pass it off as my own. My then boyfriend tried to defend me. He had witnessed me make it but she was adamant. I was a liar and a cheat. My relationship with her son did not survive very long after she left.

But I still bake that cake! It’s easy and delicious. Two things to bear in mind when you are making it. Don’t skimp on the time beating it or it will be dense and heavy. Go the full five minutes for a light airy texture. And double the frosting recipe. I’m sorry. Betty lies. As you can see from the picture, it does not make enough to fill and frost three 8-inch layers.

Verdict: Yum!! This one’s a keeper!!

Bonnie Butter Cake with French Silk Frosting
(Source: Betty Crocker Cookbook)


Bonnie Butter Cake

⅔ cup butter or margarine, softened
1 ¾ cups sugar
2 eggs
1 ½ teaspoons vanilla
3 cups cake flour or 2 ¾ cups all-purpose flour
2 ½ teaspoons baking powder
1 teaspoon salt
1 ¼ cups milk


Heat oven to 350°. Grease and flour baking pan, 13x9x2 inches, or two 9-inch or three 8-inch round layer pans. In large mixer bowl, mix butter, sugar, eggs and vanilla until fluffy. Beat 5 minutes on high speed, scraping bowl occasionally. On low speed, mix in flour, baking powder and salt alternately with milk. Pour into pan(s).

Bake oblong 45 to 50 minutes, layers 30 to 35 minutes or until wooden pick inserted in center comes out clean. Cool.


French Silk Frosting

2 ⅔ cups confectioners’ sugar
⅔ cup soft butter
2 ounces melted unsweetened chocolate (cool)
¾ teaspoon vanilla
2 tablespoons milk


In small mixer bowl, blend sugar, butter, chocolate and vanilla on low speed. Greadully add milk; beat until smooth and fluffy.

Makes enough frosting for two 9-inch layer or three 8-inch layer cakes.


Recycle: vanilla bottle

Compost: eggshells

Saturday, January 27, 2007

Orange Pound Cake

"A" has made a couple of the recipes from the January 2007 issue of Family Circle magazine. Now it's my turn. I wanted to try the Orange Pound cake. I like pound cake and I'm always on the lookout for cake recipes that aren't chocolate. Citrus is not one of my favorites, but I can tolerate orange. I won't eat an orange, but I enjoy orange juice, orange sherbet and orange popsicles. Orange Pound cake sounded like another winner.

The recipe calls for a tube pan. This is the second recipe I have tried that called for a tube pan rather than a bundt pan. The other was the Bacardi Rum Cake recipe. Both times I struck out looking for a tube pan. Does no one bake any more? So I crossed my fingers and made this in my bundt pan.

The batter was easy to make and tasted delicious. Just orange-y enough without being overwhelming. The cake baked up beautifully but I had a heck of a time getting it out of the pan. Loosening the sides with a knife was not sufficient. I literally had to pry it out. Fortunately, it came out in one piece. The icing was also easy and only slightly orange-y tasting. I wish I could say the same for the finished cake. It lost a lot of its orange flavor in the baking process. Even the second day when most baked goods have developed their best flavor, there was precious little orange taste to this. And it was greasy, probably from all the butter. I prefer moist cakes over dry ones, but I don't care for greasy. All in all, very disappointing.

Verdict: Not bad, but I probably won't be making this again.

Orange Pound Cake
(source: Family Circle Magazine, January 2007)


1 3/4 cups (3 1/2 sticks) unsalted butter, softened
2 3/4 cups granulated sugar
8 eggs
1 teaspoon orange extract
2 teaspoons grated orange rind
3 cups all-purpose flour
1 tablespoon baking powder
1 teaspoon salt
3/4 cup fresh orange juice (from 3 oranges)

Drizzle:
3/4 cup confectioners' sugar
1 tablespoon orange juice plus 1 teaspoon water

1. Het oven to 350 degrees. Butter and flour 10-inch tube pan. Tap out excess flour.

2. Beat butter in bowl until creamy. Gradually beat in sugar until fluffy, scraping down bowl. Add eggs, one at a time. Beat in extract and rind.

3. Combine flour, baking powder and salt in small bowl. Gradually beat into butter mixture on medium speed alternating with orange juice. Beat 2 minutes, scraping down bowl occasionally, until thick and creamy. Pour into prepared pan.

4. Bake at 350 degrees for 35 minutes. Lower heat to 300 degrees. Bake 45 to 50 minutes or until toothpick comes out clean. Cool in pan on rack 15 minutes; turn cake out on rack; cool completely.

5. Drizzle: In a bowl, whisk confectioners' sugar and thinned juice until smooth. Drizzle over cooled cake. Let dry before slicing and serving.

Recycle: orange extract bottle

Compost: eggshells

Tuesday, January 23, 2007

Buttermilk Carrot Cake

Every January, the Steering Committee of the Middlesex County Master Gardeners sponsors a get-together for all of the Master Gardeners. They call it a "Reunion" because one of the purposes is for members to get together with their former classmates. It's also a great time to meet members of other classes and for the new class to get to know those who have gone before. Hey, it's January. There's not a whole lot else to do!

Everyone is asked to bring a dish or dessert for the buffet. I always volunteer to bake. I already had a pretty good idea of what I wanted to make, but it was still gratifying to be requested to make "those cookies". It took a while to decide which brownies recipe to bake but in the interests of keeping it fairly simple, I went with the Melt in Your Mouth Brownies and the Frosty Snowballs ("those cookies"). This was an excellent chance to try out a new carrot cake recipe. Who doesn't like carrot cake?

This recipe was appealing because it called for buttermilk, coconut, a glaze and could be made into a sheet cake, very handy for a crowd. The first problem I ran into was the cream cheese. You will note that the recipe calls for two 3 ounce packages of cream cheese. Apparently no one bakes any more because despite visiting every grocery store in town, I couldn't find cream cheese in 3 ounce packages. I ended up buying one 8 ounce package and whacking off a guesstimated 2 ounces.

My next problem was the baking time. I left it in for the minimum 40 minutes, but it came out a little overbaked. Not bad, just browner around the edges than I like it and the bottom appeared to be burned or nearly burned. I think 30 to 35 minutes would be more appropriate.

I'm not entirely certain what the purpose of the glaze is in this recipe. It was definitely glaze-y in the pan but soaked into the cake when I poured it on. The frosting, on the other hand, was heavenly. Much, much better than the cream cheese frosting I make with my "regular" carrot cake recipe. The cake part of this recipe is pretty blah considering all of the ingredients that go into it, but the frosting is definitely a keeper!

Verdict: Not bad, but I don't think I'll be making it again.

Buttermilk Carrot Cake
(Source: BHG.com)

Cake

2 cups all-pupose flour

2 cups sugar

2 teaspoons baking soda

1 ½ teaspoons ground cinnamon

1 teaspoon baking powder

¼ teaspoon salt

4 medium carrots, shredded (2 cups)

¼ cup buttermilk or sour milk

¼ cup cooking oil

1 8-¼ ounce can crushed pineapple, drained

1 cup chopped walnuts

3 eggs

½ cup coconut

1 teaspoon vanilla

Glaze

½ cup sugar

¼ cup buttermilk or sour milk

¼ cup margarine or butter

2 teaspoons light-colored corn syrup

½ teaspoon vanilla

Frosting

2 3-ounce packages cream cheese

½ cup margarine or butter, softened

2 teaspoons vanilla

4-1/2 to 4-3/4 cups sifted powdered sugar

½ cup chopped walnuts

Grease and lightly flour two 9x1-1/2-inch round baking pans (or one 13x9x2-inch baking pan); set aside. In a large mixing bowl combine flour, 2 cups sugar, baking soda, cinnamon, baking powder, and salt. Add shredded carrot, ¼ cup buttermilk or sour milk, cooking oil, pineapple, nuts, eggs, coconut, and 1 teaspoon vanilla. Stir until combined. Spread batter in prepared pans.

Bake in a 350º F oven for 40 to 45 minutes or until cakes spring back when touched lightly.

Meanwhile, prepare glaze: In a medium saucepan combine ½ cup sugar, the remaining ¼ cup buttermilk or sour milk, ¼ cup margarine or butter, and corn styrup. Bring to boiling; reduce heat. Cook and stir for 4 minutes. Remove from heat and stir in ½ teaspoon vanilla. Pour evenly over tops of cakes. Cool cakes in pans on wire racks for 15 minutes. Remove layer cakes from pans and place on wire racks (do not remove cake from 13x9x2-inch pan). Cool completely.

In a large mixing bowl beat cream cheese, ½ cup margarine or butter, and 2 teaspoons vanilla with an electric mixer on medium to high speed until light and fluffy. Gradually add sifted powdered sugar, beating to spreading consistency. Stir in walnuts. Forst cake. Store in the refrigerator. Makes 16 servings.

Make-Ahead Tip: Cover and chill frosted cake up to 48 hours.

Recycle: vanilla bottle, cooking oil bottle, pineapple can, corn syrup bottle

Compost: eggshells, carrot peelings